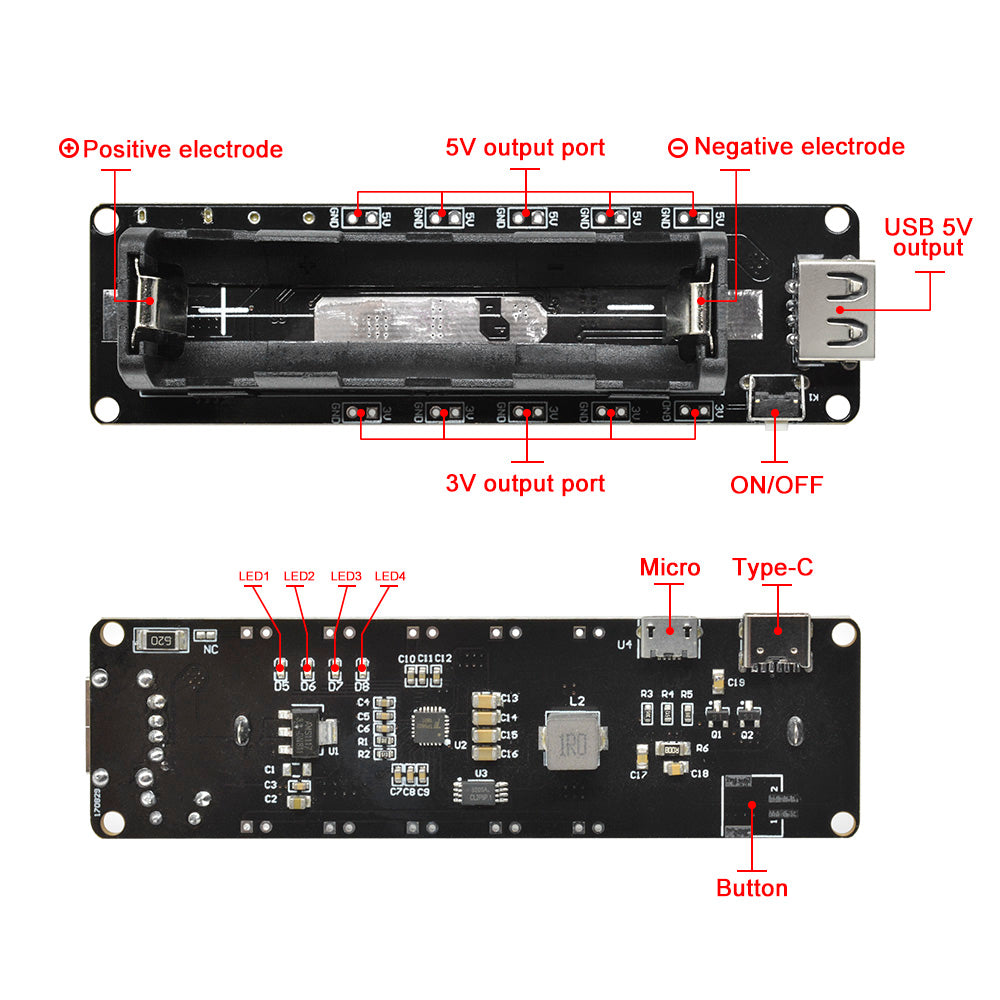
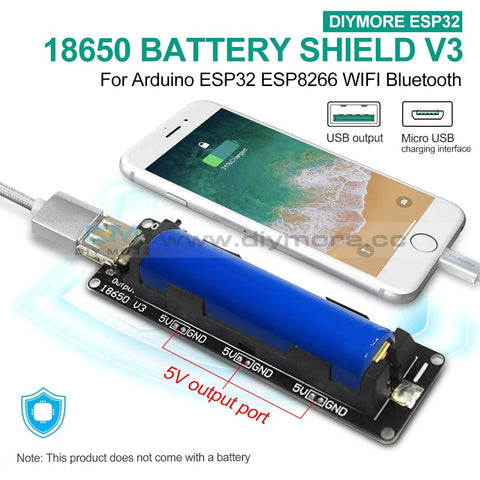
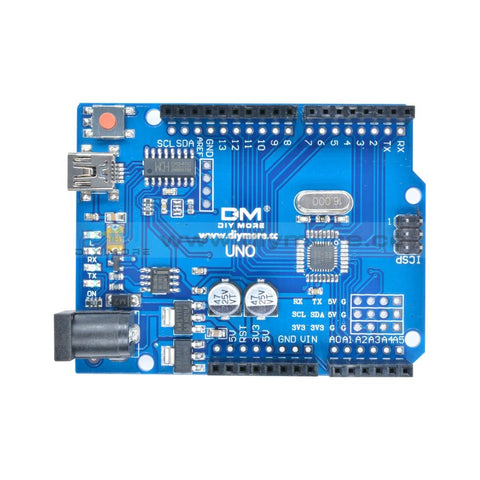
ESP8266 ESP-12F MicroPython Maker CH340 USB 5V Programming Development Board
ESP8266 ESP-12F MicroPython Maker CH340 USB 5V Programming Development Board
SKU:XF0061
Regular price
$6.99
![]()
- guaranteeQuality checked
- Special gift cardsSpecial gift cards
- Free return Within 60 days
- Consultancy86-0755-85201155
Reference description:
http://docs.tpyboard.com/zh/latest/tpyboard/tutorial/v202/
- Send relevant code, programming language Python, develop with arduino or Lua etc.
- So, similar to NodeMcu. USB interface power supply can also be 5V and 3.3V wiring input,
- The USB interface connects the CH340 serial chip and the automatic programming circuit to facilitate development.
- Open the firmware file in the package and use flash_download_tools to burn micropython-esp8266.bin to
- In the ESP module, this file is the necessary underlying firmware for python development. Connect the USB and click START.
- Open the MicroPython File Uploader.exe file in the development tool, here you need to use the USB to power up the development board,
- The driver of CH340 needs to be installed, this software needs .NET Framework 4.2 and above, if it fails to open, please install
- Use after .NET Framework.
- Click the folder icon on the right side of the tool, select the main.py file in the TPO03-Water Lamp folder, and then click Send to burn
- Write, the effect achieved is that the available IO ports will output a high level for one second and a low level for one second. For example, the LED light on the ESP module will be on for one second
- -Seconds dark. Use after .NET Framework.
http://docs.tpyboard.com/zh/latest/tpyboard/tutorial/v202/
Purchasing & Delivery
Before you make your purchase, it’s helpful to know the measurements of the area you plan to place the furniture. You should also measure any doorways and hallways through which the furniture will pass to get to its final destination.Picking up at the store
Shopify Shop requires that all products are properly inspected BEFORE you take it home to insure there are no surprises. Our team is happy to open all packages and will assist in the inspection process. We will then reseal packages for safe transport. We encourage all customers to bring furniture pads or blankets to protect the items during transport as well as rope or tie downs. Shopify Shop will not be responsible for damage that occurs after leaving the store or during transit. It is the purchaser’s responsibility to make sure the correct items are picked up and in good condition.Delivery
Customers are able to pick the next available delivery day that best fits their schedule. However, to route stops as efficiently as possible, Shopify Shop will provide the time frame. Customers will not be able to choose a time. You will be notified in advance of your scheduled time frame. Please make sure that a responsible adult (18 years or older) will be home at that time.In preparation for your delivery, please remove existing furniture, pictures, mirrors, accessories, etc. to prevent damages. Also insure that the area where you would like your furniture placed is clear of any old furniture and any other items that may obstruct the passageway of the delivery team. Shopify Shop will deliver, assemble, and set-up your new furniture purchase and remove all packing materials from your home. Our delivery crews are not permitted to move your existing furniture or other household items. Delivery personnel will attempt to deliver the purchased items in a safe and controlled manner but will not attempt to place furniture if they feel it will result in damage to the product or your home. Delivery personnel are unable to remove doors, hoist furniture or carry furniture up more than 3 flights of stairs. An elevator must be available for deliveries to the 4th floor and above.
Other Customers also buy:
-
Translation missing: en.products.product.regular_price $5.99{"id":4869640257607,"title":"ESP8266 ESP-12F MicroPython Maker CH340 USB 5V Programming Development Board","handle":"micropython-maker-programming-esp8266-development-board-micropython-development-board","description":"\u003cstrong\u003eReference description:\u003c\/strong\u003e\u003cbr data-mce-fragment=\"1\"\u003e\n\u003cul\u003e\n\u003cli\u003eSend relevant code, programming language Python, develop with arduino or Lua etc.\u003c\/li\u003e\n\u003cli\u003eSo, similar to NodeMcu. USB interface power supply can also be 5V and 3.3V wiring input,\u003c\/li\u003e\n\u003cli\u003eThe USB interface connects the CH340 serial chip and the automatic programming circuit to facilitate development.\u003c\/li\u003e\n\u003cli\u003eOpen the firmware file in the package and use flash_download_tools to burn micropython-esp8266.bin to\u003c\/li\u003e\n\u003cli\u003eIn the ESP module, this file is the necessary underlying firmware for python development. Connect the USB and click START.\u003c\/li\u003e\n\u003cli\u003eOpen the MicroPython File Uploader.exe file in the development tool, here you need to use the USB to power up the development board,\u003c\/li\u003e\n\u003cli\u003eThe driver of CH340 needs to be installed, this software needs .NET Framework 4.2 and above, if it fails to open, please install\u003c\/li\u003e\n\u003cli\u003eUse after .NET Framework.\u003c\/li\u003e\n\u003cli\u003eClick the folder icon on the right side of the tool, select the main.py file in the TPO03-Water Lamp folder, and then click Send to burn\u003c\/li\u003e\n\u003cli\u003eWrite, the effect achieved is that the available IO ports will output a high level for one second and a low level for one second. For example, the LED light on the ESP module will be on for one second\u003c\/li\u003e\n\u003cli\u003e-Seconds dark. Use after .NET Framework.\u003c\/li\u003e\n\u003c\/ul\u003e\n\u003cstrong\u003eSpecific tutorials and materials can refer to:\u003c\/strong\u003e\u003cbr data-mce-fragment=\"1\"\u003ehttp:\/\/docs.tpyboard.com\/zh\/latest\/tpyboard\/tutorial\/v202\/","published_at":"2020-10-08T16:55:32+08:00","created_at":"2020-10-08T16:55:31+08:00","vendor":"DIYMORE","type":"","tags":[],"price":699,"price_min":699,"price_max":699,"available":true,"price_varies":false,"compare_at_price":null,"compare_at_price_min":0,"compare_at_price_max":0,"compare_at_price_varies":false,"variants":[{"id":32603647967303,"title":"Default Title","option1":"Default Title","option2":null,"option3":null,"sku":"XF0061","requires_shipping":true,"taxable":false,"featured_image":null,"available":true,"name":"ESP8266 ESP-12F MicroPython Maker CH340 USB 5V Programming Development Board","public_title":null,"options":["Default Title"],"price":699,"weight":0,"compare_at_price":null,"inventory_management":"shopify","barcode":"","requires_selling_plan":false,"selling_plan_allocations":[]}],"images":["\/\/www.diymore.cc\/cdn\/shop\/products\/1_8ac6eafe-ee63-4f30-8728-5e052eb0c1ee.jpg?v=1602147363","\/\/www.diymore.cc\/cdn\/shop\/products\/2_cb568fff-94cf-4bcf-9103-9800277de38e.jpg?v=1602147363","\/\/www.diymore.cc\/cdn\/shop\/products\/3_c9403615-8c34-4fa3-9ea9-efdeaa912555.jpg?v=1602147363","\/\/www.diymore.cc\/cdn\/shop\/products\/4_72ca90af-a5b7-495e-b807-3aa51efc1912.jpg?v=1602147334","\/\/www.diymore.cc\/cdn\/shop\/products\/5_7e55d36a-7a6d-441e-a49e-93f4b7980368.jpg?v=1602147334"],"featured_image":"\/\/www.diymore.cc\/cdn\/shop\/products\/1_8ac6eafe-ee63-4f30-8728-5e052eb0c1ee.jpg?v=1602147363","options":["Title"],"media":[{"alt":null,"id":7547788263495,"position":1,"preview_image":{"aspect_ratio":1.0,"height":1000,"width":1000,"src":"\/\/www.diymore.cc\/cdn\/shop\/products\/1_8ac6eafe-ee63-4f30-8728-5e052eb0c1ee.jpg?v=1602147363"},"aspect_ratio":1.0,"height":1000,"media_type":"image","src":"\/\/www.diymore.cc\/cdn\/shop\/products\/1_8ac6eafe-ee63-4f30-8728-5e052eb0c1ee.jpg?v=1602147363","width":1000},{"alt":null,"id":7547788197959,"position":2,"preview_image":{"aspect_ratio":1.0,"height":1000,"width":1000,"src":"\/\/www.diymore.cc\/cdn\/shop\/products\/2_cb568fff-94cf-4bcf-9103-9800277de38e.jpg?v=1602147363"},"aspect_ratio":1.0,"height":1000,"media_type":"image","src":"\/\/www.diymore.cc\/cdn\/shop\/products\/2_cb568fff-94cf-4bcf-9103-9800277de38e.jpg?v=1602147363","width":1000},{"alt":null,"id":7547788230727,"position":3,"preview_image":{"aspect_ratio":1.0,"height":1000,"width":1000,"src":"\/\/www.diymore.cc\/cdn\/shop\/products\/3_c9403615-8c34-4fa3-9ea9-efdeaa912555.jpg?v=1602147363"},"aspect_ratio":1.0,"height":1000,"media_type":"image","src":"\/\/www.diymore.cc\/cdn\/shop\/products\/3_c9403615-8c34-4fa3-9ea9-efdeaa912555.jpg?v=1602147363","width":1000},{"alt":null,"id":7547788296263,"position":4,"preview_image":{"aspect_ratio":1.0,"height":1000,"width":1000,"src":"\/\/www.diymore.cc\/cdn\/shop\/products\/4_72ca90af-a5b7-495e-b807-3aa51efc1912.jpg?v=1602147334"},"aspect_ratio":1.0,"height":1000,"media_type":"image","src":"\/\/www.diymore.cc\/cdn\/shop\/products\/4_72ca90af-a5b7-495e-b807-3aa51efc1912.jpg?v=1602147334","width":1000},{"alt":null,"id":7547788329031,"position":5,"preview_image":{"aspect_ratio":1.0,"height":1000,"width":1000,"src":"\/\/www.diymore.cc\/cdn\/shop\/products\/5_7e55d36a-7a6d-441e-a49e-93f4b7980368.jpg?v=1602147334"},"aspect_ratio":1.0,"height":1000,"media_type":"image","src":"\/\/www.diymore.cc\/cdn\/shop\/products\/5_7e55d36a-7a6d-441e-a49e-93f4b7980368.jpg?v=1602147334","width":1000}],"requires_selling_plan":false,"selling_plan_groups":[],"content":"\u003cstrong\u003eReference description:\u003c\/strong\u003e\u003cbr data-mce-fragment=\"1\"\u003e\n\u003cul\u003e\n\u003cli\u003eSend relevant code, programming language Python, develop with arduino or Lua etc.\u003c\/li\u003e\n\u003cli\u003eSo, similar to NodeMcu. USB interface power supply can also be 5V and 3.3V wiring input,\u003c\/li\u003e\n\u003cli\u003eThe USB interface connects the CH340 serial chip and the automatic programming circuit to facilitate development.\u003c\/li\u003e\n\u003cli\u003eOpen the firmware file in the package and use flash_download_tools to burn micropython-esp8266.bin to\u003c\/li\u003e\n\u003cli\u003eIn the ESP module, this file is the necessary underlying firmware for python development. Connect the USB and click START.\u003c\/li\u003e\n\u003cli\u003eOpen the MicroPython File Uploader.exe file in the development tool, here you need to use the USB to power up the development board,\u003c\/li\u003e\n\u003cli\u003eThe driver of CH340 needs to be installed, this software needs .NET Framework 4.2 and above, if it fails to open, please install\u003c\/li\u003e\n\u003cli\u003eUse after .NET Framework.\u003c\/li\u003e\n\u003cli\u003eClick the folder icon on the right side of the tool, select the main.py file in the TPO03-Water Lamp folder, and then click Send to burn\u003c\/li\u003e\n\u003cli\u003eWrite, the effect achieved is that the available IO ports will output a high level for one second and a low level for one second. For example, the LED light on the ESP module will be on for one second\u003c\/li\u003e\n\u003cli\u003e-Seconds dark. Use after .NET Framework.\u003c\/li\u003e\n\u003c\/ul\u003e\n\u003cstrong\u003eSpecific tutorials and materials can refer to:\u003c\/strong\u003e\u003cbr data-mce-fragment=\"1\"\u003ehttp:\/\/docs.tpyboard.com\/zh\/latest\/tpyboard\/tutorial\/v202\/"}
-
Translation missing: en.products.product.regular_price $9.99{"id":4869640257607,"title":"ESP8266 ESP-12F MicroPython Maker CH340 USB 5V Programming Development Board","handle":"micropython-maker-programming-esp8266-development-board-micropython-development-board","description":"\u003cstrong\u003eReference description:\u003c\/strong\u003e\u003cbr data-mce-fragment=\"1\"\u003e\n\u003cul\u003e\n\u003cli\u003eSend relevant code, programming language Python, develop with arduino or Lua etc.\u003c\/li\u003e\n\u003cli\u003eSo, similar to NodeMcu. USB interface power supply can also be 5V and 3.3V wiring input,\u003c\/li\u003e\n\u003cli\u003eThe USB interface connects the CH340 serial chip and the automatic programming circuit to facilitate development.\u003c\/li\u003e\n\u003cli\u003eOpen the firmware file in the package and use flash_download_tools to burn micropython-esp8266.bin to\u003c\/li\u003e\n\u003cli\u003eIn the ESP module, this file is the necessary underlying firmware for python development. Connect the USB and click START.\u003c\/li\u003e\n\u003cli\u003eOpen the MicroPython File Uploader.exe file in the development tool, here you need to use the USB to power up the development board,\u003c\/li\u003e\n\u003cli\u003eThe driver of CH340 needs to be installed, this software needs .NET Framework 4.2 and above, if it fails to open, please install\u003c\/li\u003e\n\u003cli\u003eUse after .NET Framework.\u003c\/li\u003e\n\u003cli\u003eClick the folder icon on the right side of the tool, select the main.py file in the TPO03-Water Lamp folder, and then click Send to burn\u003c\/li\u003e\n\u003cli\u003eWrite, the effect achieved is that the available IO ports will output a high level for one second and a low level for one second. For example, the LED light on the ESP module will be on for one second\u003c\/li\u003e\n\u003cli\u003e-Seconds dark. Use after .NET Framework.\u003c\/li\u003e\n\u003c\/ul\u003e\n\u003cstrong\u003eSpecific tutorials and materials can refer to:\u003c\/strong\u003e\u003cbr data-mce-fragment=\"1\"\u003ehttp:\/\/docs.tpyboard.com\/zh\/latest\/tpyboard\/tutorial\/v202\/","published_at":"2020-10-08T16:55:32+08:00","created_at":"2020-10-08T16:55:31+08:00","vendor":"DIYMORE","type":"","tags":[],"price":699,"price_min":699,"price_max":699,"available":true,"price_varies":false,"compare_at_price":null,"compare_at_price_min":0,"compare_at_price_max":0,"compare_at_price_varies":false,"variants":[{"id":32603647967303,"title":"Default Title","option1":"Default Title","option2":null,"option3":null,"sku":"XF0061","requires_shipping":true,"taxable":false,"featured_image":null,"available":true,"name":"ESP8266 ESP-12F MicroPython Maker CH340 USB 5V Programming Development Board","public_title":null,"options":["Default Title"],"price":699,"weight":0,"compare_at_price":null,"inventory_management":"shopify","barcode":"","requires_selling_plan":false,"selling_plan_allocations":[]}],"images":["\/\/www.diymore.cc\/cdn\/shop\/products\/1_8ac6eafe-ee63-4f30-8728-5e052eb0c1ee.jpg?v=1602147363","\/\/www.diymore.cc\/cdn\/shop\/products\/2_cb568fff-94cf-4bcf-9103-9800277de38e.jpg?v=1602147363","\/\/www.diymore.cc\/cdn\/shop\/products\/3_c9403615-8c34-4fa3-9ea9-efdeaa912555.jpg?v=1602147363","\/\/www.diymore.cc\/cdn\/shop\/products\/4_72ca90af-a5b7-495e-b807-3aa51efc1912.jpg?v=1602147334","\/\/www.diymore.cc\/cdn\/shop\/products\/5_7e55d36a-7a6d-441e-a49e-93f4b7980368.jpg?v=1602147334"],"featured_image":"\/\/www.diymore.cc\/cdn\/shop\/products\/1_8ac6eafe-ee63-4f30-8728-5e052eb0c1ee.jpg?v=1602147363","options":["Title"],"media":[{"alt":null,"id":7547788263495,"position":1,"preview_image":{"aspect_ratio":1.0,"height":1000,"width":1000,"src":"\/\/www.diymore.cc\/cdn\/shop\/products\/1_8ac6eafe-ee63-4f30-8728-5e052eb0c1ee.jpg?v=1602147363"},"aspect_ratio":1.0,"height":1000,"media_type":"image","src":"\/\/www.diymore.cc\/cdn\/shop\/products\/1_8ac6eafe-ee63-4f30-8728-5e052eb0c1ee.jpg?v=1602147363","width":1000},{"alt":null,"id":7547788197959,"position":2,"preview_image":{"aspect_ratio":1.0,"height":1000,"width":1000,"src":"\/\/www.diymore.cc\/cdn\/shop\/products\/2_cb568fff-94cf-4bcf-9103-9800277de38e.jpg?v=1602147363"},"aspect_ratio":1.0,"height":1000,"media_type":"image","src":"\/\/www.diymore.cc\/cdn\/shop\/products\/2_cb568fff-94cf-4bcf-9103-9800277de38e.jpg?v=1602147363","width":1000},{"alt":null,"id":7547788230727,"position":3,"preview_image":{"aspect_ratio":1.0,"height":1000,"width":1000,"src":"\/\/www.diymore.cc\/cdn\/shop\/products\/3_c9403615-8c34-4fa3-9ea9-efdeaa912555.jpg?v=1602147363"},"aspect_ratio":1.0,"height":1000,"media_type":"image","src":"\/\/www.diymore.cc\/cdn\/shop\/products\/3_c9403615-8c34-4fa3-9ea9-efdeaa912555.jpg?v=1602147363","width":1000},{"alt":null,"id":7547788296263,"position":4,"preview_image":{"aspect_ratio":1.0,"height":1000,"width":1000,"src":"\/\/www.diymore.cc\/cdn\/shop\/products\/4_72ca90af-a5b7-495e-b807-3aa51efc1912.jpg?v=1602147334"},"aspect_ratio":1.0,"height":1000,"media_type":"image","src":"\/\/www.diymore.cc\/cdn\/shop\/products\/4_72ca90af-a5b7-495e-b807-3aa51efc1912.jpg?v=1602147334","width":1000},{"alt":null,"id":7547788329031,"position":5,"preview_image":{"aspect_ratio":1.0,"height":1000,"width":1000,"src":"\/\/www.diymore.cc\/cdn\/shop\/products\/5_7e55d36a-7a6d-441e-a49e-93f4b7980368.jpg?v=1602147334"},"aspect_ratio":1.0,"height":1000,"media_type":"image","src":"\/\/www.diymore.cc\/cdn\/shop\/products\/5_7e55d36a-7a6d-441e-a49e-93f4b7980368.jpg?v=1602147334","width":1000}],"requires_selling_plan":false,"selling_plan_groups":[],"content":"\u003cstrong\u003eReference description:\u003c\/strong\u003e\u003cbr data-mce-fragment=\"1\"\u003e\n\u003cul\u003e\n\u003cli\u003eSend relevant code, programming language Python, develop with arduino or Lua etc.\u003c\/li\u003e\n\u003cli\u003eSo, similar to NodeMcu. USB interface power supply can also be 5V and 3.3V wiring input,\u003c\/li\u003e\n\u003cli\u003eThe USB interface connects the CH340 serial chip and the automatic programming circuit to facilitate development.\u003c\/li\u003e\n\u003cli\u003eOpen the firmware file in the package and use flash_download_tools to burn micropython-esp8266.bin to\u003c\/li\u003e\n\u003cli\u003eIn the ESP module, this file is the necessary underlying firmware for python development. Connect the USB and click START.\u003c\/li\u003e\n\u003cli\u003eOpen the MicroPython File Uploader.exe file in the development tool, here you need to use the USB to power up the development board,\u003c\/li\u003e\n\u003cli\u003eThe driver of CH340 needs to be installed, this software needs .NET Framework 4.2 and above, if it fails to open, please install\u003c\/li\u003e\n\u003cli\u003eUse after .NET Framework.\u003c\/li\u003e\n\u003cli\u003eClick the folder icon on the right side of the tool, select the main.py file in the TPO03-Water Lamp folder, and then click Send to burn\u003c\/li\u003e\n\u003cli\u003eWrite, the effect achieved is that the available IO ports will output a high level for one second and a low level for one second. For example, the LED light on the ESP module will be on for one second\u003c\/li\u003e\n\u003cli\u003e-Seconds dark. Use after .NET Framework.\u003c\/li\u003e\n\u003c\/ul\u003e\n\u003cstrong\u003eSpecific tutorials and materials can refer to:\u003c\/strong\u003e\u003cbr data-mce-fragment=\"1\"\u003ehttp:\/\/docs.tpyboard.com\/zh\/latest\/tpyboard\/tutorial\/v202\/"}
-
Translation missing: en.products.product.regular_price $7.99{"id":4869640257607,"title":"ESP8266 ESP-12F MicroPython Maker CH340 USB 5V Programming Development Board","handle":"micropython-maker-programming-esp8266-development-board-micropython-development-board","description":"\u003cstrong\u003eReference description:\u003c\/strong\u003e\u003cbr data-mce-fragment=\"1\"\u003e\n\u003cul\u003e\n\u003cli\u003eSend relevant code, programming language Python, develop with arduino or Lua etc.\u003c\/li\u003e\n\u003cli\u003eSo, similar to NodeMcu. USB interface power supply can also be 5V and 3.3V wiring input,\u003c\/li\u003e\n\u003cli\u003eThe USB interface connects the CH340 serial chip and the automatic programming circuit to facilitate development.\u003c\/li\u003e\n\u003cli\u003eOpen the firmware file in the package and use flash_download_tools to burn micropython-esp8266.bin to\u003c\/li\u003e\n\u003cli\u003eIn the ESP module, this file is the necessary underlying firmware for python development. Connect the USB and click START.\u003c\/li\u003e\n\u003cli\u003eOpen the MicroPython File Uploader.exe file in the development tool, here you need to use the USB to power up the development board,\u003c\/li\u003e\n\u003cli\u003eThe driver of CH340 needs to be installed, this software needs .NET Framework 4.2 and above, if it fails to open, please install\u003c\/li\u003e\n\u003cli\u003eUse after .NET Framework.\u003c\/li\u003e\n\u003cli\u003eClick the folder icon on the right side of the tool, select the main.py file in the TPO03-Water Lamp folder, and then click Send to burn\u003c\/li\u003e\n\u003cli\u003eWrite, the effect achieved is that the available IO ports will output a high level for one second and a low level for one second. For example, the LED light on the ESP module will be on for one second\u003c\/li\u003e\n\u003cli\u003e-Seconds dark. Use after .NET Framework.\u003c\/li\u003e\n\u003c\/ul\u003e\n\u003cstrong\u003eSpecific tutorials and materials can refer to:\u003c\/strong\u003e\u003cbr data-mce-fragment=\"1\"\u003ehttp:\/\/docs.tpyboard.com\/zh\/latest\/tpyboard\/tutorial\/v202\/","published_at":"2020-10-08T16:55:32+08:00","created_at":"2020-10-08T16:55:31+08:00","vendor":"DIYMORE","type":"","tags":[],"price":699,"price_min":699,"price_max":699,"available":true,"price_varies":false,"compare_at_price":null,"compare_at_price_min":0,"compare_at_price_max":0,"compare_at_price_varies":false,"variants":[{"id":32603647967303,"title":"Default Title","option1":"Default Title","option2":null,"option3":null,"sku":"XF0061","requires_shipping":true,"taxable":false,"featured_image":null,"available":true,"name":"ESP8266 ESP-12F MicroPython Maker CH340 USB 5V Programming Development Board","public_title":null,"options":["Default Title"],"price":699,"weight":0,"compare_at_price":null,"inventory_management":"shopify","barcode":"","requires_selling_plan":false,"selling_plan_allocations":[]}],"images":["\/\/www.diymore.cc\/cdn\/shop\/products\/1_8ac6eafe-ee63-4f30-8728-5e052eb0c1ee.jpg?v=1602147363","\/\/www.diymore.cc\/cdn\/shop\/products\/2_cb568fff-94cf-4bcf-9103-9800277de38e.jpg?v=1602147363","\/\/www.diymore.cc\/cdn\/shop\/products\/3_c9403615-8c34-4fa3-9ea9-efdeaa912555.jpg?v=1602147363","\/\/www.diymore.cc\/cdn\/shop\/products\/4_72ca90af-a5b7-495e-b807-3aa51efc1912.jpg?v=1602147334","\/\/www.diymore.cc\/cdn\/shop\/products\/5_7e55d36a-7a6d-441e-a49e-93f4b7980368.jpg?v=1602147334"],"featured_image":"\/\/www.diymore.cc\/cdn\/shop\/products\/1_8ac6eafe-ee63-4f30-8728-5e052eb0c1ee.jpg?v=1602147363","options":["Title"],"media":[{"alt":null,"id":7547788263495,"position":1,"preview_image":{"aspect_ratio":1.0,"height":1000,"width":1000,"src":"\/\/www.diymore.cc\/cdn\/shop\/products\/1_8ac6eafe-ee63-4f30-8728-5e052eb0c1ee.jpg?v=1602147363"},"aspect_ratio":1.0,"height":1000,"media_type":"image","src":"\/\/www.diymore.cc\/cdn\/shop\/products\/1_8ac6eafe-ee63-4f30-8728-5e052eb0c1ee.jpg?v=1602147363","width":1000},{"alt":null,"id":7547788197959,"position":2,"preview_image":{"aspect_ratio":1.0,"height":1000,"width":1000,"src":"\/\/www.diymore.cc\/cdn\/shop\/products\/2_cb568fff-94cf-4bcf-9103-9800277de38e.jpg?v=1602147363"},"aspect_ratio":1.0,"height":1000,"media_type":"image","src":"\/\/www.diymore.cc\/cdn\/shop\/products\/2_cb568fff-94cf-4bcf-9103-9800277de38e.jpg?v=1602147363","width":1000},{"alt":null,"id":7547788230727,"position":3,"preview_image":{"aspect_ratio":1.0,"height":1000,"width":1000,"src":"\/\/www.diymore.cc\/cdn\/shop\/products\/3_c9403615-8c34-4fa3-9ea9-efdeaa912555.jpg?v=1602147363"},"aspect_ratio":1.0,"height":1000,"media_type":"image","src":"\/\/www.diymore.cc\/cdn\/shop\/products\/3_c9403615-8c34-4fa3-9ea9-efdeaa912555.jpg?v=1602147363","width":1000},{"alt":null,"id":7547788296263,"position":4,"preview_image":{"aspect_ratio":1.0,"height":1000,"width":1000,"src":"\/\/www.diymore.cc\/cdn\/shop\/products\/4_72ca90af-a5b7-495e-b807-3aa51efc1912.jpg?v=1602147334"},"aspect_ratio":1.0,"height":1000,"media_type":"image","src":"\/\/www.diymore.cc\/cdn\/shop\/products\/4_72ca90af-a5b7-495e-b807-3aa51efc1912.jpg?v=1602147334","width":1000},{"alt":null,"id":7547788329031,"position":5,"preview_image":{"aspect_ratio":1.0,"height":1000,"width":1000,"src":"\/\/www.diymore.cc\/cdn\/shop\/products\/5_7e55d36a-7a6d-441e-a49e-93f4b7980368.jpg?v=1602147334"},"aspect_ratio":1.0,"height":1000,"media_type":"image","src":"\/\/www.diymore.cc\/cdn\/shop\/products\/5_7e55d36a-7a6d-441e-a49e-93f4b7980368.jpg?v=1602147334","width":1000}],"requires_selling_plan":false,"selling_plan_groups":[],"content":"\u003cstrong\u003eReference description:\u003c\/strong\u003e\u003cbr data-mce-fragment=\"1\"\u003e\n\u003cul\u003e\n\u003cli\u003eSend relevant code, programming language Python, develop with arduino or Lua etc.\u003c\/li\u003e\n\u003cli\u003eSo, similar to NodeMcu. USB interface power supply can also be 5V and 3.3V wiring input,\u003c\/li\u003e\n\u003cli\u003eThe USB interface connects the CH340 serial chip and the automatic programming circuit to facilitate development.\u003c\/li\u003e\n\u003cli\u003eOpen the firmware file in the package and use flash_download_tools to burn micropython-esp8266.bin to\u003c\/li\u003e\n\u003cli\u003eIn the ESP module, this file is the necessary underlying firmware for python development. Connect the USB and click START.\u003c\/li\u003e\n\u003cli\u003eOpen the MicroPython File Uploader.exe file in the development tool, here you need to use the USB to power up the development board,\u003c\/li\u003e\n\u003cli\u003eThe driver of CH340 needs to be installed, this software needs .NET Framework 4.2 and above, if it fails to open, please install\u003c\/li\u003e\n\u003cli\u003eUse after .NET Framework.\u003c\/li\u003e\n\u003cli\u003eClick the folder icon on the right side of the tool, select the main.py file in the TPO03-Water Lamp folder, and then click Send to burn\u003c\/li\u003e\n\u003cli\u003eWrite, the effect achieved is that the available IO ports will output a high level for one second and a low level for one second. For example, the LED light on the ESP module will be on for one second\u003c\/li\u003e\n\u003cli\u003e-Seconds dark. Use after .NET Framework.\u003c\/li\u003e\n\u003c\/ul\u003e\n\u003cstrong\u003eSpecific tutorials and materials can refer to:\u003c\/strong\u003e\u003cbr data-mce-fragment=\"1\"\u003ehttp:\/\/docs.tpyboard.com\/zh\/latest\/tpyboard\/tutorial\/v202\/"}
-
Translation missing: en.products.product.regular_price $47.99{"id":4869640257607,"title":"ESP8266 ESP-12F MicroPython Maker CH340 USB 5V Programming Development Board","handle":"micropython-maker-programming-esp8266-development-board-micropython-development-board","description":"\u003cstrong\u003eReference description:\u003c\/strong\u003e\u003cbr data-mce-fragment=\"1\"\u003e\n\u003cul\u003e\n\u003cli\u003eSend relevant code, programming language Python, develop with arduino or Lua etc.\u003c\/li\u003e\n\u003cli\u003eSo, similar to NodeMcu. USB interface power supply can also be 5V and 3.3V wiring input,\u003c\/li\u003e\n\u003cli\u003eThe USB interface connects the CH340 serial chip and the automatic programming circuit to facilitate development.\u003c\/li\u003e\n\u003cli\u003eOpen the firmware file in the package and use flash_download_tools to burn micropython-esp8266.bin to\u003c\/li\u003e\n\u003cli\u003eIn the ESP module, this file is the necessary underlying firmware for python development. Connect the USB and click START.\u003c\/li\u003e\n\u003cli\u003eOpen the MicroPython File Uploader.exe file in the development tool, here you need to use the USB to power up the development board,\u003c\/li\u003e\n\u003cli\u003eThe driver of CH340 needs to be installed, this software needs .NET Framework 4.2 and above, if it fails to open, please install\u003c\/li\u003e\n\u003cli\u003eUse after .NET Framework.\u003c\/li\u003e\n\u003cli\u003eClick the folder icon on the right side of the tool, select the main.py file in the TPO03-Water Lamp folder, and then click Send to burn\u003c\/li\u003e\n\u003cli\u003eWrite, the effect achieved is that the available IO ports will output a high level for one second and a low level for one second. For example, the LED light on the ESP module will be on for one second\u003c\/li\u003e\n\u003cli\u003e-Seconds dark. Use after .NET Framework.\u003c\/li\u003e\n\u003c\/ul\u003e\n\u003cstrong\u003eSpecific tutorials and materials can refer to:\u003c\/strong\u003e\u003cbr data-mce-fragment=\"1\"\u003ehttp:\/\/docs.tpyboard.com\/zh\/latest\/tpyboard\/tutorial\/v202\/","published_at":"2020-10-08T16:55:32+08:00","created_at":"2020-10-08T16:55:31+08:00","vendor":"DIYMORE","type":"","tags":[],"price":699,"price_min":699,"price_max":699,"available":true,"price_varies":false,"compare_at_price":null,"compare_at_price_min":0,"compare_at_price_max":0,"compare_at_price_varies":false,"variants":[{"id":32603647967303,"title":"Default Title","option1":"Default Title","option2":null,"option3":null,"sku":"XF0061","requires_shipping":true,"taxable":false,"featured_image":null,"available":true,"name":"ESP8266 ESP-12F MicroPython Maker CH340 USB 5V Programming Development Board","public_title":null,"options":["Default Title"],"price":699,"weight":0,"compare_at_price":null,"inventory_management":"shopify","barcode":"","requires_selling_plan":false,"selling_plan_allocations":[]}],"images":["\/\/www.diymore.cc\/cdn\/shop\/products\/1_8ac6eafe-ee63-4f30-8728-5e052eb0c1ee.jpg?v=1602147363","\/\/www.diymore.cc\/cdn\/shop\/products\/2_cb568fff-94cf-4bcf-9103-9800277de38e.jpg?v=1602147363","\/\/www.diymore.cc\/cdn\/shop\/products\/3_c9403615-8c34-4fa3-9ea9-efdeaa912555.jpg?v=1602147363","\/\/www.diymore.cc\/cdn\/shop\/products\/4_72ca90af-a5b7-495e-b807-3aa51efc1912.jpg?v=1602147334","\/\/www.diymore.cc\/cdn\/shop\/products\/5_7e55d36a-7a6d-441e-a49e-93f4b7980368.jpg?v=1602147334"],"featured_image":"\/\/www.diymore.cc\/cdn\/shop\/products\/1_8ac6eafe-ee63-4f30-8728-5e052eb0c1ee.jpg?v=1602147363","options":["Title"],"media":[{"alt":null,"id":7547788263495,"position":1,"preview_image":{"aspect_ratio":1.0,"height":1000,"width":1000,"src":"\/\/www.diymore.cc\/cdn\/shop\/products\/1_8ac6eafe-ee63-4f30-8728-5e052eb0c1ee.jpg?v=1602147363"},"aspect_ratio":1.0,"height":1000,"media_type":"image","src":"\/\/www.diymore.cc\/cdn\/shop\/products\/1_8ac6eafe-ee63-4f30-8728-5e052eb0c1ee.jpg?v=1602147363","width":1000},{"alt":null,"id":7547788197959,"position":2,"preview_image":{"aspect_ratio":1.0,"height":1000,"width":1000,"src":"\/\/www.diymore.cc\/cdn\/shop\/products\/2_cb568fff-94cf-4bcf-9103-9800277de38e.jpg?v=1602147363"},"aspect_ratio":1.0,"height":1000,"media_type":"image","src":"\/\/www.diymore.cc\/cdn\/shop\/products\/2_cb568fff-94cf-4bcf-9103-9800277de38e.jpg?v=1602147363","width":1000},{"alt":null,"id":7547788230727,"position":3,"preview_image":{"aspect_ratio":1.0,"height":1000,"width":1000,"src":"\/\/www.diymore.cc\/cdn\/shop\/products\/3_c9403615-8c34-4fa3-9ea9-efdeaa912555.jpg?v=1602147363"},"aspect_ratio":1.0,"height":1000,"media_type":"image","src":"\/\/www.diymore.cc\/cdn\/shop\/products\/3_c9403615-8c34-4fa3-9ea9-efdeaa912555.jpg?v=1602147363","width":1000},{"alt":null,"id":7547788296263,"position":4,"preview_image":{"aspect_ratio":1.0,"height":1000,"width":1000,"src":"\/\/www.diymore.cc\/cdn\/shop\/products\/4_72ca90af-a5b7-495e-b807-3aa51efc1912.jpg?v=1602147334"},"aspect_ratio":1.0,"height":1000,"media_type":"image","src":"\/\/www.diymore.cc\/cdn\/shop\/products\/4_72ca90af-a5b7-495e-b807-3aa51efc1912.jpg?v=1602147334","width":1000},{"alt":null,"id":7547788329031,"position":5,"preview_image":{"aspect_ratio":1.0,"height":1000,"width":1000,"src":"\/\/www.diymore.cc\/cdn\/shop\/products\/5_7e55d36a-7a6d-441e-a49e-93f4b7980368.jpg?v=1602147334"},"aspect_ratio":1.0,"height":1000,"media_type":"image","src":"\/\/www.diymore.cc\/cdn\/shop\/products\/5_7e55d36a-7a6d-441e-a49e-93f4b7980368.jpg?v=1602147334","width":1000}],"requires_selling_plan":false,"selling_plan_groups":[],"content":"\u003cstrong\u003eReference description:\u003c\/strong\u003e\u003cbr data-mce-fragment=\"1\"\u003e\n\u003cul\u003e\n\u003cli\u003eSend relevant code, programming language Python, develop with arduino or Lua etc.\u003c\/li\u003e\n\u003cli\u003eSo, similar to NodeMcu. USB interface power supply can also be 5V and 3.3V wiring input,\u003c\/li\u003e\n\u003cli\u003eThe USB interface connects the CH340 serial chip and the automatic programming circuit to facilitate development.\u003c\/li\u003e\n\u003cli\u003eOpen the firmware file in the package and use flash_download_tools to burn micropython-esp8266.bin to\u003c\/li\u003e\n\u003cli\u003eIn the ESP module, this file is the necessary underlying firmware for python development. Connect the USB and click START.\u003c\/li\u003e\n\u003cli\u003eOpen the MicroPython File Uploader.exe file in the development tool, here you need to use the USB to power up the development board,\u003c\/li\u003e\n\u003cli\u003eThe driver of CH340 needs to be installed, this software needs .NET Framework 4.2 and above, if it fails to open, please install\u003c\/li\u003e\n\u003cli\u003eUse after .NET Framework.\u003c\/li\u003e\n\u003cli\u003eClick the folder icon on the right side of the tool, select the main.py file in the TPO03-Water Lamp folder, and then click Send to burn\u003c\/li\u003e\n\u003cli\u003eWrite, the effect achieved is that the available IO ports will output a high level for one second and a low level for one second. For example, the LED light on the ESP module will be on for one second\u003c\/li\u003e\n\u003cli\u003e-Seconds dark. Use after .NET Framework.\u003c\/li\u003e\n\u003c\/ul\u003e\n\u003cstrong\u003eSpecific tutorials and materials can refer to:\u003c\/strong\u003e\u003cbr data-mce-fragment=\"1\"\u003ehttp:\/\/docs.tpyboard.com\/zh\/latest\/tpyboard\/tutorial\/v202\/"}
-
STM32F4 Discovery STM32F407VGT6 Microcontroller 32bit Flash MCU ARM Cortex M4 Core Development BoardTranslation missing: en.products.product.regular_price $69.99{"id":4869640257607,"title":"ESP8266 ESP-12F MicroPython Maker CH340 USB 5V Programming Development Board","handle":"micropython-maker-programming-esp8266-development-board-micropython-development-board","description":"\u003cstrong\u003eReference description:\u003c\/strong\u003e\u003cbr data-mce-fragment=\"1\"\u003e\n\u003cul\u003e\n\u003cli\u003eSend relevant code, programming language Python, develop with arduino or Lua etc.\u003c\/li\u003e\n\u003cli\u003eSo, similar to NodeMcu. USB interface power supply can also be 5V and 3.3V wiring input,\u003c\/li\u003e\n\u003cli\u003eThe USB interface connects the CH340 serial chip and the automatic programming circuit to facilitate development.\u003c\/li\u003e\n\u003cli\u003eOpen the firmware file in the package and use flash_download_tools to burn micropython-esp8266.bin to\u003c\/li\u003e\n\u003cli\u003eIn the ESP module, this file is the necessary underlying firmware for python development. Connect the USB and click START.\u003c\/li\u003e\n\u003cli\u003eOpen the MicroPython File Uploader.exe file in the development tool, here you need to use the USB to power up the development board,\u003c\/li\u003e\n\u003cli\u003eThe driver of CH340 needs to be installed, this software needs .NET Framework 4.2 and above, if it fails to open, please install\u003c\/li\u003e\n\u003cli\u003eUse after .NET Framework.\u003c\/li\u003e\n\u003cli\u003eClick the folder icon on the right side of the tool, select the main.py file in the TPO03-Water Lamp folder, and then click Send to burn\u003c\/li\u003e\n\u003cli\u003eWrite, the effect achieved is that the available IO ports will output a high level for one second and a low level for one second. For example, the LED light on the ESP module will be on for one second\u003c\/li\u003e\n\u003cli\u003e-Seconds dark. Use after .NET Framework.\u003c\/li\u003e\n\u003c\/ul\u003e\n\u003cstrong\u003eSpecific tutorials and materials can refer to:\u003c\/strong\u003e\u003cbr data-mce-fragment=\"1\"\u003ehttp:\/\/docs.tpyboard.com\/zh\/latest\/tpyboard\/tutorial\/v202\/","published_at":"2020-10-08T16:55:32+08:00","created_at":"2020-10-08T16:55:31+08:00","vendor":"DIYMORE","type":"","tags":[],"price":699,"price_min":699,"price_max":699,"available":true,"price_varies":false,"compare_at_price":null,"compare_at_price_min":0,"compare_at_price_max":0,"compare_at_price_varies":false,"variants":[{"id":32603647967303,"title":"Default Title","option1":"Default Title","option2":null,"option3":null,"sku":"XF0061","requires_shipping":true,"taxable":false,"featured_image":null,"available":true,"name":"ESP8266 ESP-12F MicroPython Maker CH340 USB 5V Programming Development Board","public_title":null,"options":["Default Title"],"price":699,"weight":0,"compare_at_price":null,"inventory_management":"shopify","barcode":"","requires_selling_plan":false,"selling_plan_allocations":[]}],"images":["\/\/www.diymore.cc\/cdn\/shop\/products\/1_8ac6eafe-ee63-4f30-8728-5e052eb0c1ee.jpg?v=1602147363","\/\/www.diymore.cc\/cdn\/shop\/products\/2_cb568fff-94cf-4bcf-9103-9800277de38e.jpg?v=1602147363","\/\/www.diymore.cc\/cdn\/shop\/products\/3_c9403615-8c34-4fa3-9ea9-efdeaa912555.jpg?v=1602147363","\/\/www.diymore.cc\/cdn\/shop\/products\/4_72ca90af-a5b7-495e-b807-3aa51efc1912.jpg?v=1602147334","\/\/www.diymore.cc\/cdn\/shop\/products\/5_7e55d36a-7a6d-441e-a49e-93f4b7980368.jpg?v=1602147334"],"featured_image":"\/\/www.diymore.cc\/cdn\/shop\/products\/1_8ac6eafe-ee63-4f30-8728-5e052eb0c1ee.jpg?v=1602147363","options":["Title"],"media":[{"alt":null,"id":7547788263495,"position":1,"preview_image":{"aspect_ratio":1.0,"height":1000,"width":1000,"src":"\/\/www.diymore.cc\/cdn\/shop\/products\/1_8ac6eafe-ee63-4f30-8728-5e052eb0c1ee.jpg?v=1602147363"},"aspect_ratio":1.0,"height":1000,"media_type":"image","src":"\/\/www.diymore.cc\/cdn\/shop\/products\/1_8ac6eafe-ee63-4f30-8728-5e052eb0c1ee.jpg?v=1602147363","width":1000},{"alt":null,"id":7547788197959,"position":2,"preview_image":{"aspect_ratio":1.0,"height":1000,"width":1000,"src":"\/\/www.diymore.cc\/cdn\/shop\/products\/2_cb568fff-94cf-4bcf-9103-9800277de38e.jpg?v=1602147363"},"aspect_ratio":1.0,"height":1000,"media_type":"image","src":"\/\/www.diymore.cc\/cdn\/shop\/products\/2_cb568fff-94cf-4bcf-9103-9800277de38e.jpg?v=1602147363","width":1000},{"alt":null,"id":7547788230727,"position":3,"preview_image":{"aspect_ratio":1.0,"height":1000,"width":1000,"src":"\/\/www.diymore.cc\/cdn\/shop\/products\/3_c9403615-8c34-4fa3-9ea9-efdeaa912555.jpg?v=1602147363"},"aspect_ratio":1.0,"height":1000,"media_type":"image","src":"\/\/www.diymore.cc\/cdn\/shop\/products\/3_c9403615-8c34-4fa3-9ea9-efdeaa912555.jpg?v=1602147363","width":1000},{"alt":null,"id":7547788296263,"position":4,"preview_image":{"aspect_ratio":1.0,"height":1000,"width":1000,"src":"\/\/www.diymore.cc\/cdn\/shop\/products\/4_72ca90af-a5b7-495e-b807-3aa51efc1912.jpg?v=1602147334"},"aspect_ratio":1.0,"height":1000,"media_type":"image","src":"\/\/www.diymore.cc\/cdn\/shop\/products\/4_72ca90af-a5b7-495e-b807-3aa51efc1912.jpg?v=1602147334","width":1000},{"alt":null,"id":7547788329031,"position":5,"preview_image":{"aspect_ratio":1.0,"height":1000,"width":1000,"src":"\/\/www.diymore.cc\/cdn\/shop\/products\/5_7e55d36a-7a6d-441e-a49e-93f4b7980368.jpg?v=1602147334"},"aspect_ratio":1.0,"height":1000,"media_type":"image","src":"\/\/www.diymore.cc\/cdn\/shop\/products\/5_7e55d36a-7a6d-441e-a49e-93f4b7980368.jpg?v=1602147334","width":1000}],"requires_selling_plan":false,"selling_plan_groups":[],"content":"\u003cstrong\u003eReference description:\u003c\/strong\u003e\u003cbr data-mce-fragment=\"1\"\u003e\n\u003cul\u003e\n\u003cli\u003eSend relevant code, programming language Python, develop with arduino or Lua etc.\u003c\/li\u003e\n\u003cli\u003eSo, similar to NodeMcu. USB interface power supply can also be 5V and 3.3V wiring input,\u003c\/li\u003e\n\u003cli\u003eThe USB interface connects the CH340 serial chip and the automatic programming circuit to facilitate development.\u003c\/li\u003e\n\u003cli\u003eOpen the firmware file in the package and use flash_download_tools to burn micropython-esp8266.bin to\u003c\/li\u003e\n\u003cli\u003eIn the ESP module, this file is the necessary underlying firmware for python development. Connect the USB and click START.\u003c\/li\u003e\n\u003cli\u003eOpen the MicroPython File Uploader.exe file in the development tool, here you need to use the USB to power up the development board,\u003c\/li\u003e\n\u003cli\u003eThe driver of CH340 needs to be installed, this software needs .NET Framework 4.2 and above, if it fails to open, please install\u003c\/li\u003e\n\u003cli\u003eUse after .NET Framework.\u003c\/li\u003e\n\u003cli\u003eClick the folder icon on the right side of the tool, select the main.py file in the TPO03-Water Lamp folder, and then click Send to burn\u003c\/li\u003e\n\u003cli\u003eWrite, the effect achieved is that the available IO ports will output a high level for one second and a low level for one second. For example, the LED light on the ESP module will be on for one second\u003c\/li\u003e\n\u003cli\u003e-Seconds dark. Use after .NET Framework.\u003c\/li\u003e\n\u003c\/ul\u003e\n\u003cstrong\u003eSpecific tutorials and materials can refer to:\u003c\/strong\u003e\u003cbr data-mce-fragment=\"1\"\u003ehttp:\/\/docs.tpyboard.com\/zh\/latest\/tpyboard\/tutorial\/v202\/"}


