
W1018 DC 12V Timing Delay Relay Module Cycle Timer Digital LED Time Dual Display Thermolator With Swtich Case Instruments


W1018 DC 12V Timing Delay Relay Module Cycle Timer Digital LED Time Dual Display Thermolator With Swtich Case Instruments
SKU:011863
Regular price
$11.95
![]()
- guaranteeQuality checked
- Special gift cardsSpecial gift cards
- Free return Within 60 days
- Consultancy86-0755-85201155

W1018 microcomputer digital thermostat manual
Temperature range: -20 ~ +100 °
Resolution: -9.9 ° ~ 99.9 ° 0.1 °, other temperature 1 °
Temperature measurement accuracy: 1 °
Refresh frequency: about 0.5S
Input power: Dc 12V
Measurement input: 1 meter NTC (10K 0.5%) waterproof sensor
Output: All the way 10A relay
Environmental requirements: -10 ° ~ +60 ° Humidity 20% ~ 75%
Appearance size: 79 * 43mm
Hole size: 76 * 39mm
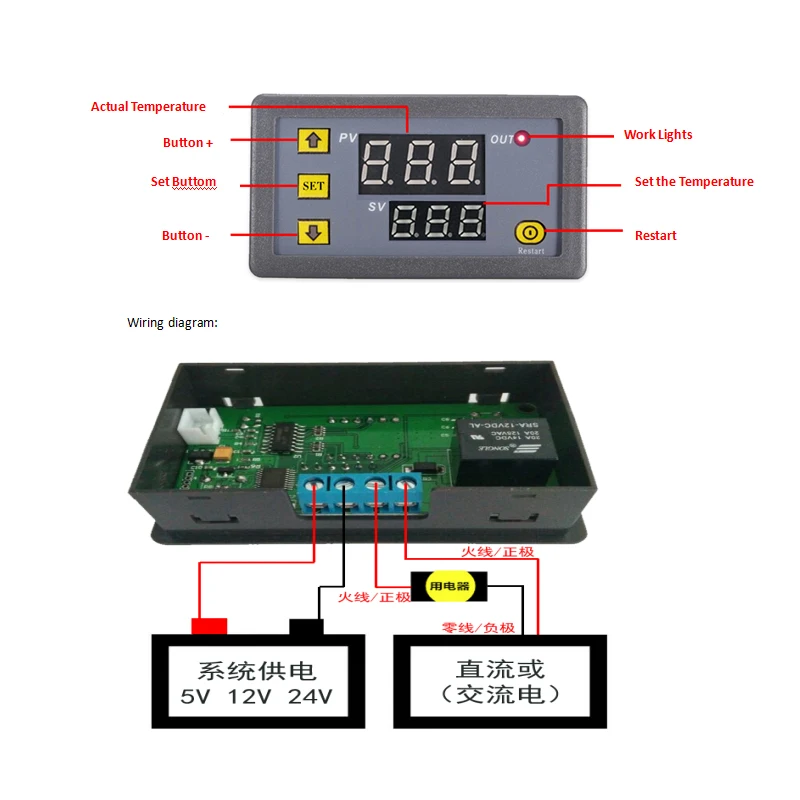
Panel introduction:
Circuit connection:
The reference circuit is connected with the power supply and load. At this time, the digital tube (upper) shows the actual measured temperature, the digital tube (lower) shows the preset temperature. Missing or damaged temperature sensor The digital display shows "- - -" and the purchaser must check if the temperature sensor is installed before use.
The thermostat output 10A relay, to meet a variety of high-power load, make sure the line is correct.
LED, LED status Description:
Indicator: Off means the relay is off, it means the relay is on
Digital tube: display "- - -", 1, check the temperature sensor is missing or damaged 2, heating mode high temperature protection 3, cooling mode low temperature protection. In protection mode the relay is automatically disconnected.
The use of buttons: Thermostat panel has three buttons, buttons + button - set the button SET
Button +: to achieve rapid accumulation of values
Button -: to achieve the rapid decline in value
Restart: Restart the button
Set the key SET: to achieve two-tier interface settings temperature setting interface parameter settings interface
SET short press digital tube (down) to quickly set the temperature. Preset -20 °, 0 °, 20 °, 40 °, 60 °, 80 °, 100 ° and other data sets to facilitate the user to quickly call. For example: Users need to set 68.8 °, first short press SET adjusted to 60 °, and then through the key to add fine-tuning to the appropriate temperature. Set to wait 5s automatic memory to save data. Relative to the 1st generation thermostat 2 generation more convenient and flexible operation, dual LED display the measured temperature at the same time, set the temperature more easy to observe.
SET long press to enter the parameter setting interface, P0-P5 is the corresponding parameter setting item. Under the parameter setting menu, P0-P5 can be switched by pressing SET briefly. Want to modify a parameter just switch to the corresponding item, through the addition and subtraction button to set. After setting, press and hold SET to save the data, or wait 6s to save the data automatically.
Friendly Reminder:
P3 set to 1 that the thermostat operation for 1 minute to stop, press SET to trigger again.
P4 set to 1 that the thermostat 1 minute after the start of work. After setting the digital tube will not light, until 1 minute after the normal work. Press SET to trigger again.
The P5 default setting is OFF, and once the user has set the temperature, the P5 option can be set to ON in order to prevent others from changing it at will. Once set to ON data is locked, need to be set again when P5 needs to be OFF.
Knowledge Expansion: the concept of backtracking
Back to the simple understanding of the difference is to go back to the difference. Thermostat can be set heating and cooling two modes of work, so the backlash has two meanings:
In the cooling mode (when P0 = C), if the set temperature is 30 °, the hysteresis is 2, indicating that the actual temperature> = 32 °, the relay is closed, when the actual temperature <= 30 °, the relay is disconnected;
In the heating mode (P0 = H), if the set temperature is 30 °, the hysteresis is 2, indicating the actual temperature> = 30 °, the relay is off, when the actual temperature <= 28 ° closed.
Package included:
1 x Timing Delay Relay Module
Purchasing & Delivery
Before you make your purchase, it’s helpful to know the measurements of the area you plan to place the furniture. You should also measure any doorways and hallways through which the furniture will pass to get to its final destination.Picking up at the store
Shopify Shop requires that all products are properly inspected BEFORE you take it home to insure there are no surprises. Our team is happy to open all packages and will assist in the inspection process. We will then reseal packages for safe transport. We encourage all customers to bring furniture pads or blankets to protect the items during transport as well as rope or tie downs. Shopify Shop will not be responsible for damage that occurs after leaving the store or during transit. It is the purchaser’s responsibility to make sure the correct items are picked up and in good condition.Delivery
Customers are able to pick the next available delivery day that best fits their schedule. However, to route stops as efficiently as possible, Shopify Shop will provide the time frame. Customers will not be able to choose a time. You will be notified in advance of your scheduled time frame. Please make sure that a responsible adult (18 years or older) will be home at that time.In preparation for your delivery, please remove existing furniture, pictures, mirrors, accessories, etc. to prevent damages. Also insure that the area where you would like your furniture placed is clear of any old furniture and any other items that may obstruct the passageway of the delivery team. Shopify Shop will deliver, assemble, and set-up your new furniture purchase and remove all packing materials from your home. Our delivery crews are not permitted to move your existing furniture or other household items. Delivery personnel will attempt to deliver the purchased items in a safe and controlled manner but will not attempt to place furniture if they feel it will result in damage to the product or your home. Delivery personnel are unable to remove doors, hoist furniture or carry furniture up more than 3 flights of stairs. An elevator must be available for deliveries to the 4th floor and above.
Other Customers also buy:
-
 Translation missing: en.products.product.regular_price $3.83{"id":4568268341319,"title":"W1018 DC 12V Timing Delay Relay Module Cycle Timer Digital LED Time Dual Display Thermolator With Swtich Case Instruments","handle":"w1018-dc-12v-timing-delay-relay-module-cycle-timer-digital-led-time-dual-display-thermolator-with-swtich-case-instruments","description":"\u003cp\u003e\u003cimg src=\"https:\/\/ae01.alicdn.com\/kf\/HTB12JMgilsmBKNjSZFsq6yXSVXaS.jpg\"\u003e\u003c\/p\u003e\n\u003cdiv\u003e\n\u003cdiv\u003e\n\u003cspan\u003e\u003c\/span\u003e \u003c\/div\u003e\n\u003cdiv\u003e\n\u003cspan\u003e\u003c\/span\u003e \u003c\/div\u003e\n\u003cdiv\u003e\n\u003cspan\u003e\u003c\/span\u003e \u003c\/div\u003e\n\u003cdiv\u003e\u003cspan\u003eW1018 microcomputer digital thermostat manual\u003c\/span\u003e\u003c\/div\u003e\n\u003cdiv\u003e\u003cspan\u003eTemperature range: -20 ~ +100 °\u003c\/span\u003e\u003c\/div\u003e\n\u003cdiv\u003e\u003cspan\u003eResolution: -9.9 ° ~ 99.9 ° 0.1 °, other temperature 1 °\u003c\/span\u003e\u003c\/div\u003e\n\u003cdiv\u003e\u003cspan\u003eTemperature measurement accuracy: 1 °\u003c\/span\u003e\u003c\/div\u003e\n\u003cdiv\u003e\u003cspan\u003eRefresh frequency: about 0.5S\u003c\/span\u003e\u003c\/div\u003e\n\u003cdiv\u003e\u003cspan\u003eInput power: Dc 12V \u003c\/span\u003e\u003c\/div\u003e\n\u003cdiv\u003e\u003cspan\u003eMeasurement input: 1 meter NTC (10K 0.5%) waterproof sensor\u003c\/span\u003e\u003c\/div\u003e\n\u003cdiv\u003e\u003cspan\u003eOutput: All the way 10A relay\u003c\/span\u003e\u003c\/div\u003e\n\u003cdiv\u003e\u003cspan\u003eEnvironmental requirements: -10 ° ~ +60 ° Humidity 20% ~ 75%\u003c\/span\u003e\u003c\/div\u003e\n\u003cdiv\u003e\u003cspan\u003eAppearance size: 79 * 43mm\u003c\/span\u003e\u003c\/div\u003e\n\u003cdiv\u003e\u003cspan\u003eHole size: 76 * 39mm\u003c\/span\u003e\u003c\/div\u003e\n\u003cdiv\u003e\u003cspan\u003e \u003c\/span\u003e\u003c\/div\u003e\n\u003cdiv\u003e\u003cspan\u003e \u003c\/span\u003e\u003c\/div\u003e\n\u003cdiv\u003e\u003cimg alt=\"11\" src=\"https:\/\/ae01.alicdn.com\/kf\/HTB1ePjXEY1YBuNjSszeq6yblFXaZ.jpg\"\u003e\u003c\/div\u003e\n\u003cdiv\u003e\u003cspan\u003e \u003c\/span\u003e\u003c\/div\u003e\n\u003cdiv\u003e\u003cspan\u003e \u003c\/span\u003e\u003c\/div\u003e\n\u003cdiv\u003e\u003cspan\u003e \u003c\/span\u003e\u003c\/div\u003e\n\u003cdiv\u003e\u003cspan\u003ePanel introduction:\u003c\/span\u003e\u003c\/div\u003e\n\u003cdiv\u003e\u003cspan\u003e \u003c\/span\u003e\u003c\/div\u003e\n\u003cdiv\u003e\u003cspan\u003eCircuit connection: \u003c\/span\u003e\u003c\/div\u003e\n\u003cdiv\u003e\u003cspan\u003eThe reference circuit is connected with the power supply and load. At this time, the digital tube (upper) shows the actual measured temperature, the digital tube (lower) shows the preset temperature. Missing or damaged temperature sensor The digital display shows \"- - -\" and the purchaser must check if the temperature sensor is installed before use.\u003c\/span\u003e\u003c\/div\u003e\n\u003cdiv\u003e\u003cspan\u003eThe thermostat output 10A relay, to meet a variety of high-power load, make sure the line is correct.\u003c\/span\u003e\u003c\/div\u003e\n\u003cdiv\u003e\u003cspan\u003e \u003c\/span\u003e\u003c\/div\u003e\n\u003cdiv\u003e\u003cspan\u003eLED, LED status Description:\u003c\/span\u003e\u003c\/div\u003e\n\u003cdiv\u003e\u003cspan\u003eIndicator: Off means the relay is off, it means the relay is on\u003c\/span\u003e\u003c\/div\u003e\n\u003cdiv\u003e\u003cspan\u003eDigital tube: display \"- - -\", 1, check the temperature sensor is missing or damaged 2, heating mode high temperature protection 3, cooling mode low temperature protection. In protection mode the relay is automatically disconnected.\u003c\/span\u003e\u003c\/div\u003e\n\u003cdiv\u003e\u003cspan\u003e \u003c\/span\u003e\u003c\/div\u003e\n\u003cdiv\u003e\u003cspan\u003eThe use of buttons: Thermostat panel has three buttons, buttons + button - set the button SET\u003c\/span\u003e\u003c\/div\u003e\n\u003cdiv\u003e\u003cspan\u003eButton +: to achieve rapid accumulation of values\u003c\/span\u003e\u003c\/div\u003e\n\u003cdiv\u003e\u003cspan\u003eButton -: to achieve the rapid decline in value\u003c\/span\u003e\u003c\/div\u003e\n\u003cdiv\u003e\u003cspan\u003eRestart: Restart the button\u003c\/span\u003e\u003c\/div\u003e\n\u003cdiv\u003e\u003cspan\u003eSet the key SET: to achieve two-tier interface settings temperature setting interface parameter settings interface\u003c\/span\u003e\u003c\/div\u003e\n\u003cdiv\u003e\u003cspan\u003eSET short press digital tube (down) to quickly set the temperature. Preset -20 °, 0 °, 20 °, 40 °, 60 °, 80 °, 100 ° and other data sets to facilitate the user to quickly call. For example: Users need to set 68.8 °, first short press SET adjusted to 60 °, and then through the key to add fine-tuning to the appropriate temperature. Set to wait 5s automatic memory to save data. Relative to the 1st generation thermostat 2 generation more convenient and flexible operation, dual LED display the measured temperature at the same time, set the temperature more easy to observe.\u003c\/span\u003e\u003c\/div\u003e\n\u003cdiv\u003e\u003cspan\u003eSET long press to enter the parameter setting interface, P0-P5 is the corresponding parameter setting item. Under the parameter setting menu, P0-P5 can be switched by pressing SET briefly. Want to modify a parameter just switch to the corresponding item, through the addition and subtraction button to set. After setting, press and hold SET to save the data, or wait 6s to save the data automatically.\u003c\/span\u003e\u003c\/div\u003e\n\u003cdiv\u003e\u003cspan\u003e \u003c\/span\u003e\u003c\/div\u003e\n\u003cdiv\u003e\u003cspan\u003e \u003c\/span\u003e\u003c\/div\u003e\n\u003cdiv\u003e\u003cspan\u003eFriendly Reminder:\u003c\/span\u003e\u003c\/div\u003e\n\u003cdiv\u003e\u003cspan\u003eP3 set to 1 that the thermostat operation for 1 minute to stop, press SET to trigger again.\u003c\/span\u003e\u003c\/div\u003e\n\u003cdiv\u003e\u003cspan\u003eP4 set to 1 that the thermostat 1 minute after the start of work. After setting the digital tube will not light, until 1 minute after the normal work. Press SET to trigger again.\u003c\/span\u003e\u003c\/div\u003e\n\u003cdiv\u003e\u003cspan\u003eThe P5 default setting is OFF, and once the user has set the temperature, the P5 option can be set to ON in order to prevent others from changing it at will. Once set to ON data is locked, need to be set again when P5 needs to be OFF.\u003c\/span\u003e\u003c\/div\u003e\n\u003cdiv\u003e\u003cspan\u003e \u003c\/span\u003e\u003c\/div\u003e\n\u003cdiv\u003e\u003cspan\u003e \u003c\/span\u003e\u003c\/div\u003e\n\u003cdiv\u003e\u003cspan\u003eKnowledge Expansion: the concept of backtracking\u003c\/span\u003e\u003c\/div\u003e\n\u003cdiv\u003e\u003cspan\u003eBack to the simple understanding of the difference is to go back to the difference. Thermostat can be set heating and cooling two modes of work, so the backlash has two meanings:\u003c\/span\u003e\u003c\/div\u003e\n\u003cdiv\u003e\u003cspan\u003eIn the cooling mode (when P0 = C), if the set temperature is 30 °, the hysteresis is 2, indicating that the actual temperature\u0026gt; = 32 °, the relay is closed, when the actual temperature \u0026lt;= 30 °, the relay is disconnected;\u003c\/span\u003e\u003c\/div\u003e\n\u003cdiv\u003e\u003cspan\u003eIn the heating mode (P0 = H), if the set temperature is 30 °, the hysteresis is 2, indicating the actual temperature\u0026gt; = 30 °, the relay is off, when the actual temperature \u0026lt;= 28 ° closed.\u003c\/span\u003e\u003c\/div\u003e\n\u003c\/div\u003e\n\u003cdiv\u003e\u003cspan\u003e \u003c\/span\u003e\u003c\/div\u003e\n\u003cdiv\u003e\u003cspan\u003e \u003c\/span\u003e\u003c\/div\u003e\n\u003cdiv\u003e\u003cspan\u003ePackage included:\u003c\/span\u003e\u003c\/div\u003e\n\u003cdiv\u003e\n\u003cspan\u003e\u003c\/span\u003e\u003cbr\u003e\n\u003c\/div\u003e\n\u003cdiv\u003e\u003cspan\u003e1 x Timing Delay Relay Module\u003c\/span\u003e\u003c\/div\u003e","published_at":"2022-09-19T12:31:24+08:00","created_at":"2020-04-10T20:28:03+08:00","vendor":"diymore","type":"Relay Module","tags":[],"price":1195,"price_min":1195,"price_max":1195,"available":true,"price_varies":false,"compare_at_price":null,"compare_at_price_min":0,"compare_at_price_max":0,"compare_at_price_varies":false,"variants":[{"id":32037754044487,"title":"Default Title","option1":"Default Title","option2":null,"option3":null,"sku":"011863","requires_shipping":true,"taxable":true,"featured_image":null,"available":true,"name":"W1018 DC 12V Timing Delay Relay Module Cycle Timer Digital LED Time Dual Display Thermolator With Swtich Case Instruments","public_title":null,"options":["Default Title"],"price":1195,"weight":500,"compare_at_price":null,"inventory_management":null,"barcode":"","requires_selling_plan":false,"selling_plan_allocations":[]}],"images":["\/\/www.diymore.cc\/cdn\/shop\/products\/011863_10_238.jpg?v=1588701838","\/\/www.diymore.cc\/cdn\/shop\/products\/011863_1_577.jpg?v=1588701838","\/\/www.diymore.cc\/cdn\/shop\/products\/011863_2_568.jpg?v=1588701838","\/\/www.diymore.cc\/cdn\/shop\/products\/011863_3_280.jpg?v=1588701838","\/\/www.diymore.cc\/cdn\/shop\/products\/011863_6_222.jpg?v=1588701838","\/\/www.diymore.cc\/cdn\/shop\/products\/011863_7_939.jpg?v=1588701838","\/\/www.diymore.cc\/cdn\/shop\/products\/011863_8_685.jpg?v=1588701838"],"featured_image":"\/\/www.diymore.cc\/cdn\/shop\/products\/011863_10_238.jpg?v=1588701838","options":["Title"],"media":[{"alt":"W1018 Dc 12V Timing Delay Relay Module Cycle Timer Digital Led Time Dual Display Thermolator With","id":6682588938311,"position":1,"preview_image":{"aspect_ratio":1.0,"height":1000,"width":1000,"src":"\/\/www.diymore.cc\/cdn\/shop\/products\/011863_10_238.jpg?v=1588701838"},"aspect_ratio":1.0,"height":1000,"media_type":"image","src":"\/\/www.diymore.cc\/cdn\/shop\/products\/011863_10_238.jpg?v=1588701838","width":1000},{"alt":"W1018 Dc 12V Timing Delay Relay Module Cycle Timer Digital Led Time Dual Display Thermolator With","id":6682589167687,"position":2,"preview_image":{"aspect_ratio":1.0,"height":1000,"width":1000,"src":"\/\/www.diymore.cc\/cdn\/shop\/products\/011863_1_577.jpg?v=1588701838"},"aspect_ratio":1.0,"height":1000,"media_type":"image","src":"\/\/www.diymore.cc\/cdn\/shop\/products\/011863_1_577.jpg?v=1588701838","width":1000},{"alt":"W1018 Dc 12V Timing Delay Relay Module Cycle Timer Digital Led Time Dual Display Thermolator With","id":6682589331527,"position":3,"preview_image":{"aspect_ratio":1.0,"height":1000,"width":1000,"src":"\/\/www.diymore.cc\/cdn\/shop\/products\/011863_2_568.jpg?v=1588701838"},"aspect_ratio":1.0,"height":1000,"media_type":"image","src":"\/\/www.diymore.cc\/cdn\/shop\/products\/011863_2_568.jpg?v=1588701838","width":1000},{"alt":"W1018 Dc 12V Timing Delay Relay Module Cycle Timer Digital Led Time Dual Display Thermolator With","id":6682589593671,"position":4,"preview_image":{"aspect_ratio":1.0,"height":1000,"width":1000,"src":"\/\/www.diymore.cc\/cdn\/shop\/products\/011863_3_280.jpg?v=1588701838"},"aspect_ratio":1.0,"height":1000,"media_type":"image","src":"\/\/www.diymore.cc\/cdn\/shop\/products\/011863_3_280.jpg?v=1588701838","width":1000},{"alt":"W1018 Dc 12V Timing Delay Relay Module Cycle Timer Digital Led Time Dual Display Thermolator With","id":6682590019655,"position":5,"preview_image":{"aspect_ratio":1.0,"height":1000,"width":1000,"src":"\/\/www.diymore.cc\/cdn\/shop\/products\/011863_6_222.jpg?v=1588701838"},"aspect_ratio":1.0,"height":1000,"media_type":"image","src":"\/\/www.diymore.cc\/cdn\/shop\/products\/011863_6_222.jpg?v=1588701838","width":1000},{"alt":"W1018 Dc 12V Timing Delay Relay Module Cycle Timer Digital Led Time Dual Display Thermolator With","id":6682590249031,"position":6,"preview_image":{"aspect_ratio":1.0,"height":1000,"width":1000,"src":"\/\/www.diymore.cc\/cdn\/shop\/products\/011863_7_939.jpg?v=1588701838"},"aspect_ratio":1.0,"height":1000,"media_type":"image","src":"\/\/www.diymore.cc\/cdn\/shop\/products\/011863_7_939.jpg?v=1588701838","width":1000},{"alt":"W1018 Dc 12V Timing Delay Relay Module Cycle Timer Digital Led Time Dual Display Thermolator With","id":6682590445639,"position":7,"preview_image":{"aspect_ratio":1.0,"height":1000,"width":1000,"src":"\/\/www.diymore.cc\/cdn\/shop\/products\/011863_8_685.jpg?v=1588701838"},"aspect_ratio":1.0,"height":1000,"media_type":"image","src":"\/\/www.diymore.cc\/cdn\/shop\/products\/011863_8_685.jpg?v=1588701838","width":1000}],"requires_selling_plan":false,"selling_plan_groups":[],"content":"\u003cp\u003e\u003cimg src=\"https:\/\/ae01.alicdn.com\/kf\/HTB12JMgilsmBKNjSZFsq6yXSVXaS.jpg\"\u003e\u003c\/p\u003e\n\u003cdiv\u003e\n\u003cdiv\u003e\n\u003cspan\u003e\u003c\/span\u003e \u003c\/div\u003e\n\u003cdiv\u003e\n\u003cspan\u003e\u003c\/span\u003e \u003c\/div\u003e\n\u003cdiv\u003e\n\u003cspan\u003e\u003c\/span\u003e \u003c\/div\u003e\n\u003cdiv\u003e\u003cspan\u003eW1018 microcomputer digital thermostat manual\u003c\/span\u003e\u003c\/div\u003e\n\u003cdiv\u003e\u003cspan\u003eTemperature range: -20 ~ +100 °\u003c\/span\u003e\u003c\/div\u003e\n\u003cdiv\u003e\u003cspan\u003eResolution: -9.9 ° ~ 99.9 ° 0.1 °, other temperature 1 °\u003c\/span\u003e\u003c\/div\u003e\n\u003cdiv\u003e\u003cspan\u003eTemperature measurement accuracy: 1 °\u003c\/span\u003e\u003c\/div\u003e\n\u003cdiv\u003e\u003cspan\u003eRefresh frequency: about 0.5S\u003c\/span\u003e\u003c\/div\u003e\n\u003cdiv\u003e\u003cspan\u003eInput power: Dc 12V \u003c\/span\u003e\u003c\/div\u003e\n\u003cdiv\u003e\u003cspan\u003eMeasurement input: 1 meter NTC (10K 0.5%) waterproof sensor\u003c\/span\u003e\u003c\/div\u003e\n\u003cdiv\u003e\u003cspan\u003eOutput: All the way 10A relay\u003c\/span\u003e\u003c\/div\u003e\n\u003cdiv\u003e\u003cspan\u003eEnvironmental requirements: -10 ° ~ +60 ° Humidity 20% ~ 75%\u003c\/span\u003e\u003c\/div\u003e\n\u003cdiv\u003e\u003cspan\u003eAppearance size: 79 * 43mm\u003c\/span\u003e\u003c\/div\u003e\n\u003cdiv\u003e\u003cspan\u003eHole size: 76 * 39mm\u003c\/span\u003e\u003c\/div\u003e\n\u003cdiv\u003e\u003cspan\u003e \u003c\/span\u003e\u003c\/div\u003e\n\u003cdiv\u003e\u003cspan\u003e \u003c\/span\u003e\u003c\/div\u003e\n\u003cdiv\u003e\u003cimg alt=\"11\" src=\"https:\/\/ae01.alicdn.com\/kf\/HTB1ePjXEY1YBuNjSszeq6yblFXaZ.jpg\"\u003e\u003c\/div\u003e\n\u003cdiv\u003e\u003cspan\u003e \u003c\/span\u003e\u003c\/div\u003e\n\u003cdiv\u003e\u003cspan\u003e \u003c\/span\u003e\u003c\/div\u003e\n\u003cdiv\u003e\u003cspan\u003e \u003c\/span\u003e\u003c\/div\u003e\n\u003cdiv\u003e\u003cspan\u003ePanel introduction:\u003c\/span\u003e\u003c\/div\u003e\n\u003cdiv\u003e\u003cspan\u003e \u003c\/span\u003e\u003c\/div\u003e\n\u003cdiv\u003e\u003cspan\u003eCircuit connection: \u003c\/span\u003e\u003c\/div\u003e\n\u003cdiv\u003e\u003cspan\u003eThe reference circuit is connected with the power supply and load. At this time, the digital tube (upper) shows the actual measured temperature, the digital tube (lower) shows the preset temperature. Missing or damaged temperature sensor The digital display shows \"- - -\" and the purchaser must check if the temperature sensor is installed before use.\u003c\/span\u003e\u003c\/div\u003e\n\u003cdiv\u003e\u003cspan\u003eThe thermostat output 10A relay, to meet a variety of high-power load, make sure the line is correct.\u003c\/span\u003e\u003c\/div\u003e\n\u003cdiv\u003e\u003cspan\u003e \u003c\/span\u003e\u003c\/div\u003e\n\u003cdiv\u003e\u003cspan\u003eLED, LED status Description:\u003c\/span\u003e\u003c\/div\u003e\n\u003cdiv\u003e\u003cspan\u003eIndicator: Off means the relay is off, it means the relay is on\u003c\/span\u003e\u003c\/div\u003e\n\u003cdiv\u003e\u003cspan\u003eDigital tube: display \"- - -\", 1, check the temperature sensor is missing or damaged 2, heating mode high temperature protection 3, cooling mode low temperature protection. In protection mode the relay is automatically disconnected.\u003c\/span\u003e\u003c\/div\u003e\n\u003cdiv\u003e\u003cspan\u003e \u003c\/span\u003e\u003c\/div\u003e\n\u003cdiv\u003e\u003cspan\u003eThe use of buttons: Thermostat panel has three buttons, buttons + button - set the button SET\u003c\/span\u003e\u003c\/div\u003e\n\u003cdiv\u003e\u003cspan\u003eButton +: to achieve rapid accumulation of values\u003c\/span\u003e\u003c\/div\u003e\n\u003cdiv\u003e\u003cspan\u003eButton -: to achieve the rapid decline in value\u003c\/span\u003e\u003c\/div\u003e\n\u003cdiv\u003e\u003cspan\u003eRestart: Restart the button\u003c\/span\u003e\u003c\/div\u003e\n\u003cdiv\u003e\u003cspan\u003eSet the key SET: to achieve two-tier interface settings temperature setting interface parameter settings interface\u003c\/span\u003e\u003c\/div\u003e\n\u003cdiv\u003e\u003cspan\u003eSET short press digital tube (down) to quickly set the temperature. Preset -20 °, 0 °, 20 °, 40 °, 60 °, 80 °, 100 ° and other data sets to facilitate the user to quickly call. For example: Users need to set 68.8 °, first short press SET adjusted to 60 °, and then through the key to add fine-tuning to the appropriate temperature. Set to wait 5s automatic memory to save data. Relative to the 1st generation thermostat 2 generation more convenient and flexible operation, dual LED display the measured temperature at the same time, set the temperature more easy to observe.\u003c\/span\u003e\u003c\/div\u003e\n\u003cdiv\u003e\u003cspan\u003eSET long press to enter the parameter setting interface, P0-P5 is the corresponding parameter setting item. Under the parameter setting menu, P0-P5 can be switched by pressing SET briefly. Want to modify a parameter just switch to the corresponding item, through the addition and subtraction button to set. After setting, press and hold SET to save the data, or wait 6s to save the data automatically.\u003c\/span\u003e\u003c\/div\u003e\n\u003cdiv\u003e\u003cspan\u003e \u003c\/span\u003e\u003c\/div\u003e\n\u003cdiv\u003e\u003cspan\u003e \u003c\/span\u003e\u003c\/div\u003e\n\u003cdiv\u003e\u003cspan\u003eFriendly Reminder:\u003c\/span\u003e\u003c\/div\u003e\n\u003cdiv\u003e\u003cspan\u003eP3 set to 1 that the thermostat operation for 1 minute to stop, press SET to trigger again.\u003c\/span\u003e\u003c\/div\u003e\n\u003cdiv\u003e\u003cspan\u003eP4 set to 1 that the thermostat 1 minute after the start of work. After setting the digital tube will not light, until 1 minute after the normal work. Press SET to trigger again.\u003c\/span\u003e\u003c\/div\u003e\n\u003cdiv\u003e\u003cspan\u003eThe P5 default setting is OFF, and once the user has set the temperature, the P5 option can be set to ON in order to prevent others from changing it at will. Once set to ON data is locked, need to be set again when P5 needs to be OFF.\u003c\/span\u003e\u003c\/div\u003e\n\u003cdiv\u003e\u003cspan\u003e \u003c\/span\u003e\u003c\/div\u003e\n\u003cdiv\u003e\u003cspan\u003e \u003c\/span\u003e\u003c\/div\u003e\n\u003cdiv\u003e\u003cspan\u003eKnowledge Expansion: the concept of backtracking\u003c\/span\u003e\u003c\/div\u003e\n\u003cdiv\u003e\u003cspan\u003eBack to the simple understanding of the difference is to go back to the difference. Thermostat can be set heating and cooling two modes of work, so the backlash has two meanings:\u003c\/span\u003e\u003c\/div\u003e\n\u003cdiv\u003e\u003cspan\u003eIn the cooling mode (when P0 = C), if the set temperature is 30 °, the hysteresis is 2, indicating that the actual temperature\u0026gt; = 32 °, the relay is closed, when the actual temperature \u0026lt;= 30 °, the relay is disconnected;\u003c\/span\u003e\u003c\/div\u003e\n\u003cdiv\u003e\u003cspan\u003eIn the heating mode (P0 = H), if the set temperature is 30 °, the hysteresis is 2, indicating the actual temperature\u0026gt; = 30 °, the relay is off, when the actual temperature \u0026lt;= 28 ° closed.\u003c\/span\u003e\u003c\/div\u003e\n\u003c\/div\u003e\n\u003cdiv\u003e\u003cspan\u003e \u003c\/span\u003e\u003c\/div\u003e\n\u003cdiv\u003e\u003cspan\u003e \u003c\/span\u003e\u003c\/div\u003e\n\u003cdiv\u003e\u003cspan\u003ePackage included:\u003c\/span\u003e\u003c\/div\u003e\n\u003cdiv\u003e\n\u003cspan\u003e\u003c\/span\u003e\u003cbr\u003e\n\u003c\/div\u003e\n\u003cdiv\u003e\u003cspan\u003e1 x Timing Delay Relay Module\u003c\/span\u003e\u003c\/div\u003e"}
 -
 Translation missing: en.products.product.regular_price $8.00{"id":4568268341319,"title":"W1018 DC 12V Timing Delay Relay Module Cycle Timer Digital LED Time Dual Display Thermolator With Swtich Case Instruments","handle":"w1018-dc-12v-timing-delay-relay-module-cycle-timer-digital-led-time-dual-display-thermolator-with-swtich-case-instruments","description":"\u003cp\u003e\u003cimg src=\"https:\/\/ae01.alicdn.com\/kf\/HTB12JMgilsmBKNjSZFsq6yXSVXaS.jpg\"\u003e\u003c\/p\u003e\n\u003cdiv\u003e\n\u003cdiv\u003e\n\u003cspan\u003e\u003c\/span\u003e \u003c\/div\u003e\n\u003cdiv\u003e\n\u003cspan\u003e\u003c\/span\u003e \u003c\/div\u003e\n\u003cdiv\u003e\n\u003cspan\u003e\u003c\/span\u003e \u003c\/div\u003e\n\u003cdiv\u003e\u003cspan\u003eW1018 microcomputer digital thermostat manual\u003c\/span\u003e\u003c\/div\u003e\n\u003cdiv\u003e\u003cspan\u003eTemperature range: -20 ~ +100 °\u003c\/span\u003e\u003c\/div\u003e\n\u003cdiv\u003e\u003cspan\u003eResolution: -9.9 ° ~ 99.9 ° 0.1 °, other temperature 1 °\u003c\/span\u003e\u003c\/div\u003e\n\u003cdiv\u003e\u003cspan\u003eTemperature measurement accuracy: 1 °\u003c\/span\u003e\u003c\/div\u003e\n\u003cdiv\u003e\u003cspan\u003eRefresh frequency: about 0.5S\u003c\/span\u003e\u003c\/div\u003e\n\u003cdiv\u003e\u003cspan\u003eInput power: Dc 12V \u003c\/span\u003e\u003c\/div\u003e\n\u003cdiv\u003e\u003cspan\u003eMeasurement input: 1 meter NTC (10K 0.5%) waterproof sensor\u003c\/span\u003e\u003c\/div\u003e\n\u003cdiv\u003e\u003cspan\u003eOutput: All the way 10A relay\u003c\/span\u003e\u003c\/div\u003e\n\u003cdiv\u003e\u003cspan\u003eEnvironmental requirements: -10 ° ~ +60 ° Humidity 20% ~ 75%\u003c\/span\u003e\u003c\/div\u003e\n\u003cdiv\u003e\u003cspan\u003eAppearance size: 79 * 43mm\u003c\/span\u003e\u003c\/div\u003e\n\u003cdiv\u003e\u003cspan\u003eHole size: 76 * 39mm\u003c\/span\u003e\u003c\/div\u003e\n\u003cdiv\u003e\u003cspan\u003e \u003c\/span\u003e\u003c\/div\u003e\n\u003cdiv\u003e\u003cspan\u003e \u003c\/span\u003e\u003c\/div\u003e\n\u003cdiv\u003e\u003cimg alt=\"11\" src=\"https:\/\/ae01.alicdn.com\/kf\/HTB1ePjXEY1YBuNjSszeq6yblFXaZ.jpg\"\u003e\u003c\/div\u003e\n\u003cdiv\u003e\u003cspan\u003e \u003c\/span\u003e\u003c\/div\u003e\n\u003cdiv\u003e\u003cspan\u003e \u003c\/span\u003e\u003c\/div\u003e\n\u003cdiv\u003e\u003cspan\u003e \u003c\/span\u003e\u003c\/div\u003e\n\u003cdiv\u003e\u003cspan\u003ePanel introduction:\u003c\/span\u003e\u003c\/div\u003e\n\u003cdiv\u003e\u003cspan\u003e \u003c\/span\u003e\u003c\/div\u003e\n\u003cdiv\u003e\u003cspan\u003eCircuit connection: \u003c\/span\u003e\u003c\/div\u003e\n\u003cdiv\u003e\u003cspan\u003eThe reference circuit is connected with the power supply and load. At this time, the digital tube (upper) shows the actual measured temperature, the digital tube (lower) shows the preset temperature. Missing or damaged temperature sensor The digital display shows \"- - -\" and the purchaser must check if the temperature sensor is installed before use.\u003c\/span\u003e\u003c\/div\u003e\n\u003cdiv\u003e\u003cspan\u003eThe thermostat output 10A relay, to meet a variety of high-power load, make sure the line is correct.\u003c\/span\u003e\u003c\/div\u003e\n\u003cdiv\u003e\u003cspan\u003e \u003c\/span\u003e\u003c\/div\u003e\n\u003cdiv\u003e\u003cspan\u003eLED, LED status Description:\u003c\/span\u003e\u003c\/div\u003e\n\u003cdiv\u003e\u003cspan\u003eIndicator: Off means the relay is off, it means the relay is on\u003c\/span\u003e\u003c\/div\u003e\n\u003cdiv\u003e\u003cspan\u003eDigital tube: display \"- - -\", 1, check the temperature sensor is missing or damaged 2, heating mode high temperature protection 3, cooling mode low temperature protection. In protection mode the relay is automatically disconnected.\u003c\/span\u003e\u003c\/div\u003e\n\u003cdiv\u003e\u003cspan\u003e \u003c\/span\u003e\u003c\/div\u003e\n\u003cdiv\u003e\u003cspan\u003eThe use of buttons: Thermostat panel has three buttons, buttons + button - set the button SET\u003c\/span\u003e\u003c\/div\u003e\n\u003cdiv\u003e\u003cspan\u003eButton +: to achieve rapid accumulation of values\u003c\/span\u003e\u003c\/div\u003e\n\u003cdiv\u003e\u003cspan\u003eButton -: to achieve the rapid decline in value\u003c\/span\u003e\u003c\/div\u003e\n\u003cdiv\u003e\u003cspan\u003eRestart: Restart the button\u003c\/span\u003e\u003c\/div\u003e\n\u003cdiv\u003e\u003cspan\u003eSet the key SET: to achieve two-tier interface settings temperature setting interface parameter settings interface\u003c\/span\u003e\u003c\/div\u003e\n\u003cdiv\u003e\u003cspan\u003eSET short press digital tube (down) to quickly set the temperature. Preset -20 °, 0 °, 20 °, 40 °, 60 °, 80 °, 100 ° and other data sets to facilitate the user to quickly call. For example: Users need to set 68.8 °, first short press SET adjusted to 60 °, and then through the key to add fine-tuning to the appropriate temperature. Set to wait 5s automatic memory to save data. Relative to the 1st generation thermostat 2 generation more convenient and flexible operation, dual LED display the measured temperature at the same time, set the temperature more easy to observe.\u003c\/span\u003e\u003c\/div\u003e\n\u003cdiv\u003e\u003cspan\u003eSET long press to enter the parameter setting interface, P0-P5 is the corresponding parameter setting item. Under the parameter setting menu, P0-P5 can be switched by pressing SET briefly. Want to modify a parameter just switch to the corresponding item, through the addition and subtraction button to set. After setting, press and hold SET to save the data, or wait 6s to save the data automatically.\u003c\/span\u003e\u003c\/div\u003e\n\u003cdiv\u003e\u003cspan\u003e \u003c\/span\u003e\u003c\/div\u003e\n\u003cdiv\u003e\u003cspan\u003e \u003c\/span\u003e\u003c\/div\u003e\n\u003cdiv\u003e\u003cspan\u003eFriendly Reminder:\u003c\/span\u003e\u003c\/div\u003e\n\u003cdiv\u003e\u003cspan\u003eP3 set to 1 that the thermostat operation for 1 minute to stop, press SET to trigger again.\u003c\/span\u003e\u003c\/div\u003e\n\u003cdiv\u003e\u003cspan\u003eP4 set to 1 that the thermostat 1 minute after the start of work. After setting the digital tube will not light, until 1 minute after the normal work. Press SET to trigger again.\u003c\/span\u003e\u003c\/div\u003e\n\u003cdiv\u003e\u003cspan\u003eThe P5 default setting is OFF, and once the user has set the temperature, the P5 option can be set to ON in order to prevent others from changing it at will. Once set to ON data is locked, need to be set again when P5 needs to be OFF.\u003c\/span\u003e\u003c\/div\u003e\n\u003cdiv\u003e\u003cspan\u003e \u003c\/span\u003e\u003c\/div\u003e\n\u003cdiv\u003e\u003cspan\u003e \u003c\/span\u003e\u003c\/div\u003e\n\u003cdiv\u003e\u003cspan\u003eKnowledge Expansion: the concept of backtracking\u003c\/span\u003e\u003c\/div\u003e\n\u003cdiv\u003e\u003cspan\u003eBack to the simple understanding of the difference is to go back to the difference. Thermostat can be set heating and cooling two modes of work, so the backlash has two meanings:\u003c\/span\u003e\u003c\/div\u003e\n\u003cdiv\u003e\u003cspan\u003eIn the cooling mode (when P0 = C), if the set temperature is 30 °, the hysteresis is 2, indicating that the actual temperature\u0026gt; = 32 °, the relay is closed, when the actual temperature \u0026lt;= 30 °, the relay is disconnected;\u003c\/span\u003e\u003c\/div\u003e\n\u003cdiv\u003e\u003cspan\u003eIn the heating mode (P0 = H), if the set temperature is 30 °, the hysteresis is 2, indicating the actual temperature\u0026gt; = 30 °, the relay is off, when the actual temperature \u0026lt;= 28 ° closed.\u003c\/span\u003e\u003c\/div\u003e\n\u003c\/div\u003e\n\u003cdiv\u003e\u003cspan\u003e \u003c\/span\u003e\u003c\/div\u003e\n\u003cdiv\u003e\u003cspan\u003e \u003c\/span\u003e\u003c\/div\u003e\n\u003cdiv\u003e\u003cspan\u003ePackage included:\u003c\/span\u003e\u003c\/div\u003e\n\u003cdiv\u003e\n\u003cspan\u003e\u003c\/span\u003e\u003cbr\u003e\n\u003c\/div\u003e\n\u003cdiv\u003e\u003cspan\u003e1 x Timing Delay Relay Module\u003c\/span\u003e\u003c\/div\u003e","published_at":"2022-09-19T12:31:24+08:00","created_at":"2020-04-10T20:28:03+08:00","vendor":"diymore","type":"Relay Module","tags":[],"price":1195,"price_min":1195,"price_max":1195,"available":true,"price_varies":false,"compare_at_price":null,"compare_at_price_min":0,"compare_at_price_max":0,"compare_at_price_varies":false,"variants":[{"id":32037754044487,"title":"Default Title","option1":"Default Title","option2":null,"option3":null,"sku":"011863","requires_shipping":true,"taxable":true,"featured_image":null,"available":true,"name":"W1018 DC 12V Timing Delay Relay Module Cycle Timer Digital LED Time Dual Display Thermolator With Swtich Case Instruments","public_title":null,"options":["Default Title"],"price":1195,"weight":500,"compare_at_price":null,"inventory_management":null,"barcode":"","requires_selling_plan":false,"selling_plan_allocations":[]}],"images":["\/\/www.diymore.cc\/cdn\/shop\/products\/011863_10_238.jpg?v=1588701838","\/\/www.diymore.cc\/cdn\/shop\/products\/011863_1_577.jpg?v=1588701838","\/\/www.diymore.cc\/cdn\/shop\/products\/011863_2_568.jpg?v=1588701838","\/\/www.diymore.cc\/cdn\/shop\/products\/011863_3_280.jpg?v=1588701838","\/\/www.diymore.cc\/cdn\/shop\/products\/011863_6_222.jpg?v=1588701838","\/\/www.diymore.cc\/cdn\/shop\/products\/011863_7_939.jpg?v=1588701838","\/\/www.diymore.cc\/cdn\/shop\/products\/011863_8_685.jpg?v=1588701838"],"featured_image":"\/\/www.diymore.cc\/cdn\/shop\/products\/011863_10_238.jpg?v=1588701838","options":["Title"],"media":[{"alt":"W1018 Dc 12V Timing Delay Relay Module Cycle Timer Digital Led Time Dual Display Thermolator With","id":6682588938311,"position":1,"preview_image":{"aspect_ratio":1.0,"height":1000,"width":1000,"src":"\/\/www.diymore.cc\/cdn\/shop\/products\/011863_10_238.jpg?v=1588701838"},"aspect_ratio":1.0,"height":1000,"media_type":"image","src":"\/\/www.diymore.cc\/cdn\/shop\/products\/011863_10_238.jpg?v=1588701838","width":1000},{"alt":"W1018 Dc 12V Timing Delay Relay Module Cycle Timer Digital Led Time Dual Display Thermolator With","id":6682589167687,"position":2,"preview_image":{"aspect_ratio":1.0,"height":1000,"width":1000,"src":"\/\/www.diymore.cc\/cdn\/shop\/products\/011863_1_577.jpg?v=1588701838"},"aspect_ratio":1.0,"height":1000,"media_type":"image","src":"\/\/www.diymore.cc\/cdn\/shop\/products\/011863_1_577.jpg?v=1588701838","width":1000},{"alt":"W1018 Dc 12V Timing Delay Relay Module Cycle Timer Digital Led Time Dual Display Thermolator With","id":6682589331527,"position":3,"preview_image":{"aspect_ratio":1.0,"height":1000,"width":1000,"src":"\/\/www.diymore.cc\/cdn\/shop\/products\/011863_2_568.jpg?v=1588701838"},"aspect_ratio":1.0,"height":1000,"media_type":"image","src":"\/\/www.diymore.cc\/cdn\/shop\/products\/011863_2_568.jpg?v=1588701838","width":1000},{"alt":"W1018 Dc 12V Timing Delay Relay Module Cycle Timer Digital Led Time Dual Display Thermolator With","id":6682589593671,"position":4,"preview_image":{"aspect_ratio":1.0,"height":1000,"width":1000,"src":"\/\/www.diymore.cc\/cdn\/shop\/products\/011863_3_280.jpg?v=1588701838"},"aspect_ratio":1.0,"height":1000,"media_type":"image","src":"\/\/www.diymore.cc\/cdn\/shop\/products\/011863_3_280.jpg?v=1588701838","width":1000},{"alt":"W1018 Dc 12V Timing Delay Relay Module Cycle Timer Digital Led Time Dual Display Thermolator With","id":6682590019655,"position":5,"preview_image":{"aspect_ratio":1.0,"height":1000,"width":1000,"src":"\/\/www.diymore.cc\/cdn\/shop\/products\/011863_6_222.jpg?v=1588701838"},"aspect_ratio":1.0,"height":1000,"media_type":"image","src":"\/\/www.diymore.cc\/cdn\/shop\/products\/011863_6_222.jpg?v=1588701838","width":1000},{"alt":"W1018 Dc 12V Timing Delay Relay Module Cycle Timer Digital Led Time Dual Display Thermolator With","id":6682590249031,"position":6,"preview_image":{"aspect_ratio":1.0,"height":1000,"width":1000,"src":"\/\/www.diymore.cc\/cdn\/shop\/products\/011863_7_939.jpg?v=1588701838"},"aspect_ratio":1.0,"height":1000,"media_type":"image","src":"\/\/www.diymore.cc\/cdn\/shop\/products\/011863_7_939.jpg?v=1588701838","width":1000},{"alt":"W1018 Dc 12V Timing Delay Relay Module Cycle Timer Digital Led Time Dual Display Thermolator With","id":6682590445639,"position":7,"preview_image":{"aspect_ratio":1.0,"height":1000,"width":1000,"src":"\/\/www.diymore.cc\/cdn\/shop\/products\/011863_8_685.jpg?v=1588701838"},"aspect_ratio":1.0,"height":1000,"media_type":"image","src":"\/\/www.diymore.cc\/cdn\/shop\/products\/011863_8_685.jpg?v=1588701838","width":1000}],"requires_selling_plan":false,"selling_plan_groups":[],"content":"\u003cp\u003e\u003cimg src=\"https:\/\/ae01.alicdn.com\/kf\/HTB12JMgilsmBKNjSZFsq6yXSVXaS.jpg\"\u003e\u003c\/p\u003e\n\u003cdiv\u003e\n\u003cdiv\u003e\n\u003cspan\u003e\u003c\/span\u003e \u003c\/div\u003e\n\u003cdiv\u003e\n\u003cspan\u003e\u003c\/span\u003e \u003c\/div\u003e\n\u003cdiv\u003e\n\u003cspan\u003e\u003c\/span\u003e \u003c\/div\u003e\n\u003cdiv\u003e\u003cspan\u003eW1018 microcomputer digital thermostat manual\u003c\/span\u003e\u003c\/div\u003e\n\u003cdiv\u003e\u003cspan\u003eTemperature range: -20 ~ +100 °\u003c\/span\u003e\u003c\/div\u003e\n\u003cdiv\u003e\u003cspan\u003eResolution: -9.9 ° ~ 99.9 ° 0.1 °, other temperature 1 °\u003c\/span\u003e\u003c\/div\u003e\n\u003cdiv\u003e\u003cspan\u003eTemperature measurement accuracy: 1 °\u003c\/span\u003e\u003c\/div\u003e\n\u003cdiv\u003e\u003cspan\u003eRefresh frequency: about 0.5S\u003c\/span\u003e\u003c\/div\u003e\n\u003cdiv\u003e\u003cspan\u003eInput power: Dc 12V \u003c\/span\u003e\u003c\/div\u003e\n\u003cdiv\u003e\u003cspan\u003eMeasurement input: 1 meter NTC (10K 0.5%) waterproof sensor\u003c\/span\u003e\u003c\/div\u003e\n\u003cdiv\u003e\u003cspan\u003eOutput: All the way 10A relay\u003c\/span\u003e\u003c\/div\u003e\n\u003cdiv\u003e\u003cspan\u003eEnvironmental requirements: -10 ° ~ +60 ° Humidity 20% ~ 75%\u003c\/span\u003e\u003c\/div\u003e\n\u003cdiv\u003e\u003cspan\u003eAppearance size: 79 * 43mm\u003c\/span\u003e\u003c\/div\u003e\n\u003cdiv\u003e\u003cspan\u003eHole size: 76 * 39mm\u003c\/span\u003e\u003c\/div\u003e\n\u003cdiv\u003e\u003cspan\u003e \u003c\/span\u003e\u003c\/div\u003e\n\u003cdiv\u003e\u003cspan\u003e \u003c\/span\u003e\u003c\/div\u003e\n\u003cdiv\u003e\u003cimg alt=\"11\" src=\"https:\/\/ae01.alicdn.com\/kf\/HTB1ePjXEY1YBuNjSszeq6yblFXaZ.jpg\"\u003e\u003c\/div\u003e\n\u003cdiv\u003e\u003cspan\u003e \u003c\/span\u003e\u003c\/div\u003e\n\u003cdiv\u003e\u003cspan\u003e \u003c\/span\u003e\u003c\/div\u003e\n\u003cdiv\u003e\u003cspan\u003e \u003c\/span\u003e\u003c\/div\u003e\n\u003cdiv\u003e\u003cspan\u003ePanel introduction:\u003c\/span\u003e\u003c\/div\u003e\n\u003cdiv\u003e\u003cspan\u003e \u003c\/span\u003e\u003c\/div\u003e\n\u003cdiv\u003e\u003cspan\u003eCircuit connection: \u003c\/span\u003e\u003c\/div\u003e\n\u003cdiv\u003e\u003cspan\u003eThe reference circuit is connected with the power supply and load. At this time, the digital tube (upper) shows the actual measured temperature, the digital tube (lower) shows the preset temperature. Missing or damaged temperature sensor The digital display shows \"- - -\" and the purchaser must check if the temperature sensor is installed before use.\u003c\/span\u003e\u003c\/div\u003e\n\u003cdiv\u003e\u003cspan\u003eThe thermostat output 10A relay, to meet a variety of high-power load, make sure the line is correct.\u003c\/span\u003e\u003c\/div\u003e\n\u003cdiv\u003e\u003cspan\u003e \u003c\/span\u003e\u003c\/div\u003e\n\u003cdiv\u003e\u003cspan\u003eLED, LED status Description:\u003c\/span\u003e\u003c\/div\u003e\n\u003cdiv\u003e\u003cspan\u003eIndicator: Off means the relay is off, it means the relay is on\u003c\/span\u003e\u003c\/div\u003e\n\u003cdiv\u003e\u003cspan\u003eDigital tube: display \"- - -\", 1, check the temperature sensor is missing or damaged 2, heating mode high temperature protection 3, cooling mode low temperature protection. In protection mode the relay is automatically disconnected.\u003c\/span\u003e\u003c\/div\u003e\n\u003cdiv\u003e\u003cspan\u003e \u003c\/span\u003e\u003c\/div\u003e\n\u003cdiv\u003e\u003cspan\u003eThe use of buttons: Thermostat panel has three buttons, buttons + button - set the button SET\u003c\/span\u003e\u003c\/div\u003e\n\u003cdiv\u003e\u003cspan\u003eButton +: to achieve rapid accumulation of values\u003c\/span\u003e\u003c\/div\u003e\n\u003cdiv\u003e\u003cspan\u003eButton -: to achieve the rapid decline in value\u003c\/span\u003e\u003c\/div\u003e\n\u003cdiv\u003e\u003cspan\u003eRestart: Restart the button\u003c\/span\u003e\u003c\/div\u003e\n\u003cdiv\u003e\u003cspan\u003eSet the key SET: to achieve two-tier interface settings temperature setting interface parameter settings interface\u003c\/span\u003e\u003c\/div\u003e\n\u003cdiv\u003e\u003cspan\u003eSET short press digital tube (down) to quickly set the temperature. Preset -20 °, 0 °, 20 °, 40 °, 60 °, 80 °, 100 ° and other data sets to facilitate the user to quickly call. For example: Users need to set 68.8 °, first short press SET adjusted to 60 °, and then through the key to add fine-tuning to the appropriate temperature. Set to wait 5s automatic memory to save data. Relative to the 1st generation thermostat 2 generation more convenient and flexible operation, dual LED display the measured temperature at the same time, set the temperature more easy to observe.\u003c\/span\u003e\u003c\/div\u003e\n\u003cdiv\u003e\u003cspan\u003eSET long press to enter the parameter setting interface, P0-P5 is the corresponding parameter setting item. Under the parameter setting menu, P0-P5 can be switched by pressing SET briefly. Want to modify a parameter just switch to the corresponding item, through the addition and subtraction button to set. After setting, press and hold SET to save the data, or wait 6s to save the data automatically.\u003c\/span\u003e\u003c\/div\u003e\n\u003cdiv\u003e\u003cspan\u003e \u003c\/span\u003e\u003c\/div\u003e\n\u003cdiv\u003e\u003cspan\u003e \u003c\/span\u003e\u003c\/div\u003e\n\u003cdiv\u003e\u003cspan\u003eFriendly Reminder:\u003c\/span\u003e\u003c\/div\u003e\n\u003cdiv\u003e\u003cspan\u003eP3 set to 1 that the thermostat operation for 1 minute to stop, press SET to trigger again.\u003c\/span\u003e\u003c\/div\u003e\n\u003cdiv\u003e\u003cspan\u003eP4 set to 1 that the thermostat 1 minute after the start of work. After setting the digital tube will not light, until 1 minute after the normal work. Press SET to trigger again.\u003c\/span\u003e\u003c\/div\u003e\n\u003cdiv\u003e\u003cspan\u003eThe P5 default setting is OFF, and once the user has set the temperature, the P5 option can be set to ON in order to prevent others from changing it at will. Once set to ON data is locked, need to be set again when P5 needs to be OFF.\u003c\/span\u003e\u003c\/div\u003e\n\u003cdiv\u003e\u003cspan\u003e \u003c\/span\u003e\u003c\/div\u003e\n\u003cdiv\u003e\u003cspan\u003e \u003c\/span\u003e\u003c\/div\u003e\n\u003cdiv\u003e\u003cspan\u003eKnowledge Expansion: the concept of backtracking\u003c\/span\u003e\u003c\/div\u003e\n\u003cdiv\u003e\u003cspan\u003eBack to the simple understanding of the difference is to go back to the difference. Thermostat can be set heating and cooling two modes of work, so the backlash has two meanings:\u003c\/span\u003e\u003c\/div\u003e\n\u003cdiv\u003e\u003cspan\u003eIn the cooling mode (when P0 = C), if the set temperature is 30 °, the hysteresis is 2, indicating that the actual temperature\u0026gt; = 32 °, the relay is closed, when the actual temperature \u0026lt;= 30 °, the relay is disconnected;\u003c\/span\u003e\u003c\/div\u003e\n\u003cdiv\u003e\u003cspan\u003eIn the heating mode (P0 = H), if the set temperature is 30 °, the hysteresis is 2, indicating the actual temperature\u0026gt; = 30 °, the relay is off, when the actual temperature \u0026lt;= 28 ° closed.\u003c\/span\u003e\u003c\/div\u003e\n\u003c\/div\u003e\n\u003cdiv\u003e\u003cspan\u003e \u003c\/span\u003e\u003c\/div\u003e\n\u003cdiv\u003e\u003cspan\u003e \u003c\/span\u003e\u003c\/div\u003e\n\u003cdiv\u003e\u003cspan\u003ePackage included:\u003c\/span\u003e\u003c\/div\u003e\n\u003cdiv\u003e\n\u003cspan\u003e\u003c\/span\u003e\u003cbr\u003e\n\u003c\/div\u003e\n\u003cdiv\u003e\u003cspan\u003e1 x Timing Delay Relay Module\u003c\/span\u003e\u003c\/div\u003e"}
 -
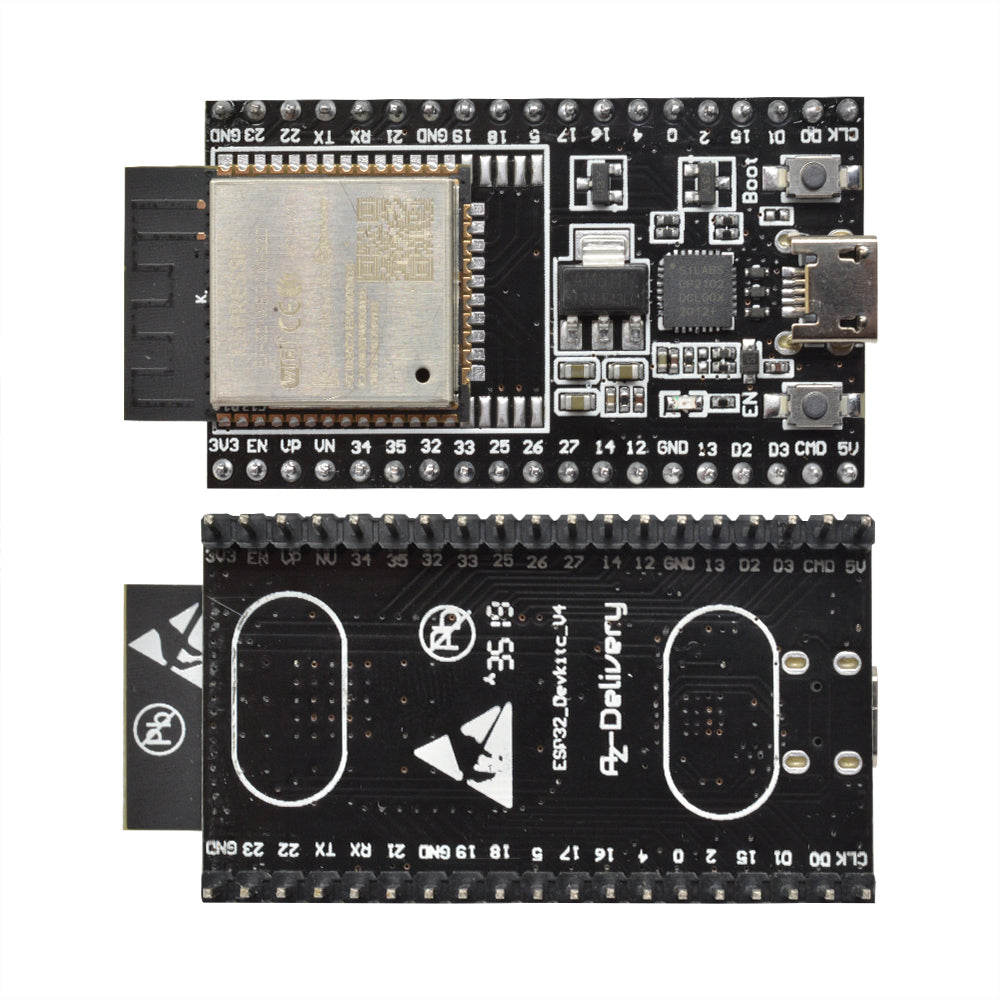
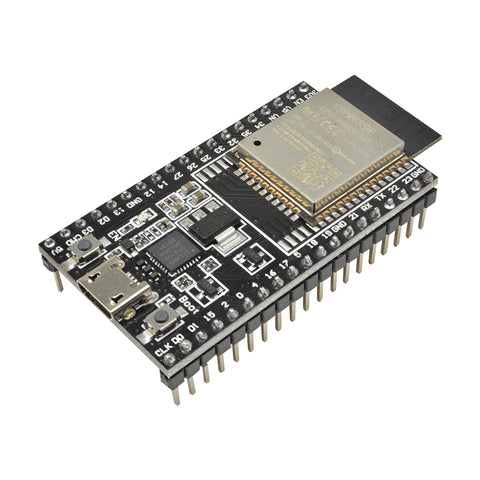 Translation missing: en.products.product.regular_price $9.99{"id":4568268341319,"title":"W1018 DC 12V Timing Delay Relay Module Cycle Timer Digital LED Time Dual Display Thermolator With Swtich Case Instruments","handle":"w1018-dc-12v-timing-delay-relay-module-cycle-timer-digital-led-time-dual-display-thermolator-with-swtich-case-instruments","description":"\u003cp\u003e\u003cimg src=\"https:\/\/ae01.alicdn.com\/kf\/HTB12JMgilsmBKNjSZFsq6yXSVXaS.jpg\"\u003e\u003c\/p\u003e\n\u003cdiv\u003e\n\u003cdiv\u003e\n\u003cspan\u003e\u003c\/span\u003e \u003c\/div\u003e\n\u003cdiv\u003e\n\u003cspan\u003e\u003c\/span\u003e \u003c\/div\u003e\n\u003cdiv\u003e\n\u003cspan\u003e\u003c\/span\u003e \u003c\/div\u003e\n\u003cdiv\u003e\u003cspan\u003eW1018 microcomputer digital thermostat manual\u003c\/span\u003e\u003c\/div\u003e\n\u003cdiv\u003e\u003cspan\u003eTemperature range: -20 ~ +100 °\u003c\/span\u003e\u003c\/div\u003e\n\u003cdiv\u003e\u003cspan\u003eResolution: -9.9 ° ~ 99.9 ° 0.1 °, other temperature 1 °\u003c\/span\u003e\u003c\/div\u003e\n\u003cdiv\u003e\u003cspan\u003eTemperature measurement accuracy: 1 °\u003c\/span\u003e\u003c\/div\u003e\n\u003cdiv\u003e\u003cspan\u003eRefresh frequency: about 0.5S\u003c\/span\u003e\u003c\/div\u003e\n\u003cdiv\u003e\u003cspan\u003eInput power: Dc 12V \u003c\/span\u003e\u003c\/div\u003e\n\u003cdiv\u003e\u003cspan\u003eMeasurement input: 1 meter NTC (10K 0.5%) waterproof sensor\u003c\/span\u003e\u003c\/div\u003e\n\u003cdiv\u003e\u003cspan\u003eOutput: All the way 10A relay\u003c\/span\u003e\u003c\/div\u003e\n\u003cdiv\u003e\u003cspan\u003eEnvironmental requirements: -10 ° ~ +60 ° Humidity 20% ~ 75%\u003c\/span\u003e\u003c\/div\u003e\n\u003cdiv\u003e\u003cspan\u003eAppearance size: 79 * 43mm\u003c\/span\u003e\u003c\/div\u003e\n\u003cdiv\u003e\u003cspan\u003eHole size: 76 * 39mm\u003c\/span\u003e\u003c\/div\u003e\n\u003cdiv\u003e\u003cspan\u003e \u003c\/span\u003e\u003c\/div\u003e\n\u003cdiv\u003e\u003cspan\u003e \u003c\/span\u003e\u003c\/div\u003e\n\u003cdiv\u003e\u003cimg alt=\"11\" src=\"https:\/\/ae01.alicdn.com\/kf\/HTB1ePjXEY1YBuNjSszeq6yblFXaZ.jpg\"\u003e\u003c\/div\u003e\n\u003cdiv\u003e\u003cspan\u003e \u003c\/span\u003e\u003c\/div\u003e\n\u003cdiv\u003e\u003cspan\u003e \u003c\/span\u003e\u003c\/div\u003e\n\u003cdiv\u003e\u003cspan\u003e \u003c\/span\u003e\u003c\/div\u003e\n\u003cdiv\u003e\u003cspan\u003ePanel introduction:\u003c\/span\u003e\u003c\/div\u003e\n\u003cdiv\u003e\u003cspan\u003e \u003c\/span\u003e\u003c\/div\u003e\n\u003cdiv\u003e\u003cspan\u003eCircuit connection: \u003c\/span\u003e\u003c\/div\u003e\n\u003cdiv\u003e\u003cspan\u003eThe reference circuit is connected with the power supply and load. At this time, the digital tube (upper) shows the actual measured temperature, the digital tube (lower) shows the preset temperature. Missing or damaged temperature sensor The digital display shows \"- - -\" and the purchaser must check if the temperature sensor is installed before use.\u003c\/span\u003e\u003c\/div\u003e\n\u003cdiv\u003e\u003cspan\u003eThe thermostat output 10A relay, to meet a variety of high-power load, make sure the line is correct.\u003c\/span\u003e\u003c\/div\u003e\n\u003cdiv\u003e\u003cspan\u003e \u003c\/span\u003e\u003c\/div\u003e\n\u003cdiv\u003e\u003cspan\u003eLED, LED status Description:\u003c\/span\u003e\u003c\/div\u003e\n\u003cdiv\u003e\u003cspan\u003eIndicator: Off means the relay is off, it means the relay is on\u003c\/span\u003e\u003c\/div\u003e\n\u003cdiv\u003e\u003cspan\u003eDigital tube: display \"- - -\", 1, check the temperature sensor is missing or damaged 2, heating mode high temperature protection 3, cooling mode low temperature protection. In protection mode the relay is automatically disconnected.\u003c\/span\u003e\u003c\/div\u003e\n\u003cdiv\u003e\u003cspan\u003e \u003c\/span\u003e\u003c\/div\u003e\n\u003cdiv\u003e\u003cspan\u003eThe use of buttons: Thermostat panel has three buttons, buttons + button - set the button SET\u003c\/span\u003e\u003c\/div\u003e\n\u003cdiv\u003e\u003cspan\u003eButton +: to achieve rapid accumulation of values\u003c\/span\u003e\u003c\/div\u003e\n\u003cdiv\u003e\u003cspan\u003eButton -: to achieve the rapid decline in value\u003c\/span\u003e\u003c\/div\u003e\n\u003cdiv\u003e\u003cspan\u003eRestart: Restart the button\u003c\/span\u003e\u003c\/div\u003e\n\u003cdiv\u003e\u003cspan\u003eSet the key SET: to achieve two-tier interface settings temperature setting interface parameter settings interface\u003c\/span\u003e\u003c\/div\u003e\n\u003cdiv\u003e\u003cspan\u003eSET short press digital tube (down) to quickly set the temperature. Preset -20 °, 0 °, 20 °, 40 °, 60 °, 80 °, 100 ° and other data sets to facilitate the user to quickly call. For example: Users need to set 68.8 °, first short press SET adjusted to 60 °, and then through the key to add fine-tuning to the appropriate temperature. Set to wait 5s automatic memory to save data. Relative to the 1st generation thermostat 2 generation more convenient and flexible operation, dual LED display the measured temperature at the same time, set the temperature more easy to observe.\u003c\/span\u003e\u003c\/div\u003e\n\u003cdiv\u003e\u003cspan\u003eSET long press to enter the parameter setting interface, P0-P5 is the corresponding parameter setting item. Under the parameter setting menu, P0-P5 can be switched by pressing SET briefly. Want to modify a parameter just switch to the corresponding item, through the addition and subtraction button to set. After setting, press and hold SET to save the data, or wait 6s to save the data automatically.\u003c\/span\u003e\u003c\/div\u003e\n\u003cdiv\u003e\u003cspan\u003e \u003c\/span\u003e\u003c\/div\u003e\n\u003cdiv\u003e\u003cspan\u003e \u003c\/span\u003e\u003c\/div\u003e\n\u003cdiv\u003e\u003cspan\u003eFriendly Reminder:\u003c\/span\u003e\u003c\/div\u003e\n\u003cdiv\u003e\u003cspan\u003eP3 set to 1 that the thermostat operation for 1 minute to stop, press SET to trigger again.\u003c\/span\u003e\u003c\/div\u003e\n\u003cdiv\u003e\u003cspan\u003eP4 set to 1 that the thermostat 1 minute after the start of work. After setting the digital tube will not light, until 1 minute after the normal work. Press SET to trigger again.\u003c\/span\u003e\u003c\/div\u003e\n\u003cdiv\u003e\u003cspan\u003eThe P5 default setting is OFF, and once the user has set the temperature, the P5 option can be set to ON in order to prevent others from changing it at will. Once set to ON data is locked, need to be set again when P5 needs to be OFF.\u003c\/span\u003e\u003c\/div\u003e\n\u003cdiv\u003e\u003cspan\u003e \u003c\/span\u003e\u003c\/div\u003e\n\u003cdiv\u003e\u003cspan\u003e \u003c\/span\u003e\u003c\/div\u003e\n\u003cdiv\u003e\u003cspan\u003eKnowledge Expansion: the concept of backtracking\u003c\/span\u003e\u003c\/div\u003e\n\u003cdiv\u003e\u003cspan\u003eBack to the simple understanding of the difference is to go back to the difference. Thermostat can be set heating and cooling two modes of work, so the backlash has two meanings:\u003c\/span\u003e\u003c\/div\u003e\n\u003cdiv\u003e\u003cspan\u003eIn the cooling mode (when P0 = C), if the set temperature is 30 °, the hysteresis is 2, indicating that the actual temperature\u0026gt; = 32 °, the relay is closed, when the actual temperature \u0026lt;= 30 °, the relay is disconnected;\u003c\/span\u003e\u003c\/div\u003e\n\u003cdiv\u003e\u003cspan\u003eIn the heating mode (P0 = H), if the set temperature is 30 °, the hysteresis is 2, indicating the actual temperature\u0026gt; = 30 °, the relay is off, when the actual temperature \u0026lt;= 28 ° closed.\u003c\/span\u003e\u003c\/div\u003e\n\u003c\/div\u003e\n\u003cdiv\u003e\u003cspan\u003e \u003c\/span\u003e\u003c\/div\u003e\n\u003cdiv\u003e\u003cspan\u003e \u003c\/span\u003e\u003c\/div\u003e\n\u003cdiv\u003e\u003cspan\u003ePackage included:\u003c\/span\u003e\u003c\/div\u003e\n\u003cdiv\u003e\n\u003cspan\u003e\u003c\/span\u003e\u003cbr\u003e\n\u003c\/div\u003e\n\u003cdiv\u003e\u003cspan\u003e1 x Timing Delay Relay Module\u003c\/span\u003e\u003c\/div\u003e","published_at":"2022-09-19T12:31:24+08:00","created_at":"2020-04-10T20:28:03+08:00","vendor":"diymore","type":"Relay Module","tags":[],"price":1195,"price_min":1195,"price_max":1195,"available":true,"price_varies":false,"compare_at_price":null,"compare_at_price_min":0,"compare_at_price_max":0,"compare_at_price_varies":false,"variants":[{"id":32037754044487,"title":"Default Title","option1":"Default Title","option2":null,"option3":null,"sku":"011863","requires_shipping":true,"taxable":true,"featured_image":null,"available":true,"name":"W1018 DC 12V Timing Delay Relay Module Cycle Timer Digital LED Time Dual Display Thermolator With Swtich Case Instruments","public_title":null,"options":["Default Title"],"price":1195,"weight":500,"compare_at_price":null,"inventory_management":null,"barcode":"","requires_selling_plan":false,"selling_plan_allocations":[]}],"images":["\/\/www.diymore.cc\/cdn\/shop\/products\/011863_10_238.jpg?v=1588701838","\/\/www.diymore.cc\/cdn\/shop\/products\/011863_1_577.jpg?v=1588701838","\/\/www.diymore.cc\/cdn\/shop\/products\/011863_2_568.jpg?v=1588701838","\/\/www.diymore.cc\/cdn\/shop\/products\/011863_3_280.jpg?v=1588701838","\/\/www.diymore.cc\/cdn\/shop\/products\/011863_6_222.jpg?v=1588701838","\/\/www.diymore.cc\/cdn\/shop\/products\/011863_7_939.jpg?v=1588701838","\/\/www.diymore.cc\/cdn\/shop\/products\/011863_8_685.jpg?v=1588701838"],"featured_image":"\/\/www.diymore.cc\/cdn\/shop\/products\/011863_10_238.jpg?v=1588701838","options":["Title"],"media":[{"alt":"W1018 Dc 12V Timing Delay Relay Module Cycle Timer Digital Led Time Dual Display Thermolator With","id":6682588938311,"position":1,"preview_image":{"aspect_ratio":1.0,"height":1000,"width":1000,"src":"\/\/www.diymore.cc\/cdn\/shop\/products\/011863_10_238.jpg?v=1588701838"},"aspect_ratio":1.0,"height":1000,"media_type":"image","src":"\/\/www.diymore.cc\/cdn\/shop\/products\/011863_10_238.jpg?v=1588701838","width":1000},{"alt":"W1018 Dc 12V Timing Delay Relay Module Cycle Timer Digital Led Time Dual Display Thermolator With","id":6682589167687,"position":2,"preview_image":{"aspect_ratio":1.0,"height":1000,"width":1000,"src":"\/\/www.diymore.cc\/cdn\/shop\/products\/011863_1_577.jpg?v=1588701838"},"aspect_ratio":1.0,"height":1000,"media_type":"image","src":"\/\/www.diymore.cc\/cdn\/shop\/products\/011863_1_577.jpg?v=1588701838","width":1000},{"alt":"W1018 Dc 12V Timing Delay Relay Module Cycle Timer Digital Led Time Dual Display Thermolator With","id":6682589331527,"position":3,"preview_image":{"aspect_ratio":1.0,"height":1000,"width":1000,"src":"\/\/www.diymore.cc\/cdn\/shop\/products\/011863_2_568.jpg?v=1588701838"},"aspect_ratio":1.0,"height":1000,"media_type":"image","src":"\/\/www.diymore.cc\/cdn\/shop\/products\/011863_2_568.jpg?v=1588701838","width":1000},{"alt":"W1018 Dc 12V Timing Delay Relay Module Cycle Timer Digital Led Time Dual Display Thermolator With","id":6682589593671,"position":4,"preview_image":{"aspect_ratio":1.0,"height":1000,"width":1000,"src":"\/\/www.diymore.cc\/cdn\/shop\/products\/011863_3_280.jpg?v=1588701838"},"aspect_ratio":1.0,"height":1000,"media_type":"image","src":"\/\/www.diymore.cc\/cdn\/shop\/products\/011863_3_280.jpg?v=1588701838","width":1000},{"alt":"W1018 Dc 12V Timing Delay Relay Module Cycle Timer Digital Led Time Dual Display Thermolator With","id":6682590019655,"position":5,"preview_image":{"aspect_ratio":1.0,"height":1000,"width":1000,"src":"\/\/www.diymore.cc\/cdn\/shop\/products\/011863_6_222.jpg?v=1588701838"},"aspect_ratio":1.0,"height":1000,"media_type":"image","src":"\/\/www.diymore.cc\/cdn\/shop\/products\/011863_6_222.jpg?v=1588701838","width":1000},{"alt":"W1018 Dc 12V Timing Delay Relay Module Cycle Timer Digital Led Time Dual Display Thermolator With","id":6682590249031,"position":6,"preview_image":{"aspect_ratio":1.0,"height":1000,"width":1000,"src":"\/\/www.diymore.cc\/cdn\/shop\/products\/011863_7_939.jpg?v=1588701838"},"aspect_ratio":1.0,"height":1000,"media_type":"image","src":"\/\/www.diymore.cc\/cdn\/shop\/products\/011863_7_939.jpg?v=1588701838","width":1000},{"alt":"W1018 Dc 12V Timing Delay Relay Module Cycle Timer Digital Led Time Dual Display Thermolator With","id":6682590445639,"position":7,"preview_image":{"aspect_ratio":1.0,"height":1000,"width":1000,"src":"\/\/www.diymore.cc\/cdn\/shop\/products\/011863_8_685.jpg?v=1588701838"},"aspect_ratio":1.0,"height":1000,"media_type":"image","src":"\/\/www.diymore.cc\/cdn\/shop\/products\/011863_8_685.jpg?v=1588701838","width":1000}],"requires_selling_plan":false,"selling_plan_groups":[],"content":"\u003cp\u003e\u003cimg src=\"https:\/\/ae01.alicdn.com\/kf\/HTB12JMgilsmBKNjSZFsq6yXSVXaS.jpg\"\u003e\u003c\/p\u003e\n\u003cdiv\u003e\n\u003cdiv\u003e\n\u003cspan\u003e\u003c\/span\u003e \u003c\/div\u003e\n\u003cdiv\u003e\n\u003cspan\u003e\u003c\/span\u003e \u003c\/div\u003e\n\u003cdiv\u003e\n\u003cspan\u003e\u003c\/span\u003e \u003c\/div\u003e\n\u003cdiv\u003e\u003cspan\u003eW1018 microcomputer digital thermostat manual\u003c\/span\u003e\u003c\/div\u003e\n\u003cdiv\u003e\u003cspan\u003eTemperature range: -20 ~ +100 °\u003c\/span\u003e\u003c\/div\u003e\n\u003cdiv\u003e\u003cspan\u003eResolution: -9.9 ° ~ 99.9 ° 0.1 °, other temperature 1 °\u003c\/span\u003e\u003c\/div\u003e\n\u003cdiv\u003e\u003cspan\u003eTemperature measurement accuracy: 1 °\u003c\/span\u003e\u003c\/div\u003e\n\u003cdiv\u003e\u003cspan\u003eRefresh frequency: about 0.5S\u003c\/span\u003e\u003c\/div\u003e\n\u003cdiv\u003e\u003cspan\u003eInput power: Dc 12V \u003c\/span\u003e\u003c\/div\u003e\n\u003cdiv\u003e\u003cspan\u003eMeasurement input: 1 meter NTC (10K 0.5%) waterproof sensor\u003c\/span\u003e\u003c\/div\u003e\n\u003cdiv\u003e\u003cspan\u003eOutput: All the way 10A relay\u003c\/span\u003e\u003c\/div\u003e\n\u003cdiv\u003e\u003cspan\u003eEnvironmental requirements: -10 ° ~ +60 ° Humidity 20% ~ 75%\u003c\/span\u003e\u003c\/div\u003e\n\u003cdiv\u003e\u003cspan\u003eAppearance size: 79 * 43mm\u003c\/span\u003e\u003c\/div\u003e\n\u003cdiv\u003e\u003cspan\u003eHole size: 76 * 39mm\u003c\/span\u003e\u003c\/div\u003e\n\u003cdiv\u003e\u003cspan\u003e \u003c\/span\u003e\u003c\/div\u003e\n\u003cdiv\u003e\u003cspan\u003e \u003c\/span\u003e\u003c\/div\u003e\n\u003cdiv\u003e\u003cimg alt=\"11\" src=\"https:\/\/ae01.alicdn.com\/kf\/HTB1ePjXEY1YBuNjSszeq6yblFXaZ.jpg\"\u003e\u003c\/div\u003e\n\u003cdiv\u003e\u003cspan\u003e \u003c\/span\u003e\u003c\/div\u003e\n\u003cdiv\u003e\u003cspan\u003e \u003c\/span\u003e\u003c\/div\u003e\n\u003cdiv\u003e\u003cspan\u003e \u003c\/span\u003e\u003c\/div\u003e\n\u003cdiv\u003e\u003cspan\u003ePanel introduction:\u003c\/span\u003e\u003c\/div\u003e\n\u003cdiv\u003e\u003cspan\u003e \u003c\/span\u003e\u003c\/div\u003e\n\u003cdiv\u003e\u003cspan\u003eCircuit connection: \u003c\/span\u003e\u003c\/div\u003e\n\u003cdiv\u003e\u003cspan\u003eThe reference circuit is connected with the power supply and load. At this time, the digital tube (upper) shows the actual measured temperature, the digital tube (lower) shows the preset temperature. Missing or damaged temperature sensor The digital display shows \"- - -\" and the purchaser must check if the temperature sensor is installed before use.\u003c\/span\u003e\u003c\/div\u003e\n\u003cdiv\u003e\u003cspan\u003eThe thermostat output 10A relay, to meet a variety of high-power load, make sure the line is correct.\u003c\/span\u003e\u003c\/div\u003e\n\u003cdiv\u003e\u003cspan\u003e \u003c\/span\u003e\u003c\/div\u003e\n\u003cdiv\u003e\u003cspan\u003eLED, LED status Description:\u003c\/span\u003e\u003c\/div\u003e\n\u003cdiv\u003e\u003cspan\u003eIndicator: Off means the relay is off, it means the relay is on\u003c\/span\u003e\u003c\/div\u003e\n\u003cdiv\u003e\u003cspan\u003eDigital tube: display \"- - -\", 1, check the temperature sensor is missing or damaged 2, heating mode high temperature protection 3, cooling mode low temperature protection. In protection mode the relay is automatically disconnected.\u003c\/span\u003e\u003c\/div\u003e\n\u003cdiv\u003e\u003cspan\u003e \u003c\/span\u003e\u003c\/div\u003e\n\u003cdiv\u003e\u003cspan\u003eThe use of buttons: Thermostat panel has three buttons, buttons + button - set the button SET\u003c\/span\u003e\u003c\/div\u003e\n\u003cdiv\u003e\u003cspan\u003eButton +: to achieve rapid accumulation of values\u003c\/span\u003e\u003c\/div\u003e\n\u003cdiv\u003e\u003cspan\u003eButton -: to achieve the rapid decline in value\u003c\/span\u003e\u003c\/div\u003e\n\u003cdiv\u003e\u003cspan\u003eRestart: Restart the button\u003c\/span\u003e\u003c\/div\u003e\n\u003cdiv\u003e\u003cspan\u003eSet the key SET: to achieve two-tier interface settings temperature setting interface parameter settings interface\u003c\/span\u003e\u003c\/div\u003e\n\u003cdiv\u003e\u003cspan\u003eSET short press digital tube (down) to quickly set the temperature. Preset -20 °, 0 °, 20 °, 40 °, 60 °, 80 °, 100 ° and other data sets to facilitate the user to quickly call. For example: Users need to set 68.8 °, first short press SET adjusted to 60 °, and then through the key to add fine-tuning to the appropriate temperature. Set to wait 5s automatic memory to save data. Relative to the 1st generation thermostat 2 generation more convenient and flexible operation, dual LED display the measured temperature at the same time, set the temperature more easy to observe.\u003c\/span\u003e\u003c\/div\u003e\n\u003cdiv\u003e\u003cspan\u003eSET long press to enter the parameter setting interface, P0-P5 is the corresponding parameter setting item. Under the parameter setting menu, P0-P5 can be switched by pressing SET briefly. Want to modify a parameter just switch to the corresponding item, through the addition and subtraction button to set. After setting, press and hold SET to save the data, or wait 6s to save the data automatically.\u003c\/span\u003e\u003c\/div\u003e\n\u003cdiv\u003e\u003cspan\u003e \u003c\/span\u003e\u003c\/div\u003e\n\u003cdiv\u003e\u003cspan\u003e \u003c\/span\u003e\u003c\/div\u003e\n\u003cdiv\u003e\u003cspan\u003eFriendly Reminder:\u003c\/span\u003e\u003c\/div\u003e\n\u003cdiv\u003e\u003cspan\u003eP3 set to 1 that the thermostat operation for 1 minute to stop, press SET to trigger again.\u003c\/span\u003e\u003c\/div\u003e\n\u003cdiv\u003e\u003cspan\u003eP4 set to 1 that the thermostat 1 minute after the start of work. After setting the digital tube will not light, until 1 minute after the normal work. Press SET to trigger again.\u003c\/span\u003e\u003c\/div\u003e\n\u003cdiv\u003e\u003cspan\u003eThe P5 default setting is OFF, and once the user has set the temperature, the P5 option can be set to ON in order to prevent others from changing it at will. Once set to ON data is locked, need to be set again when P5 needs to be OFF.\u003c\/span\u003e\u003c\/div\u003e\n\u003cdiv\u003e\u003cspan\u003e \u003c\/span\u003e\u003c\/div\u003e\n\u003cdiv\u003e\u003cspan\u003e \u003c\/span\u003e\u003c\/div\u003e\n\u003cdiv\u003e\u003cspan\u003eKnowledge Expansion: the concept of backtracking\u003c\/span\u003e\u003c\/div\u003e\n\u003cdiv\u003e\u003cspan\u003eBack to the simple understanding of the difference is to go back to the difference. Thermostat can be set heating and cooling two modes of work, so the backlash has two meanings:\u003c\/span\u003e\u003c\/div\u003e\n\u003cdiv\u003e\u003cspan\u003eIn the cooling mode (when P0 = C), if the set temperature is 30 °, the hysteresis is 2, indicating that the actual temperature\u0026gt; = 32 °, the relay is closed, when the actual temperature \u0026lt;= 30 °, the relay is disconnected;\u003c\/span\u003e\u003c\/div\u003e\n\u003cdiv\u003e\u003cspan\u003eIn the heating mode (P0 = H), if the set temperature is 30 °, the hysteresis is 2, indicating the actual temperature\u0026gt; = 30 °, the relay is off, when the actual temperature \u0026lt;= 28 ° closed.\u003c\/span\u003e\u003c\/div\u003e\n\u003c\/div\u003e\n\u003cdiv\u003e\u003cspan\u003e \u003c\/span\u003e\u003c\/div\u003e\n\u003cdiv\u003e\u003cspan\u003e \u003c\/span\u003e\u003c\/div\u003e\n\u003cdiv\u003e\u003cspan\u003ePackage included:\u003c\/span\u003e\u003c\/div\u003e\n\u003cdiv\u003e\n\u003cspan\u003e\u003c\/span\u003e\u003cbr\u003e\n\u003c\/div\u003e\n\u003cdiv\u003e\u003cspan\u003e1 x Timing Delay Relay Module\u003c\/span\u003e\u003c\/div\u003e"}
 -
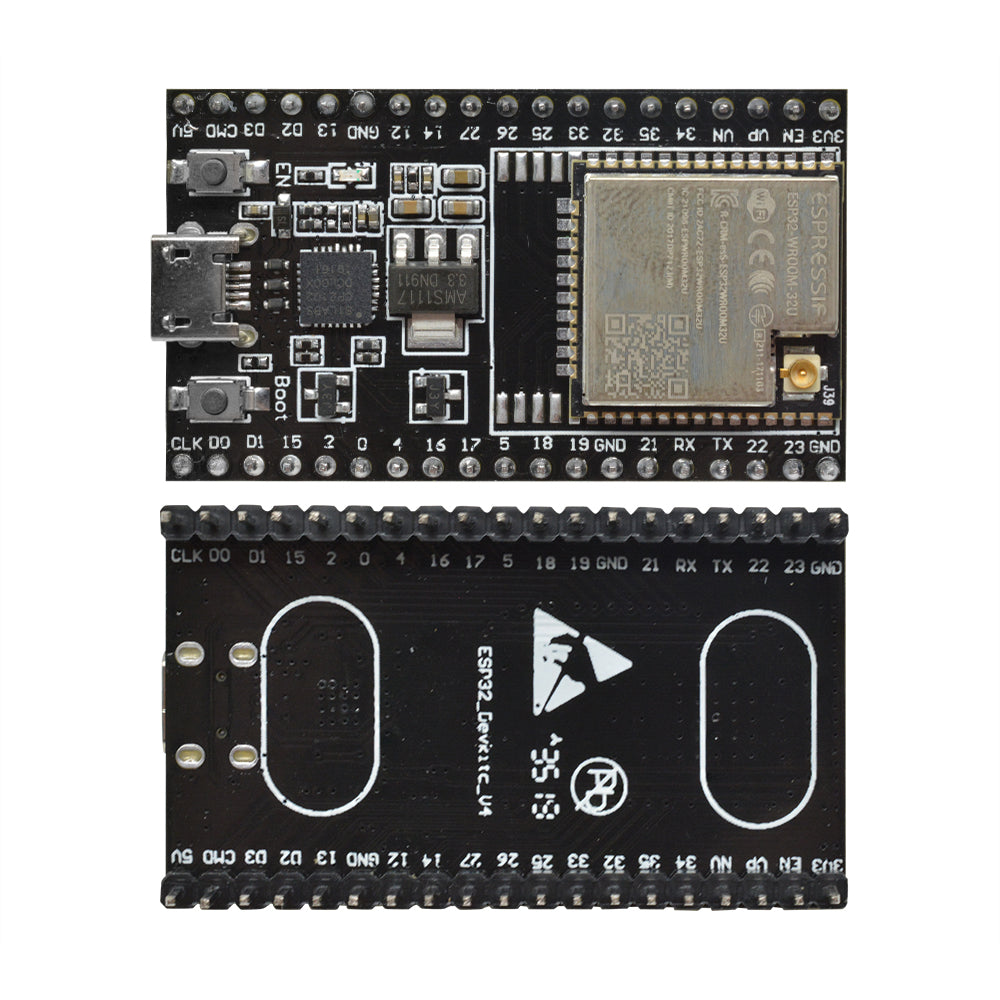
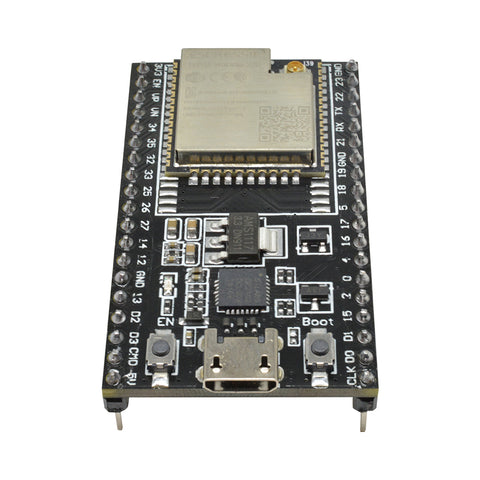 Translation missing: en.products.product.regular_price $7.99{"id":4568268341319,"title":"W1018 DC 12V Timing Delay Relay Module Cycle Timer Digital LED Time Dual Display Thermolator With Swtich Case Instruments","handle":"w1018-dc-12v-timing-delay-relay-module-cycle-timer-digital-led-time-dual-display-thermolator-with-swtich-case-instruments","description":"\u003cp\u003e\u003cimg src=\"https:\/\/ae01.alicdn.com\/kf\/HTB12JMgilsmBKNjSZFsq6yXSVXaS.jpg\"\u003e\u003c\/p\u003e\n\u003cdiv\u003e\n\u003cdiv\u003e\n\u003cspan\u003e\u003c\/span\u003e \u003c\/div\u003e\n\u003cdiv\u003e\n\u003cspan\u003e\u003c\/span\u003e \u003c\/div\u003e\n\u003cdiv\u003e\n\u003cspan\u003e\u003c\/span\u003e \u003c\/div\u003e\n\u003cdiv\u003e\u003cspan\u003eW1018 microcomputer digital thermostat manual\u003c\/span\u003e\u003c\/div\u003e\n\u003cdiv\u003e\u003cspan\u003eTemperature range: -20 ~ +100 °\u003c\/span\u003e\u003c\/div\u003e\n\u003cdiv\u003e\u003cspan\u003eResolution: -9.9 ° ~ 99.9 ° 0.1 °, other temperature 1 °\u003c\/span\u003e\u003c\/div\u003e\n\u003cdiv\u003e\u003cspan\u003eTemperature measurement accuracy: 1 °\u003c\/span\u003e\u003c\/div\u003e\n\u003cdiv\u003e\u003cspan\u003eRefresh frequency: about 0.5S\u003c\/span\u003e\u003c\/div\u003e\n\u003cdiv\u003e\u003cspan\u003eInput power: Dc 12V \u003c\/span\u003e\u003c\/div\u003e\n\u003cdiv\u003e\u003cspan\u003eMeasurement input: 1 meter NTC (10K 0.5%) waterproof sensor\u003c\/span\u003e\u003c\/div\u003e\n\u003cdiv\u003e\u003cspan\u003eOutput: All the way 10A relay\u003c\/span\u003e\u003c\/div\u003e\n\u003cdiv\u003e\u003cspan\u003eEnvironmental requirements: -10 ° ~ +60 ° Humidity 20% ~ 75%\u003c\/span\u003e\u003c\/div\u003e\n\u003cdiv\u003e\u003cspan\u003eAppearance size: 79 * 43mm\u003c\/span\u003e\u003c\/div\u003e\n\u003cdiv\u003e\u003cspan\u003eHole size: 76 * 39mm\u003c\/span\u003e\u003c\/div\u003e\n\u003cdiv\u003e\u003cspan\u003e \u003c\/span\u003e\u003c\/div\u003e\n\u003cdiv\u003e\u003cspan\u003e \u003c\/span\u003e\u003c\/div\u003e\n\u003cdiv\u003e\u003cimg alt=\"11\" src=\"https:\/\/ae01.alicdn.com\/kf\/HTB1ePjXEY1YBuNjSszeq6yblFXaZ.jpg\"\u003e\u003c\/div\u003e\n\u003cdiv\u003e\u003cspan\u003e \u003c\/span\u003e\u003c\/div\u003e\n\u003cdiv\u003e\u003cspan\u003e \u003c\/span\u003e\u003c\/div\u003e\n\u003cdiv\u003e\u003cspan\u003e \u003c\/span\u003e\u003c\/div\u003e\n\u003cdiv\u003e\u003cspan\u003ePanel introduction:\u003c\/span\u003e\u003c\/div\u003e\n\u003cdiv\u003e\u003cspan\u003e \u003c\/span\u003e\u003c\/div\u003e\n\u003cdiv\u003e\u003cspan\u003eCircuit connection: \u003c\/span\u003e\u003c\/div\u003e\n\u003cdiv\u003e\u003cspan\u003eThe reference circuit is connected with the power supply and load. At this time, the digital tube (upper) shows the actual measured temperature, the digital tube (lower) shows the preset temperature. Missing or damaged temperature sensor The digital display shows \"- - -\" and the purchaser must check if the temperature sensor is installed before use.\u003c\/span\u003e\u003c\/div\u003e\n\u003cdiv\u003e\u003cspan\u003eThe thermostat output 10A relay, to meet a variety of high-power load, make sure the line is correct.\u003c\/span\u003e\u003c\/div\u003e\n\u003cdiv\u003e\u003cspan\u003e \u003c\/span\u003e\u003c\/div\u003e\n\u003cdiv\u003e\u003cspan\u003eLED, LED status Description:\u003c\/span\u003e\u003c\/div\u003e\n\u003cdiv\u003e\u003cspan\u003eIndicator: Off means the relay is off, it means the relay is on\u003c\/span\u003e\u003c\/div\u003e\n\u003cdiv\u003e\u003cspan\u003eDigital tube: display \"- - -\", 1, check the temperature sensor is missing or damaged 2, heating mode high temperature protection 3, cooling mode low temperature protection. In protection mode the relay is automatically disconnected.\u003c\/span\u003e\u003c\/div\u003e\n\u003cdiv\u003e\u003cspan\u003e \u003c\/span\u003e\u003c\/div\u003e\n\u003cdiv\u003e\u003cspan\u003eThe use of buttons: Thermostat panel has three buttons, buttons + button - set the button SET\u003c\/span\u003e\u003c\/div\u003e\n\u003cdiv\u003e\u003cspan\u003eButton +: to achieve rapid accumulation of values\u003c\/span\u003e\u003c\/div\u003e\n\u003cdiv\u003e\u003cspan\u003eButton -: to achieve the rapid decline in value\u003c\/span\u003e\u003c\/div\u003e\n\u003cdiv\u003e\u003cspan\u003eRestart: Restart the button\u003c\/span\u003e\u003c\/div\u003e\n\u003cdiv\u003e\u003cspan\u003eSet the key SET: to achieve two-tier interface settings temperature setting interface parameter settings interface\u003c\/span\u003e\u003c\/div\u003e\n\u003cdiv\u003e\u003cspan\u003eSET short press digital tube (down) to quickly set the temperature. Preset -20 °, 0 °, 20 °, 40 °, 60 °, 80 °, 100 ° and other data sets to facilitate the user to quickly call. For example: Users need to set 68.8 °, first short press SET adjusted to 60 °, and then through the key to add fine-tuning to the appropriate temperature. Set to wait 5s automatic memory to save data. Relative to the 1st generation thermostat 2 generation more convenient and flexible operation, dual LED display the measured temperature at the same time, set the temperature more easy to observe.\u003c\/span\u003e\u003c\/div\u003e\n\u003cdiv\u003e\u003cspan\u003eSET long press to enter the parameter setting interface, P0-P5 is the corresponding parameter setting item. Under the parameter setting menu, P0-P5 can be switched by pressing SET briefly. Want to modify a parameter just switch to the corresponding item, through the addition and subtraction button to set. After setting, press and hold SET to save the data, or wait 6s to save the data automatically.\u003c\/span\u003e\u003c\/div\u003e\n\u003cdiv\u003e\u003cspan\u003e \u003c\/span\u003e\u003c\/div\u003e\n\u003cdiv\u003e\u003cspan\u003e \u003c\/span\u003e\u003c\/div\u003e\n\u003cdiv\u003e\u003cspan\u003eFriendly Reminder:\u003c\/span\u003e\u003c\/div\u003e\n\u003cdiv\u003e\u003cspan\u003eP3 set to 1 that the thermostat operation for 1 minute to stop, press SET to trigger again.\u003c\/span\u003e\u003c\/div\u003e\n\u003cdiv\u003e\u003cspan\u003eP4 set to 1 that the thermostat 1 minute after the start of work. After setting the digital tube will not light, until 1 minute after the normal work. Press SET to trigger again.\u003c\/span\u003e\u003c\/div\u003e\n\u003cdiv\u003e\u003cspan\u003eThe P5 default setting is OFF, and once the user has set the temperature, the P5 option can be set to ON in order to prevent others from changing it at will. Once set to ON data is locked, need to be set again when P5 needs to be OFF.\u003c\/span\u003e\u003c\/div\u003e\n\u003cdiv\u003e\u003cspan\u003e \u003c\/span\u003e\u003c\/div\u003e\n\u003cdiv\u003e\u003cspan\u003e \u003c\/span\u003e\u003c\/div\u003e\n\u003cdiv\u003e\u003cspan\u003eKnowledge Expansion: the concept of backtracking\u003c\/span\u003e\u003c\/div\u003e\n\u003cdiv\u003e\u003cspan\u003eBack to the simple understanding of the difference is to go back to the difference. Thermostat can be set heating and cooling two modes of work, so the backlash has two meanings:\u003c\/span\u003e\u003c\/div\u003e\n\u003cdiv\u003e\u003cspan\u003eIn the cooling mode (when P0 = C), if the set temperature is 30 °, the hysteresis is 2, indicating that the actual temperature\u0026gt; = 32 °, the relay is closed, when the actual temperature \u0026lt;= 30 °, the relay is disconnected;\u003c\/span\u003e\u003c\/div\u003e\n\u003cdiv\u003e\u003cspan\u003eIn the heating mode (P0 = H), if the set temperature is 30 °, the hysteresis is 2, indicating the actual temperature\u0026gt; = 30 °, the relay is off, when the actual temperature \u0026lt;= 28 ° closed.\u003c\/span\u003e\u003c\/div\u003e\n\u003c\/div\u003e\n\u003cdiv\u003e\u003cspan\u003e \u003c\/span\u003e\u003c\/div\u003e\n\u003cdiv\u003e\u003cspan\u003e \u003c\/span\u003e\u003c\/div\u003e\n\u003cdiv\u003e\u003cspan\u003ePackage included:\u003c\/span\u003e\u003c\/div\u003e\n\u003cdiv\u003e\n\u003cspan\u003e\u003c\/span\u003e\u003cbr\u003e\n\u003c\/div\u003e\n\u003cdiv\u003e\u003cspan\u003e1 x Timing Delay Relay Module\u003c\/span\u003e\u003c\/div\u003e","published_at":"2022-09-19T12:31:24+08:00","created_at":"2020-04-10T20:28:03+08:00","vendor":"diymore","type":"Relay Module","tags":[],"price":1195,"price_min":1195,"price_max":1195,"available":true,"price_varies":false,"compare_at_price":null,"compare_at_price_min":0,"compare_at_price_max":0,"compare_at_price_varies":false,"variants":[{"id":32037754044487,"title":"Default Title","option1":"Default Title","option2":null,"option3":null,"sku":"011863","requires_shipping":true,"taxable":true,"featured_image":null,"available":true,"name":"W1018 DC 12V Timing Delay Relay Module Cycle Timer Digital LED Time Dual Display Thermolator With Swtich Case Instruments","public_title":null,"options":["Default Title"],"price":1195,"weight":500,"compare_at_price":null,"inventory_management":null,"barcode":"","requires_selling_plan":false,"selling_plan_allocations":[]}],"images":["\/\/www.diymore.cc\/cdn\/shop\/products\/011863_10_238.jpg?v=1588701838","\/\/www.diymore.cc\/cdn\/shop\/products\/011863_1_577.jpg?v=1588701838","\/\/www.diymore.cc\/cdn\/shop\/products\/011863_2_568.jpg?v=1588701838","\/\/www.diymore.cc\/cdn\/shop\/products\/011863_3_280.jpg?v=1588701838","\/\/www.diymore.cc\/cdn\/shop\/products\/011863_6_222.jpg?v=1588701838","\/\/www.diymore.cc\/cdn\/shop\/products\/011863_7_939.jpg?v=1588701838","\/\/www.diymore.cc\/cdn\/shop\/products\/011863_8_685.jpg?v=1588701838"],"featured_image":"\/\/www.diymore.cc\/cdn\/shop\/products\/011863_10_238.jpg?v=1588701838","options":["Title"],"media":[{"alt":"W1018 Dc 12V Timing Delay Relay Module Cycle Timer Digital Led Time Dual Display Thermolator With","id":6682588938311,"position":1,"preview_image":{"aspect_ratio":1.0,"height":1000,"width":1000,"src":"\/\/www.diymore.cc\/cdn\/shop\/products\/011863_10_238.jpg?v=1588701838"},"aspect_ratio":1.0,"height":1000,"media_type":"image","src":"\/\/www.diymore.cc\/cdn\/shop\/products\/011863_10_238.jpg?v=1588701838","width":1000},{"alt":"W1018 Dc 12V Timing Delay Relay Module Cycle Timer Digital Led Time Dual Display Thermolator With","id":6682589167687,"position":2,"preview_image":{"aspect_ratio":1.0,"height":1000,"width":1000,"src":"\/\/www.diymore.cc\/cdn\/shop\/products\/011863_1_577.jpg?v=1588701838"},"aspect_ratio":1.0,"height":1000,"media_type":"image","src":"\/\/www.diymore.cc\/cdn\/shop\/products\/011863_1_577.jpg?v=1588701838","width":1000},{"alt":"W1018 Dc 12V Timing Delay Relay Module Cycle Timer Digital Led Time Dual Display Thermolator With","id":6682589331527,"position":3,"preview_image":{"aspect_ratio":1.0,"height":1000,"width":1000,"src":"\/\/www.diymore.cc\/cdn\/shop\/products\/011863_2_568.jpg?v=1588701838"},"aspect_ratio":1.0,"height":1000,"media_type":"image","src":"\/\/www.diymore.cc\/cdn\/shop\/products\/011863_2_568.jpg?v=1588701838","width":1000},{"alt":"W1018 Dc 12V Timing Delay Relay Module Cycle Timer Digital Led Time Dual Display Thermolator With","id":6682589593671,"position":4,"preview_image":{"aspect_ratio":1.0,"height":1000,"width":1000,"src":"\/\/www.diymore.cc\/cdn\/shop\/products\/011863_3_280.jpg?v=1588701838"},"aspect_ratio":1.0,"height":1000,"media_type":"image","src":"\/\/www.diymore.cc\/cdn\/shop\/products\/011863_3_280.jpg?v=1588701838","width":1000},{"alt":"W1018 Dc 12V Timing Delay Relay Module Cycle Timer Digital Led Time Dual Display Thermolator With","id":6682590019655,"position":5,"preview_image":{"aspect_ratio":1.0,"height":1000,"width":1000,"src":"\/\/www.diymore.cc\/cdn\/shop\/products\/011863_6_222.jpg?v=1588701838"},"aspect_ratio":1.0,"height":1000,"media_type":"image","src":"\/\/www.diymore.cc\/cdn\/shop\/products\/011863_6_222.jpg?v=1588701838","width":1000},{"alt":"W1018 Dc 12V Timing Delay Relay Module Cycle Timer Digital Led Time Dual Display Thermolator With","id":6682590249031,"position":6,"preview_image":{"aspect_ratio":1.0,"height":1000,"width":1000,"src":"\/\/www.diymore.cc\/cdn\/shop\/products\/011863_7_939.jpg?v=1588701838"},"aspect_ratio":1.0,"height":1000,"media_type":"image","src":"\/\/www.diymore.cc\/cdn\/shop\/products\/011863_7_939.jpg?v=1588701838","width":1000},{"alt":"W1018 Dc 12V Timing Delay Relay Module Cycle Timer Digital Led Time Dual Display Thermolator With","id":6682590445639,"position":7,"preview_image":{"aspect_ratio":1.0,"height":1000,"width":1000,"src":"\/\/www.diymore.cc\/cdn\/shop\/products\/011863_8_685.jpg?v=1588701838"},"aspect_ratio":1.0,"height":1000,"media_type":"image","src":"\/\/www.diymore.cc\/cdn\/shop\/products\/011863_8_685.jpg?v=1588701838","width":1000}],"requires_selling_plan":false,"selling_plan_groups":[],"content":"\u003cp\u003e\u003cimg src=\"https:\/\/ae01.alicdn.com\/kf\/HTB12JMgilsmBKNjSZFsq6yXSVXaS.jpg\"\u003e\u003c\/p\u003e\n\u003cdiv\u003e\n\u003cdiv\u003e\n\u003cspan\u003e\u003c\/span\u003e \u003c\/div\u003e\n\u003cdiv\u003e\n\u003cspan\u003e\u003c\/span\u003e \u003c\/div\u003e\n\u003cdiv\u003e\n\u003cspan\u003e\u003c\/span\u003e \u003c\/div\u003e\n\u003cdiv\u003e\u003cspan\u003eW1018 microcomputer digital thermostat manual\u003c\/span\u003e\u003c\/div\u003e\n\u003cdiv\u003e\u003cspan\u003eTemperature range: -20 ~ +100 °\u003c\/span\u003e\u003c\/div\u003e\n\u003cdiv\u003e\u003cspan\u003eResolution: -9.9 ° ~ 99.9 ° 0.1 °, other temperature 1 °\u003c\/span\u003e\u003c\/div\u003e\n\u003cdiv\u003e\u003cspan\u003eTemperature measurement accuracy: 1 °\u003c\/span\u003e\u003c\/div\u003e\n\u003cdiv\u003e\u003cspan\u003eRefresh frequency: about 0.5S\u003c\/span\u003e\u003c\/div\u003e\n\u003cdiv\u003e\u003cspan\u003eInput power: Dc 12V \u003c\/span\u003e\u003c\/div\u003e\n\u003cdiv\u003e\u003cspan\u003eMeasurement input: 1 meter NTC (10K 0.5%) waterproof sensor\u003c\/span\u003e\u003c\/div\u003e\n\u003cdiv\u003e\u003cspan\u003eOutput: All the way 10A relay\u003c\/span\u003e\u003c\/div\u003e\n\u003cdiv\u003e\u003cspan\u003eEnvironmental requirements: -10 ° ~ +60 ° Humidity 20% ~ 75%\u003c\/span\u003e\u003c\/div\u003e\n\u003cdiv\u003e\u003cspan\u003eAppearance size: 79 * 43mm\u003c\/span\u003e\u003c\/div\u003e\n\u003cdiv\u003e\u003cspan\u003eHole size: 76 * 39mm\u003c\/span\u003e\u003c\/div\u003e\n\u003cdiv\u003e\u003cspan\u003e \u003c\/span\u003e\u003c\/div\u003e\n\u003cdiv\u003e\u003cspan\u003e \u003c\/span\u003e\u003c\/div\u003e\n\u003cdiv\u003e\u003cimg alt=\"11\" src=\"https:\/\/ae01.alicdn.com\/kf\/HTB1ePjXEY1YBuNjSszeq6yblFXaZ.jpg\"\u003e\u003c\/div\u003e\n\u003cdiv\u003e\u003cspan\u003e \u003c\/span\u003e\u003c\/div\u003e\n\u003cdiv\u003e\u003cspan\u003e \u003c\/span\u003e\u003c\/div\u003e\n\u003cdiv\u003e\u003cspan\u003e \u003c\/span\u003e\u003c\/div\u003e\n\u003cdiv\u003e\u003cspan\u003ePanel introduction:\u003c\/span\u003e\u003c\/div\u003e\n\u003cdiv\u003e\u003cspan\u003e \u003c\/span\u003e\u003c\/div\u003e\n\u003cdiv\u003e\u003cspan\u003eCircuit connection: \u003c\/span\u003e\u003c\/div\u003e\n\u003cdiv\u003e\u003cspan\u003eThe reference circuit is connected with the power supply and load. At this time, the digital tube (upper) shows the actual measured temperature, the digital tube (lower) shows the preset temperature. Missing or damaged temperature sensor The digital display shows \"- - -\" and the purchaser must check if the temperature sensor is installed before use.\u003c\/span\u003e\u003c\/div\u003e\n\u003cdiv\u003e\u003cspan\u003eThe thermostat output 10A relay, to meet a variety of high-power load, make sure the line is correct.\u003c\/span\u003e\u003c\/div\u003e\n\u003cdiv\u003e\u003cspan\u003e \u003c\/span\u003e\u003c\/div\u003e\n\u003cdiv\u003e\u003cspan\u003eLED, LED status Description:\u003c\/span\u003e\u003c\/div\u003e\n\u003cdiv\u003e\u003cspan\u003eIndicator: Off means the relay is off, it means the relay is on\u003c\/span\u003e\u003c\/div\u003e\n\u003cdiv\u003e\u003cspan\u003eDigital tube: display \"- - -\", 1, check the temperature sensor is missing or damaged 2, heating mode high temperature protection 3, cooling mode low temperature protection. In protection mode the relay is automatically disconnected.\u003c\/span\u003e\u003c\/div\u003e\n\u003cdiv\u003e\u003cspan\u003e \u003c\/span\u003e\u003c\/div\u003e\n\u003cdiv\u003e\u003cspan\u003eThe use of buttons: Thermostat panel has three buttons, buttons + button - set the button SET\u003c\/span\u003e\u003c\/div\u003e\n\u003cdiv\u003e\u003cspan\u003eButton +: to achieve rapid accumulation of values\u003c\/span\u003e\u003c\/div\u003e\n\u003cdiv\u003e\u003cspan\u003eButton -: to achieve the rapid decline in value\u003c\/span\u003e\u003c\/div\u003e\n\u003cdiv\u003e\u003cspan\u003eRestart: Restart the button\u003c\/span\u003e\u003c\/div\u003e\n\u003cdiv\u003e\u003cspan\u003eSet the key SET: to achieve two-tier interface settings temperature setting interface parameter settings interface\u003c\/span\u003e\u003c\/div\u003e\n\u003cdiv\u003e\u003cspan\u003eSET short press digital tube (down) to quickly set the temperature. Preset -20 °, 0 °, 20 °, 40 °, 60 °, 80 °, 100 ° and other data sets to facilitate the user to quickly call. For example: Users need to set 68.8 °, first short press SET adjusted to 60 °, and then through the key to add fine-tuning to the appropriate temperature. Set to wait 5s automatic memory to save data. Relative to the 1st generation thermostat 2 generation more convenient and flexible operation, dual LED display the measured temperature at the same time, set the temperature more easy to observe.\u003c\/span\u003e\u003c\/div\u003e\n\u003cdiv\u003e\u003cspan\u003eSET long press to enter the parameter setting interface, P0-P5 is the corresponding parameter setting item. Under the parameter setting menu, P0-P5 can be switched by pressing SET briefly. Want to modify a parameter just switch to the corresponding item, through the addition and subtraction button to set. After setting, press and hold SET to save the data, or wait 6s to save the data automatically.\u003c\/span\u003e\u003c\/div\u003e\n\u003cdiv\u003e\u003cspan\u003e \u003c\/span\u003e\u003c\/div\u003e\n\u003cdiv\u003e\u003cspan\u003e \u003c\/span\u003e\u003c\/div\u003e\n\u003cdiv\u003e\u003cspan\u003eFriendly Reminder:\u003c\/span\u003e\u003c\/div\u003e\n\u003cdiv\u003e\u003cspan\u003eP3 set to 1 that the thermostat operation for 1 minute to stop, press SET to trigger again.\u003c\/span\u003e\u003c\/div\u003e\n\u003cdiv\u003e\u003cspan\u003eP4 set to 1 that the thermostat 1 minute after the start of work. After setting the digital tube will not light, until 1 minute after the normal work. Press SET to trigger again.\u003c\/span\u003e\u003c\/div\u003e\n\u003cdiv\u003e\u003cspan\u003eThe P5 default setting is OFF, and once the user has set the temperature, the P5 option can be set to ON in order to prevent others from changing it at will. Once set to ON data is locked, need to be set again when P5 needs to be OFF.\u003c\/span\u003e\u003c\/div\u003e\n\u003cdiv\u003e\u003cspan\u003e \u003c\/span\u003e\u003c\/div\u003e\n\u003cdiv\u003e\u003cspan\u003e \u003c\/span\u003e\u003c\/div\u003e\n\u003cdiv\u003e\u003cspan\u003eKnowledge Expansion: the concept of backtracking\u003c\/span\u003e\u003c\/div\u003e\n\u003cdiv\u003e\u003cspan\u003eBack to the simple understanding of the difference is to go back to the difference. Thermostat can be set heating and cooling two modes of work, so the backlash has two meanings:\u003c\/span\u003e\u003c\/div\u003e\n\u003cdiv\u003e\u003cspan\u003eIn the cooling mode (when P0 = C), if the set temperature is 30 °, the hysteresis is 2, indicating that the actual temperature\u0026gt; = 32 °, the relay is closed, when the actual temperature \u0026lt;= 30 °, the relay is disconnected;\u003c\/span\u003e\u003c\/div\u003e\n\u003cdiv\u003e\u003cspan\u003eIn the heating mode (P0 = H), if the set temperature is 30 °, the hysteresis is 2, indicating the actual temperature\u0026gt; = 30 °, the relay is off, when the actual temperature \u0026lt;= 28 ° closed.\u003c\/span\u003e\u003c\/div\u003e\n\u003c\/div\u003e\n\u003cdiv\u003e\u003cspan\u003e \u003c\/span\u003e\u003c\/div\u003e\n\u003cdiv\u003e\u003cspan\u003e \u003c\/span\u003e\u003c\/div\u003e\n\u003cdiv\u003e\u003cspan\u003ePackage included:\u003c\/span\u003e\u003c\/div\u003e\n\u003cdiv\u003e\n\u003cspan\u003e\u003c\/span\u003e\u003cbr\u003e\n\u003c\/div\u003e\n\u003cdiv\u003e\u003cspan\u003e1 x Timing Delay Relay Module\u003c\/span\u003e\u003c\/div\u003e"}
 -
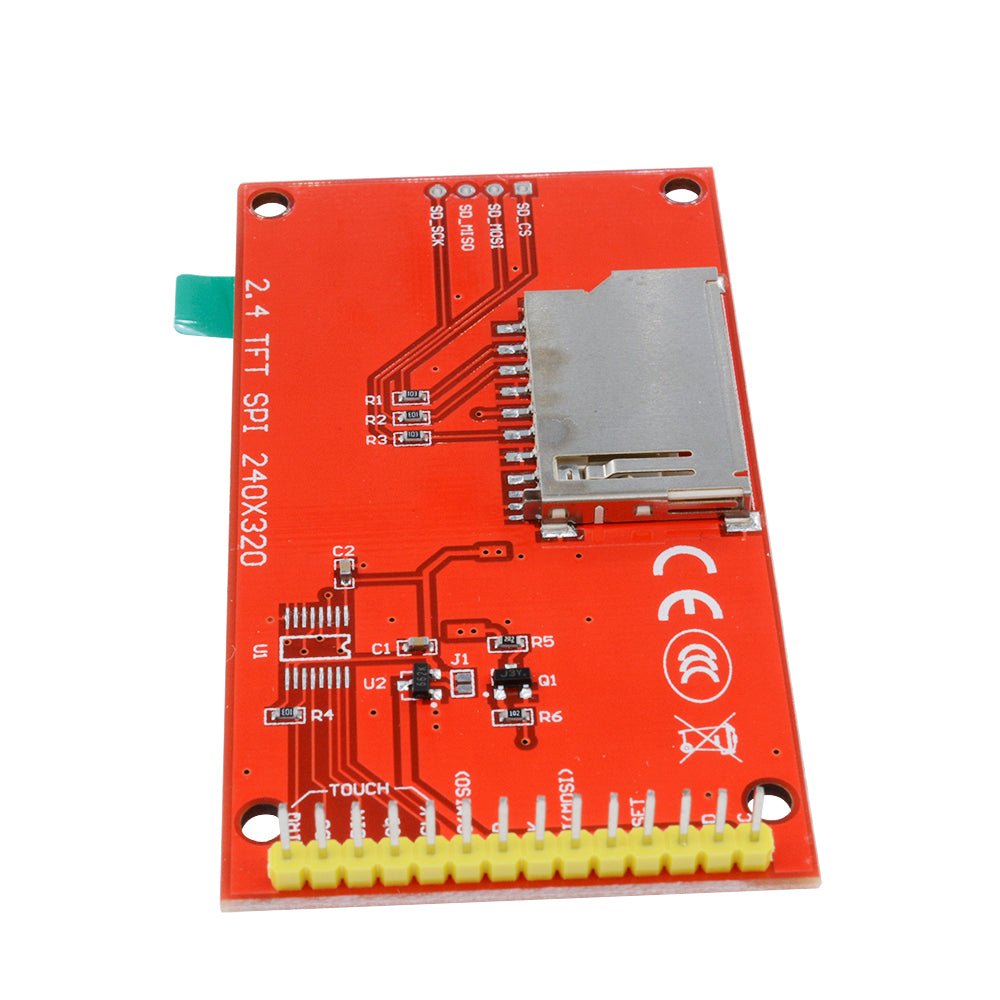
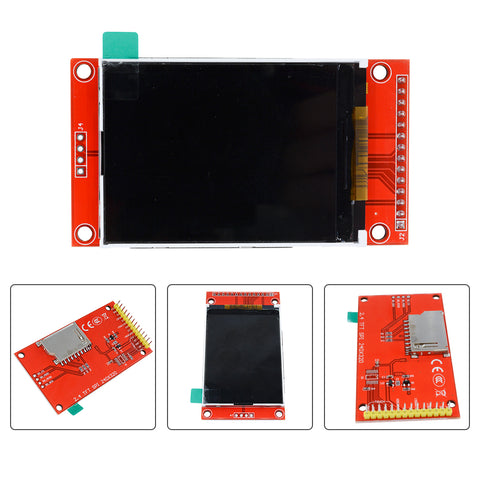 Translation missing: en.products.product.regular_price $11.99{"id":4568268341319,"title":"W1018 DC 12V Timing Delay Relay Module Cycle Timer Digital LED Time Dual Display Thermolator With Swtich Case Instruments","handle":"w1018-dc-12v-timing-delay-relay-module-cycle-timer-digital-led-time-dual-display-thermolator-with-swtich-case-instruments","description":"\u003cp\u003e\u003cimg src=\"https:\/\/ae01.alicdn.com\/kf\/HTB12JMgilsmBKNjSZFsq6yXSVXaS.jpg\"\u003e\u003c\/p\u003e\n\u003cdiv\u003e\n\u003cdiv\u003e\n\u003cspan\u003e\u003c\/span\u003e \u003c\/div\u003e\n\u003cdiv\u003e\n\u003cspan\u003e\u003c\/span\u003e \u003c\/div\u003e\n\u003cdiv\u003e\n\u003cspan\u003e\u003c\/span\u003e \u003c\/div\u003e\n\u003cdiv\u003e\u003cspan\u003eW1018 microcomputer digital thermostat manual\u003c\/span\u003e\u003c\/div\u003e\n\u003cdiv\u003e\u003cspan\u003eTemperature range: -20 ~ +100 °\u003c\/span\u003e\u003c\/div\u003e\n\u003cdiv\u003e\u003cspan\u003eResolution: -9.9 ° ~ 99.9 ° 0.1 °, other temperature 1 °\u003c\/span\u003e\u003c\/div\u003e\n\u003cdiv\u003e\u003cspan\u003eTemperature measurement accuracy: 1 °\u003c\/span\u003e\u003c\/div\u003e\n\u003cdiv\u003e\u003cspan\u003eRefresh frequency: about 0.5S\u003c\/span\u003e\u003c\/div\u003e\n\u003cdiv\u003e\u003cspan\u003eInput power: Dc 12V \u003c\/span\u003e\u003c\/div\u003e\n\u003cdiv\u003e\u003cspan\u003eMeasurement input: 1 meter NTC (10K 0.5%) waterproof sensor\u003c\/span\u003e\u003c\/div\u003e\n\u003cdiv\u003e\u003cspan\u003eOutput: All the way 10A relay\u003c\/span\u003e\u003c\/div\u003e\n\u003cdiv\u003e\u003cspan\u003eEnvironmental requirements: -10 ° ~ +60 ° Humidity 20% ~ 75%\u003c\/span\u003e\u003c\/div\u003e\n\u003cdiv\u003e\u003cspan\u003eAppearance size: 79 * 43mm\u003c\/span\u003e\u003c\/div\u003e\n\u003cdiv\u003e\u003cspan\u003eHole size: 76 * 39mm\u003c\/span\u003e\u003c\/div\u003e\n\u003cdiv\u003e\u003cspan\u003e \u003c\/span\u003e\u003c\/div\u003e\n\u003cdiv\u003e\u003cspan\u003e \u003c\/span\u003e\u003c\/div\u003e\n\u003cdiv\u003e\u003cimg alt=\"11\" src=\"https:\/\/ae01.alicdn.com\/kf\/HTB1ePjXEY1YBuNjSszeq6yblFXaZ.jpg\"\u003e\u003c\/div\u003e\n\u003cdiv\u003e\u003cspan\u003e \u003c\/span\u003e\u003c\/div\u003e\n\u003cdiv\u003e\u003cspan\u003e \u003c\/span\u003e\u003c\/div\u003e\n\u003cdiv\u003e\u003cspan\u003e \u003c\/span\u003e\u003c\/div\u003e\n\u003cdiv\u003e\u003cspan\u003ePanel introduction:\u003c\/span\u003e\u003c\/div\u003e\n\u003cdiv\u003e\u003cspan\u003e \u003c\/span\u003e\u003c\/div\u003e\n\u003cdiv\u003e\u003cspan\u003eCircuit connection: \u003c\/span\u003e\u003c\/div\u003e\n\u003cdiv\u003e\u003cspan\u003eThe reference circuit is connected with the power supply and load. At this time, the digital tube (upper) shows the actual measured temperature, the digital tube (lower) shows the preset temperature. Missing or damaged temperature sensor The digital display shows \"- - -\" and the purchaser must check if the temperature sensor is installed before use.\u003c\/span\u003e\u003c\/div\u003e\n\u003cdiv\u003e\u003cspan\u003eThe thermostat output 10A relay, to meet a variety of high-power load, make sure the line is correct.\u003c\/span\u003e\u003c\/div\u003e\n\u003cdiv\u003e\u003cspan\u003e \u003c\/span\u003e\u003c\/div\u003e\n\u003cdiv\u003e\u003cspan\u003eLED, LED status Description:\u003c\/span\u003e\u003c\/div\u003e\n\u003cdiv\u003e\u003cspan\u003eIndicator: Off means the relay is off, it means the relay is on\u003c\/span\u003e\u003c\/div\u003e\n\u003cdiv\u003e\u003cspan\u003eDigital tube: display \"- - -\", 1, check the temperature sensor is missing or damaged 2, heating mode high temperature protection 3, cooling mode low temperature protection. In protection mode the relay is automatically disconnected.\u003c\/span\u003e\u003c\/div\u003e\n\u003cdiv\u003e\u003cspan\u003e \u003c\/span\u003e\u003c\/div\u003e\n\u003cdiv\u003e\u003cspan\u003eThe use of buttons: Thermostat panel has three buttons, buttons + button - set the button SET\u003c\/span\u003e\u003c\/div\u003e\n\u003cdiv\u003e\u003cspan\u003eButton +: to achieve rapid accumulation of values\u003c\/span\u003e\u003c\/div\u003e\n\u003cdiv\u003e\u003cspan\u003eButton -: to achieve the rapid decline in value\u003c\/span\u003e\u003c\/div\u003e\n\u003cdiv\u003e\u003cspan\u003eRestart: Restart the button\u003c\/span\u003e\u003c\/div\u003e\n\u003cdiv\u003e\u003cspan\u003eSet the key SET: to achieve two-tier interface settings temperature setting interface parameter settings interface\u003c\/span\u003e\u003c\/div\u003e\n\u003cdiv\u003e\u003cspan\u003eSET short press digital tube (down) to quickly set the temperature. Preset -20 °, 0 °, 20 °, 40 °, 60 °, 80 °, 100 ° and other data sets to facilitate the user to quickly call. For example: Users need to set 68.8 °, first short press SET adjusted to 60 °, and then through the key to add fine-tuning to the appropriate temperature. Set to wait 5s automatic memory to save data. Relative to the 1st generation thermostat 2 generation more convenient and flexible operation, dual LED display the measured temperature at the same time, set the temperature more easy to observe.\u003c\/span\u003e\u003c\/div\u003e\n\u003cdiv\u003e\u003cspan\u003eSET long press to enter the parameter setting interface, P0-P5 is the corresponding parameter setting item. Under the parameter setting menu, P0-P5 can be switched by pressing SET briefly. Want to modify a parameter just switch to the corresponding item, through the addition and subtraction button to set. After setting, press and hold SET to save the data, or wait 6s to save the data automatically.\u003c\/span\u003e\u003c\/div\u003e\n\u003cdiv\u003e\u003cspan\u003e \u003c\/span\u003e\u003c\/div\u003e\n\u003cdiv\u003e\u003cspan\u003e \u003c\/span\u003e\u003c\/div\u003e\n\u003cdiv\u003e\u003cspan\u003eFriendly Reminder:\u003c\/span\u003e\u003c\/div\u003e\n\u003cdiv\u003e\u003cspan\u003eP3 set to 1 that the thermostat operation for 1 minute to stop, press SET to trigger again.\u003c\/span\u003e\u003c\/div\u003e\n\u003cdiv\u003e\u003cspan\u003eP4 set to 1 that the thermostat 1 minute after the start of work. After setting the digital tube will not light, until 1 minute after the normal work. Press SET to trigger again.\u003c\/span\u003e\u003c\/div\u003e\n\u003cdiv\u003e\u003cspan\u003eThe P5 default setting is OFF, and once the user has set the temperature, the P5 option can be set to ON in order to prevent others from changing it at will. Once set to ON data is locked, need to be set again when P5 needs to be OFF.\u003c\/span\u003e\u003c\/div\u003e\n\u003cdiv\u003e\u003cspan\u003e \u003c\/span\u003e\u003c\/div\u003e\n\u003cdiv\u003e\u003cspan\u003e \u003c\/span\u003e\u003c\/div\u003e\n\u003cdiv\u003e\u003cspan\u003eKnowledge Expansion: the concept of backtracking\u003c\/span\u003e\u003c\/div\u003e\n\u003cdiv\u003e\u003cspan\u003eBack to the simple understanding of the difference is to go back to the difference. Thermostat can be set heating and cooling two modes of work, so the backlash has two meanings:\u003c\/span\u003e\u003c\/div\u003e\n\u003cdiv\u003e\u003cspan\u003eIn the cooling mode (when P0 = C), if the set temperature is 30 °, the hysteresis is 2, indicating that the actual temperature\u0026gt; = 32 °, the relay is closed, when the actual temperature \u0026lt;= 30 °, the relay is disconnected;\u003c\/span\u003e\u003c\/div\u003e\n\u003cdiv\u003e\u003cspan\u003eIn the heating mode (P0 = H), if the set temperature is 30 °, the hysteresis is 2, indicating the actual temperature\u0026gt; = 30 °, the relay is off, when the actual temperature \u0026lt;= 28 ° closed.\u003c\/span\u003e\u003c\/div\u003e\n\u003c\/div\u003e\n\u003cdiv\u003e\u003cspan\u003e \u003c\/span\u003e\u003c\/div\u003e\n\u003cdiv\u003e\u003cspan\u003e \u003c\/span\u003e\u003c\/div\u003e\n\u003cdiv\u003e\u003cspan\u003ePackage included:\u003c\/span\u003e\u003c\/div\u003e\n\u003cdiv\u003e\n\u003cspan\u003e\u003c\/span\u003e\u003cbr\u003e\n\u003c\/div\u003e\n\u003cdiv\u003e\u003cspan\u003e1 x Timing Delay Relay Module\u003c\/span\u003e\u003c\/div\u003e","published_at":"2022-09-19T12:31:24+08:00","created_at":"2020-04-10T20:28:03+08:00","vendor":"diymore","type":"Relay Module","tags":[],"price":1195,"price_min":1195,"price_max":1195,"available":true,"price_varies":false,"compare_at_price":null,"compare_at_price_min":0,"compare_at_price_max":0,"compare_at_price_varies":false,"variants":[{"id":32037754044487,"title":"Default Title","option1":"Default Title","option2":null,"option3":null,"sku":"011863","requires_shipping":true,"taxable":true,"featured_image":null,"available":true,"name":"W1018 DC 12V Timing Delay Relay Module Cycle Timer Digital LED Time Dual Display Thermolator With Swtich Case Instruments","public_title":null,"options":["Default Title"],"price":1195,"weight":500,"compare_at_price":null,"inventory_management":null,"barcode":"","requires_selling_plan":false,"selling_plan_allocations":[]}],"images":["\/\/www.diymore.cc\/cdn\/shop\/products\/011863_10_238.jpg?v=1588701838","\/\/www.diymore.cc\/cdn\/shop\/products\/011863_1_577.jpg?v=1588701838","\/\/www.diymore.cc\/cdn\/shop\/products\/011863_2_568.jpg?v=1588701838","\/\/www.diymore.cc\/cdn\/shop\/products\/011863_3_280.jpg?v=1588701838","\/\/www.diymore.cc\/cdn\/shop\/products\/011863_6_222.jpg?v=1588701838","\/\/www.diymore.cc\/cdn\/shop\/products\/011863_7_939.jpg?v=1588701838","\/\/www.diymore.cc\/cdn\/shop\/products\/011863_8_685.jpg?v=1588701838"],"featured_image":"\/\/www.diymore.cc\/cdn\/shop\/products\/011863_10_238.jpg?v=1588701838","options":["Title"],"media":[{"alt":"W1018 Dc 12V Timing Delay Relay Module Cycle Timer Digital Led Time Dual Display Thermolator With","id":6682588938311,"position":1,"preview_image":{"aspect_ratio":1.0,"height":1000,"width":1000,"src":"\/\/www.diymore.cc\/cdn\/shop\/products\/011863_10_238.jpg?v=1588701838"},"aspect_ratio":1.0,"height":1000,"media_type":"image","src":"\/\/www.diymore.cc\/cdn\/shop\/products\/011863_10_238.jpg?v=1588701838","width":1000},{"alt":"W1018 Dc 12V Timing Delay Relay Module Cycle Timer Digital Led Time Dual Display Thermolator With","id":6682589167687,"position":2,"preview_image":{"aspect_ratio":1.0,"height":1000,"width":1000,"src":"\/\/www.diymore.cc\/cdn\/shop\/products\/011863_1_577.jpg?v=1588701838"},"aspect_ratio":1.0,"height":1000,"media_type":"image","src":"\/\/www.diymore.cc\/cdn\/shop\/products\/011863_1_577.jpg?v=1588701838","width":1000},{"alt":"W1018 Dc 12V Timing Delay Relay Module Cycle Timer Digital Led Time Dual Display Thermolator With","id":6682589331527,"position":3,"preview_image":{"aspect_ratio":1.0,"height":1000,"width":1000,"src":"\/\/www.diymore.cc\/cdn\/shop\/products\/011863_2_568.jpg?v=1588701838"},"aspect_ratio":1.0,"height":1000,"media_type":"image","src":"\/\/www.diymore.cc\/cdn\/shop\/products\/011863_2_568.jpg?v=1588701838","width":1000},{"alt":"W1018 Dc 12V Timing Delay Relay Module Cycle Timer Digital Led Time Dual Display Thermolator With","id":6682589593671,"position":4,"preview_image":{"aspect_ratio":1.0,"height":1000,"width":1000,"src":"\/\/www.diymore.cc\/cdn\/shop\/products\/011863_3_280.jpg?v=1588701838"},"aspect_ratio":1.0,"height":1000,"media_type":"image","src":"\/\/www.diymore.cc\/cdn\/shop\/products\/011863_3_280.jpg?v=1588701838","width":1000},{"alt":"W1018 Dc 12V Timing Delay Relay Module Cycle Timer Digital Led Time Dual Display Thermolator With","id":6682590019655,"position":5,"preview_image":{"aspect_ratio":1.0,"height":1000,"width":1000,"src":"\/\/www.diymore.cc\/cdn\/shop\/products\/011863_6_222.jpg?v=1588701838"},"aspect_ratio":1.0,"height":1000,"media_type":"image","src":"\/\/www.diymore.cc\/cdn\/shop\/products\/011863_6_222.jpg?v=1588701838","width":1000},{"alt":"W1018 Dc 12V Timing Delay Relay Module Cycle Timer Digital Led Time Dual Display Thermolator With","id":6682590249031,"position":6,"preview_image":{"aspect_ratio":1.0,"height":1000,"width":1000,"src":"\/\/www.diymore.cc\/cdn\/shop\/products\/011863_7_939.jpg?v=1588701838"},"aspect_ratio":1.0,"height":1000,"media_type":"image","src":"\/\/www.diymore.cc\/cdn\/shop\/products\/011863_7_939.jpg?v=1588701838","width":1000},{"alt":"W1018 Dc 12V Timing Delay Relay Module Cycle Timer Digital Led Time Dual Display Thermolator With","id":6682590445639,"position":7,"preview_image":{"aspect_ratio":1.0,"height":1000,"width":1000,"src":"\/\/www.diymore.cc\/cdn\/shop\/products\/011863_8_685.jpg?v=1588701838"},"aspect_ratio":1.0,"height":1000,"media_type":"image","src":"\/\/www.diymore.cc\/cdn\/shop\/products\/011863_8_685.jpg?v=1588701838","width":1000}],"requires_selling_plan":false,"selling_plan_groups":[],"content":"\u003cp\u003e\u003cimg src=\"https:\/\/ae01.alicdn.com\/kf\/HTB12JMgilsmBKNjSZFsq6yXSVXaS.jpg\"\u003e\u003c\/p\u003e\n\u003cdiv\u003e\n\u003cdiv\u003e\n\u003cspan\u003e\u003c\/span\u003e \u003c\/div\u003e\n\u003cdiv\u003e\n\u003cspan\u003e\u003c\/span\u003e \u003c\/div\u003e\n\u003cdiv\u003e\n\u003cspan\u003e\u003c\/span\u003e \u003c\/div\u003e\n\u003cdiv\u003e\u003cspan\u003eW1018 microcomputer digital thermostat manual\u003c\/span\u003e\u003c\/div\u003e\n\u003cdiv\u003e\u003cspan\u003eTemperature range: -20 ~ +100 °\u003c\/span\u003e\u003c\/div\u003e\n\u003cdiv\u003e\u003cspan\u003eResolution: -9.9 ° ~ 99.9 ° 0.1 °, other temperature 1 °\u003c\/span\u003e\u003c\/div\u003e\n\u003cdiv\u003e\u003cspan\u003eTemperature measurement accuracy: 1 °\u003c\/span\u003e\u003c\/div\u003e\n\u003cdiv\u003e\u003cspan\u003eRefresh frequency: about 0.5S\u003c\/span\u003e\u003c\/div\u003e\n\u003cdiv\u003e\u003cspan\u003eInput power: Dc 12V \u003c\/span\u003e\u003c\/div\u003e\n\u003cdiv\u003e\u003cspan\u003eMeasurement input: 1 meter NTC (10K 0.5%) waterproof sensor\u003c\/span\u003e\u003c\/div\u003e\n\u003cdiv\u003e\u003cspan\u003eOutput: All the way 10A relay\u003c\/span\u003e\u003c\/div\u003e\n\u003cdiv\u003e\u003cspan\u003eEnvironmental requirements: -10 ° ~ +60 ° Humidity 20% ~ 75%\u003c\/span\u003e\u003c\/div\u003e\n\u003cdiv\u003e\u003cspan\u003eAppearance size: 79 * 43mm\u003c\/span\u003e\u003c\/div\u003e\n\u003cdiv\u003e\u003cspan\u003eHole size: 76 * 39mm\u003c\/span\u003e\u003c\/div\u003e\n\u003cdiv\u003e\u003cspan\u003e \u003c\/span\u003e\u003c\/div\u003e\n\u003cdiv\u003e\u003cspan\u003e \u003c\/span\u003e\u003c\/div\u003e\n\u003cdiv\u003e\u003cimg alt=\"11\" src=\"https:\/\/ae01.alicdn.com\/kf\/HTB1ePjXEY1YBuNjSszeq6yblFXaZ.jpg\"\u003e\u003c\/div\u003e\n\u003cdiv\u003e\u003cspan\u003e \u003c\/span\u003e\u003c\/div\u003e\n\u003cdiv\u003e\u003cspan\u003e \u003c\/span\u003e\u003c\/div\u003e\n\u003cdiv\u003e\u003cspan\u003e \u003c\/span\u003e\u003c\/div\u003e\n\u003cdiv\u003e\u003cspan\u003ePanel introduction:\u003c\/span\u003e\u003c\/div\u003e\n\u003cdiv\u003e\u003cspan\u003e \u003c\/span\u003e\u003c\/div\u003e\n\u003cdiv\u003e\u003cspan\u003eCircuit connection: \u003c\/span\u003e\u003c\/div\u003e\n\u003cdiv\u003e\u003cspan\u003eThe reference circuit is connected with the power supply and load. At this time, the digital tube (upper) shows the actual measured temperature, the digital tube (lower) shows the preset temperature. Missing or damaged temperature sensor The digital display shows \"- - -\" and the purchaser must check if the temperature sensor is installed before use.\u003c\/span\u003e\u003c\/div\u003e\n\u003cdiv\u003e\u003cspan\u003eThe thermostat output 10A relay, to meet a variety of high-power load, make sure the line is correct.\u003c\/span\u003e\u003c\/div\u003e\n\u003cdiv\u003e\u003cspan\u003e \u003c\/span\u003e\u003c\/div\u003e\n\u003cdiv\u003e\u003cspan\u003eLED, LED status Description:\u003c\/span\u003e\u003c\/div\u003e\n\u003cdiv\u003e\u003cspan\u003eIndicator: Off means the relay is off, it means the relay is on\u003c\/span\u003e\u003c\/div\u003e\n\u003cdiv\u003e\u003cspan\u003eDigital tube: display \"- - -\", 1, check the temperature sensor is missing or damaged 2, heating mode high temperature protection 3, cooling mode low temperature protection. In protection mode the relay is automatically disconnected.\u003c\/span\u003e\u003c\/div\u003e\n\u003cdiv\u003e\u003cspan\u003e \u003c\/span\u003e\u003c\/div\u003e\n\u003cdiv\u003e\u003cspan\u003eThe use of buttons: Thermostat panel has three buttons, buttons + button - set the button SET\u003c\/span\u003e\u003c\/div\u003e\n\u003cdiv\u003e\u003cspan\u003eButton +: to achieve rapid accumulation of values\u003c\/span\u003e\u003c\/div\u003e\n\u003cdiv\u003e\u003cspan\u003eButton -: to achieve the rapid decline in value\u003c\/span\u003e\u003c\/div\u003e\n\u003cdiv\u003e\u003cspan\u003eRestart: Restart the button\u003c\/span\u003e\u003c\/div\u003e\n\u003cdiv\u003e\u003cspan\u003eSet the key SET: to achieve two-tier interface settings temperature setting interface parameter settings interface\u003c\/span\u003e\u003c\/div\u003e\n\u003cdiv\u003e\u003cspan\u003eSET short press digital tube (down) to quickly set the temperature. Preset -20 °, 0 °, 20 °, 40 °, 60 °, 80 °, 100 ° and other data sets to facilitate the user to quickly call. For example: Users need to set 68.8 °, first short press SET adjusted to 60 °, and then through the key to add fine-tuning to the appropriate temperature. Set to wait 5s automatic memory to save data. Relative to the 1st generation thermostat 2 generation more convenient and flexible operation, dual LED display the measured temperature at the same time, set the temperature more easy to observe.\u003c\/span\u003e\u003c\/div\u003e\n\u003cdiv\u003e\u003cspan\u003eSET long press to enter the parameter setting interface, P0-P5 is the corresponding parameter setting item. Under the parameter setting menu, P0-P5 can be switched by pressing SET briefly. Want to modify a parameter just switch to the corresponding item, through the addition and subtraction button to set. After setting, press and hold SET to save the data, or wait 6s to save the data automatically.\u003c\/span\u003e\u003c\/div\u003e\n\u003cdiv\u003e\u003cspan\u003e \u003c\/span\u003e\u003c\/div\u003e\n\u003cdiv\u003e\u003cspan\u003e \u003c\/span\u003e\u003c\/div\u003e\n\u003cdiv\u003e\u003cspan\u003eFriendly Reminder:\u003c\/span\u003e\u003c\/div\u003e\n\u003cdiv\u003e\u003cspan\u003eP3 set to 1 that the thermostat operation for 1 minute to stop, press SET to trigger again.\u003c\/span\u003e\u003c\/div\u003e\n\u003cdiv\u003e\u003cspan\u003eP4 set to 1 that the thermostat 1 minute after the start of work. After setting the digital tube will not light, until 1 minute after the normal work. Press SET to trigger again.\u003c\/span\u003e\u003c\/div\u003e\n\u003cdiv\u003e\u003cspan\u003eThe P5 default setting is OFF, and once the user has set the temperature, the P5 option can be set to ON in order to prevent others from changing it at will. Once set to ON data is locked, need to be set again when P5 needs to be OFF.\u003c\/span\u003e\u003c\/div\u003e\n\u003cdiv\u003e\u003cspan\u003e \u003c\/span\u003e\u003c\/div\u003e\n\u003cdiv\u003e\u003cspan\u003e \u003c\/span\u003e\u003c\/div\u003e\n\u003cdiv\u003e\u003cspan\u003eKnowledge Expansion: the concept of backtracking\u003c\/span\u003e\u003c\/div\u003e\n\u003cdiv\u003e\u003cspan\u003eBack to the simple understanding of the difference is to go back to the difference. Thermostat can be set heating and cooling two modes of work, so the backlash has two meanings:\u003c\/span\u003e\u003c\/div\u003e\n\u003cdiv\u003e\u003cspan\u003eIn the cooling mode (when P0 = C), if the set temperature is 30 °, the hysteresis is 2, indicating that the actual temperature\u0026gt; = 32 °, the relay is closed, when the actual temperature \u0026lt;= 30 °, the relay is disconnected;\u003c\/span\u003e\u003c\/div\u003e\n\u003cdiv\u003e\u003cspan\u003eIn the heating mode (P0 = H), if the set temperature is 30 °, the hysteresis is 2, indicating the actual temperature\u0026gt; = 30 °, the relay is off, when the actual temperature \u0026lt;= 28 ° closed.\u003c\/span\u003e\u003c\/div\u003e\n\u003c\/div\u003e\n\u003cdiv\u003e\u003cspan\u003e \u003c\/span\u003e\u003c\/div\u003e\n\u003cdiv\u003e\u003cspan\u003e \u003c\/span\u003e\u003c\/div\u003e\n\u003cdiv\u003e\u003cspan\u003ePackage included:\u003c\/span\u003e\u003c\/div\u003e\n\u003cdiv\u003e\n\u003cspan\u003e\u003c\/span\u003e\u003cbr\u003e\n\u003c\/div\u003e\n\u003cdiv\u003e\u003cspan\u003e1 x Timing Delay Relay Module\u003c\/span\u003e\u003c\/div\u003e"}
 -
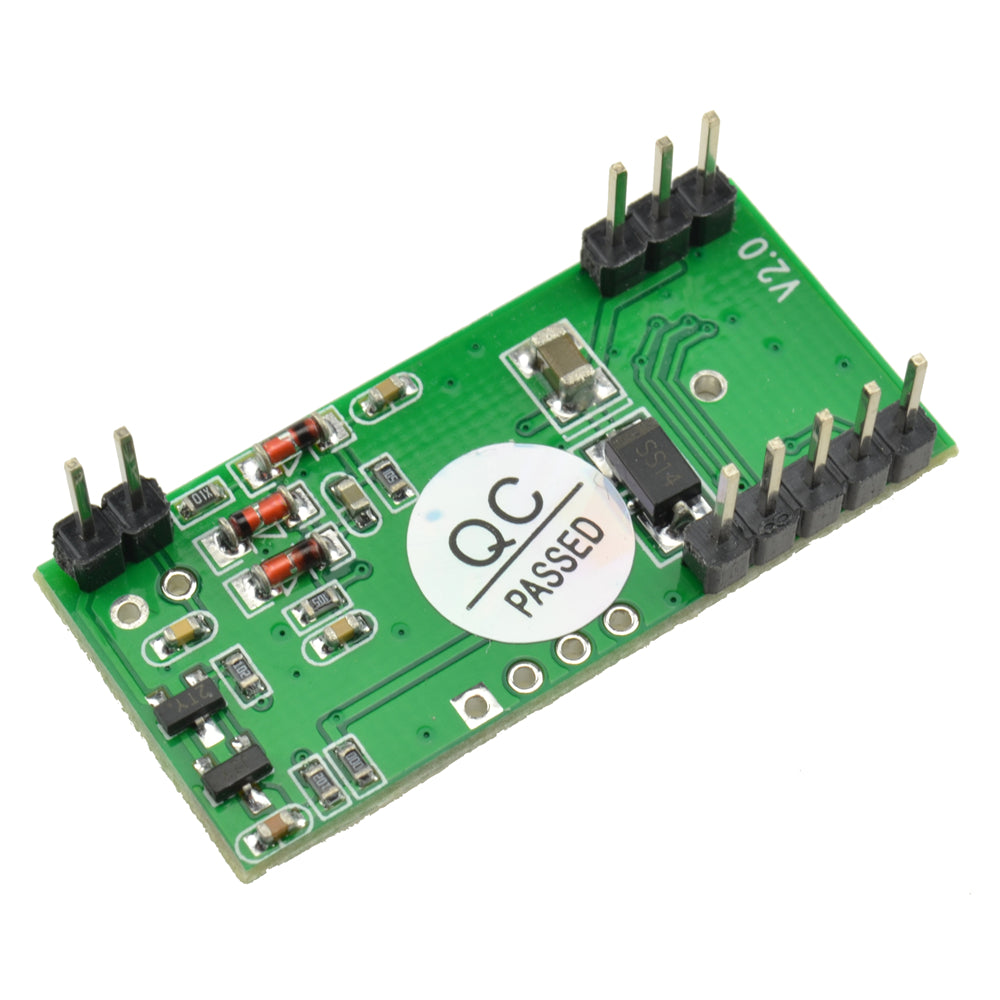
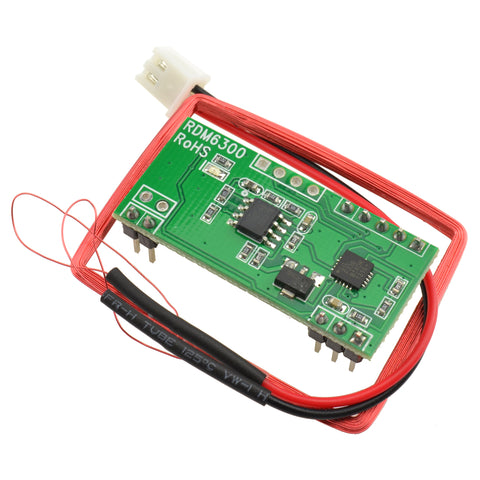 Translation missing: en.products.product.regular_price $3.56{"id":4568268341319,"title":"W1018 DC 12V Timing Delay Relay Module Cycle Timer Digital LED Time Dual Display Thermolator With Swtich Case Instruments","handle":"w1018-dc-12v-timing-delay-relay-module-cycle-timer-digital-led-time-dual-display-thermolator-with-swtich-case-instruments","description":"\u003cp\u003e\u003cimg src=\"https:\/\/ae01.alicdn.com\/kf\/HTB12JMgilsmBKNjSZFsq6yXSVXaS.jpg\"\u003e\u003c\/p\u003e\n\u003cdiv\u003e\n\u003cdiv\u003e\n\u003cspan\u003e\u003c\/span\u003e \u003c\/div\u003e\n\u003cdiv\u003e\n\u003cspan\u003e\u003c\/span\u003e \u003c\/div\u003e\n\u003cdiv\u003e\n\u003cspan\u003e\u003c\/span\u003e \u003c\/div\u003e\n\u003cdiv\u003e\u003cspan\u003eW1018 microcomputer digital thermostat manual\u003c\/span\u003e\u003c\/div\u003e\n\u003cdiv\u003e\u003cspan\u003eTemperature range: -20 ~ +100 °\u003c\/span\u003e\u003c\/div\u003e\n\u003cdiv\u003e\u003cspan\u003eResolution: -9.9 ° ~ 99.9 ° 0.1 °, other temperature 1 °\u003c\/span\u003e\u003c\/div\u003e\n\u003cdiv\u003e\u003cspan\u003eTemperature measurement accuracy: 1 °\u003c\/span\u003e\u003c\/div\u003e\n\u003cdiv\u003e\u003cspan\u003eRefresh frequency: about 0.5S\u003c\/span\u003e\u003c\/div\u003e\n\u003cdiv\u003e\u003cspan\u003eInput power: Dc 12V \u003c\/span\u003e\u003c\/div\u003e\n\u003cdiv\u003e\u003cspan\u003eMeasurement input: 1 meter NTC (10K 0.5%) waterproof sensor\u003c\/span\u003e\u003c\/div\u003e\n\u003cdiv\u003e\u003cspan\u003eOutput: All the way 10A relay\u003c\/span\u003e\u003c\/div\u003e\n\u003cdiv\u003e\u003cspan\u003eEnvironmental requirements: -10 ° ~ +60 ° Humidity 20% ~ 75%\u003c\/span\u003e\u003c\/div\u003e\n\u003cdiv\u003e\u003cspan\u003eAppearance size: 79 * 43mm\u003c\/span\u003e\u003c\/div\u003e\n\u003cdiv\u003e\u003cspan\u003eHole size: 76 * 39mm\u003c\/span\u003e\u003c\/div\u003e\n\u003cdiv\u003e\u003cspan\u003e \u003c\/span\u003e\u003c\/div\u003e\n\u003cdiv\u003e\u003cspan\u003e \u003c\/span\u003e\u003c\/div\u003e\n\u003cdiv\u003e\u003cimg alt=\"11\" src=\"https:\/\/ae01.alicdn.com\/kf\/HTB1ePjXEY1YBuNjSszeq6yblFXaZ.jpg\"\u003e\u003c\/div\u003e\n\u003cdiv\u003e\u003cspan\u003e \u003c\/span\u003e\u003c\/div\u003e\n\u003cdiv\u003e\u003cspan\u003e \u003c\/span\u003e\u003c\/div\u003e\n\u003cdiv\u003e\u003cspan\u003e \u003c\/span\u003e\u003c\/div\u003e\n\u003cdiv\u003e\u003cspan\u003ePanel introduction:\u003c\/span\u003e\u003c\/div\u003e\n\u003cdiv\u003e\u003cspan\u003e \u003c\/span\u003e\u003c\/div\u003e\n\u003cdiv\u003e\u003cspan\u003eCircuit connection: \u003c\/span\u003e\u003c\/div\u003e\n\u003cdiv\u003e\u003cspan\u003eThe reference circuit is connected with the power supply and load. At this time, the digital tube (upper) shows the actual measured temperature, the digital tube (lower) shows the preset temperature. Missing or damaged temperature sensor The digital display shows \"- - -\" and the purchaser must check if the temperature sensor is installed before use.\u003c\/span\u003e\u003c\/div\u003e\n\u003cdiv\u003e\u003cspan\u003eThe thermostat output 10A relay, to meet a variety of high-power load, make sure the line is correct.\u003c\/span\u003e\u003c\/div\u003e\n\u003cdiv\u003e\u003cspan\u003e \u003c\/span\u003e\u003c\/div\u003e\n\u003cdiv\u003e\u003cspan\u003eLED, LED status Description:\u003c\/span\u003e\u003c\/div\u003e\n\u003cdiv\u003e\u003cspan\u003eIndicator: Off means the relay is off, it means the relay is on\u003c\/span\u003e\u003c\/div\u003e\n\u003cdiv\u003e\u003cspan\u003eDigital tube: display \"- - -\", 1, check the temperature sensor is missing or damaged 2, heating mode high temperature protection 3, cooling mode low temperature protection. In protection mode the relay is automatically disconnected.\u003c\/span\u003e\u003c\/div\u003e\n\u003cdiv\u003e\u003cspan\u003e \u003c\/span\u003e\u003c\/div\u003e\n\u003cdiv\u003e\u003cspan\u003eThe use of buttons: Thermostat panel has three buttons, buttons + button - set the button SET\u003c\/span\u003e\u003c\/div\u003e\n\u003cdiv\u003e\u003cspan\u003eButton +: to achieve rapid accumulation of values\u003c\/span\u003e\u003c\/div\u003e\n\u003cdiv\u003e\u003cspan\u003eButton -: to achieve the rapid decline in value\u003c\/span\u003e\u003c\/div\u003e\n\u003cdiv\u003e\u003cspan\u003eRestart: Restart the button\u003c\/span\u003e\u003c\/div\u003e\n\u003cdiv\u003e\u003cspan\u003eSet the key SET: to achieve two-tier interface settings temperature setting interface parameter settings interface\u003c\/span\u003e\u003c\/div\u003e\n\u003cdiv\u003e\u003cspan\u003eSET short press digital tube (down) to quickly set the temperature. Preset -20 °, 0 °, 20 °, 40 °, 60 °, 80 °, 100 ° and other data sets to facilitate the user to quickly call. For example: Users need to set 68.8 °, first short press SET adjusted to 60 °, and then through the key to add fine-tuning to the appropriate temperature. Set to wait 5s automatic memory to save data. Relative to the 1st generation thermostat 2 generation more convenient and flexible operation, dual LED display the measured temperature at the same time, set the temperature more easy to observe.\u003c\/span\u003e\u003c\/div\u003e\n\u003cdiv\u003e\u003cspan\u003eSET long press to enter the parameter setting interface, P0-P5 is the corresponding parameter setting item. Under the parameter setting menu, P0-P5 can be switched by pressing SET briefly. Want to modify a parameter just switch to the corresponding item, through the addition and subtraction button to set. After setting, press and hold SET to save the data, or wait 6s to save the data automatically.\u003c\/span\u003e\u003c\/div\u003e\n\u003cdiv\u003e\u003cspan\u003e \u003c\/span\u003e\u003c\/div\u003e\n\u003cdiv\u003e\u003cspan\u003e \u003c\/span\u003e\u003c\/div\u003e\n\u003cdiv\u003e\u003cspan\u003eFriendly Reminder:\u003c\/span\u003e\u003c\/div\u003e\n\u003cdiv\u003e\u003cspan\u003eP3 set to 1 that the thermostat operation for 1 minute to stop, press SET to trigger again.\u003c\/span\u003e\u003c\/div\u003e\n\u003cdiv\u003e\u003cspan\u003eP4 set to 1 that the thermostat 1 minute after the start of work. After setting the digital tube will not light, until 1 minute after the normal work. Press SET to trigger again.\u003c\/span\u003e\u003c\/div\u003e\n\u003cdiv\u003e\u003cspan\u003eThe P5 default setting is OFF, and once the user has set the temperature, the P5 option can be set to ON in order to prevent others from changing it at will. Once set to ON data is locked, need to be set again when P5 needs to be OFF.\u003c\/span\u003e\u003c\/div\u003e\n\u003cdiv\u003e\u003cspan\u003e \u003c\/span\u003e\u003c\/div\u003e\n\u003cdiv\u003e\u003cspan\u003e \u003c\/span\u003e\u003c\/div\u003e\n\u003cdiv\u003e\u003cspan\u003eKnowledge Expansion: the concept of backtracking\u003c\/span\u003e\u003c\/div\u003e\n\u003cdiv\u003e\u003cspan\u003eBack to the simple understanding of the difference is to go back to the difference. Thermostat can be set heating and cooling two modes of work, so the backlash has two meanings:\u003c\/span\u003e\u003c\/div\u003e\n\u003cdiv\u003e\u003cspan\u003eIn the cooling mode (when P0 = C), if the set temperature is 30 °, the hysteresis is 2, indicating that the actual temperature\u0026gt; = 32 °, the relay is closed, when the actual temperature \u0026lt;= 30 °, the relay is disconnected;\u003c\/span\u003e\u003c\/div\u003e\n\u003cdiv\u003e\u003cspan\u003eIn the heating mode (P0 = H), if the set temperature is 30 °, the hysteresis is 2, indicating the actual temperature\u0026gt; = 30 °, the relay is off, when the actual temperature \u0026lt;= 28 ° closed.\u003c\/span\u003e\u003c\/div\u003e\n\u003c\/div\u003e\n\u003cdiv\u003e\u003cspan\u003e \u003c\/span\u003e\u003c\/div\u003e\n\u003cdiv\u003e\u003cspan\u003e \u003c\/span\u003e\u003c\/div\u003e\n\u003cdiv\u003e\u003cspan\u003ePackage included:\u003c\/span\u003e\u003c\/div\u003e\n\u003cdiv\u003e\n\u003cspan\u003e\u003c\/span\u003e\u003cbr\u003e\n\u003c\/div\u003e\n\u003cdiv\u003e\u003cspan\u003e1 x Timing Delay Relay Module\u003c\/span\u003e\u003c\/div\u003e","published_at":"2022-09-19T12:31:24+08:00","created_at":"2020-04-10T20:28:03+08:00","vendor":"diymore","type":"Relay Module","tags":[],"price":1195,"price_min":1195,"price_max":1195,"available":true,"price_varies":false,"compare_at_price":null,"compare_at_price_min":0,"compare_at_price_max":0,"compare_at_price_varies":false,"variants":[{"id":32037754044487,"title":"Default Title","option1":"Default Title","option2":null,"option3":null,"sku":"011863","requires_shipping":true,"taxable":true,"featured_image":null,"available":true,"name":"W1018 DC 12V Timing Delay Relay Module Cycle Timer Digital LED Time Dual Display Thermolator With Swtich Case Instruments","public_title":null,"options":["Default Title"],"price":1195,"weight":500,"compare_at_price":null,"inventory_management":null,"barcode":"","requires_selling_plan":false,"selling_plan_allocations":[]}],"images":["\/\/www.diymore.cc\/cdn\/shop\/products\/011863_10_238.jpg?v=1588701838","\/\/www.diymore.cc\/cdn\/shop\/products\/011863_1_577.jpg?v=1588701838","\/\/www.diymore.cc\/cdn\/shop\/products\/011863_2_568.jpg?v=1588701838","\/\/www.diymore.cc\/cdn\/shop\/products\/011863_3_280.jpg?v=1588701838","\/\/www.diymore.cc\/cdn\/shop\/products\/011863_6_222.jpg?v=1588701838","\/\/www.diymore.cc\/cdn\/shop\/products\/011863_7_939.jpg?v=1588701838","\/\/www.diymore.cc\/cdn\/shop\/products\/011863_8_685.jpg?v=1588701838"],"featured_image":"\/\/www.diymore.cc\/cdn\/shop\/products\/011863_10_238.jpg?v=1588701838","options":["Title"],"media":[{"alt":"W1018 Dc 12V Timing Delay Relay Module Cycle Timer Digital Led Time Dual Display Thermolator With","id":6682588938311,"position":1,"preview_image":{"aspect_ratio":1.0,"height":1000,"width":1000,"src":"\/\/www.diymore.cc\/cdn\/shop\/products\/011863_10_238.jpg?v=1588701838"},"aspect_ratio":1.0,"height":1000,"media_type":"image","src":"\/\/www.diymore.cc\/cdn\/shop\/products\/011863_10_238.jpg?v=1588701838","width":1000},{"alt":"W1018 Dc 12V Timing Delay Relay Module Cycle Timer Digital Led Time Dual Display Thermolator With","id":6682589167687,"position":2,"preview_image":{"aspect_ratio":1.0,"height":1000,"width":1000,"src":"\/\/www.diymore.cc\/cdn\/shop\/products\/011863_1_577.jpg?v=1588701838"},"aspect_ratio":1.0,"height":1000,"media_type":"image","src":"\/\/www.diymore.cc\/cdn\/shop\/products\/011863_1_577.jpg?v=1588701838","width":1000},{"alt":"W1018 Dc 12V Timing Delay Relay Module Cycle Timer Digital Led Time Dual Display Thermolator With","id":6682589331527,"position":3,"preview_image":{"aspect_ratio":1.0,"height":1000,"width":1000,"src":"\/\/www.diymore.cc\/cdn\/shop\/products\/011863_2_568.jpg?v=1588701838"},"aspect_ratio":1.0,"height":1000,"media_type":"image","src":"\/\/www.diymore.cc\/cdn\/shop\/products\/011863_2_568.jpg?v=1588701838","width":1000},{"alt":"W1018 Dc 12V Timing Delay Relay Module Cycle Timer Digital Led Time Dual Display Thermolator With","id":6682589593671,"position":4,"preview_image":{"aspect_ratio":1.0,"height":1000,"width":1000,"src":"\/\/www.diymore.cc\/cdn\/shop\/products\/011863_3_280.jpg?v=1588701838"},"aspect_ratio":1.0,"height":1000,"media_type":"image","src":"\/\/www.diymore.cc\/cdn\/shop\/products\/011863_3_280.jpg?v=1588701838","width":1000},{"alt":"W1018 Dc 12V Timing Delay Relay Module Cycle Timer Digital Led Time Dual Display Thermolator With","id":6682590019655,"position":5,"preview_image":{"aspect_ratio":1.0,"height":1000,"width":1000,"src":"\/\/www.diymore.cc\/cdn\/shop\/products\/011863_6_222.jpg?v=1588701838"},"aspect_ratio":1.0,"height":1000,"media_type":"image","src":"\/\/www.diymore.cc\/cdn\/shop\/products\/011863_6_222.jpg?v=1588701838","width":1000},{"alt":"W1018 Dc 12V Timing Delay Relay Module Cycle Timer Digital Led Time Dual Display Thermolator With","id":6682590249031,"position":6,"preview_image":{"aspect_ratio":1.0,"height":1000,"width":1000,"src":"\/\/www.diymore.cc\/cdn\/shop\/products\/011863_7_939.jpg?v=1588701838"},"aspect_ratio":1.0,"height":1000,"media_type":"image","src":"\/\/www.diymore.cc\/cdn\/shop\/products\/011863_7_939.jpg?v=1588701838","width":1000},{"alt":"W1018 Dc 12V Timing Delay Relay Module Cycle Timer Digital Led Time Dual Display Thermolator With","id":6682590445639,"position":7,"preview_image":{"aspect_ratio":1.0,"height":1000,"width":1000,"src":"\/\/www.diymore.cc\/cdn\/shop\/products\/011863_8_685.jpg?v=1588701838"},"aspect_ratio":1.0,"height":1000,"media_type":"image","src":"\/\/www.diymore.cc\/cdn\/shop\/products\/011863_8_685.jpg?v=1588701838","width":1000}],"requires_selling_plan":false,"selling_plan_groups":[],"content":"\u003cp\u003e\u003cimg src=\"https:\/\/ae01.alicdn.com\/kf\/HTB12JMgilsmBKNjSZFsq6yXSVXaS.jpg\"\u003e\u003c\/p\u003e\n\u003cdiv\u003e\n\u003cdiv\u003e\n\u003cspan\u003e\u003c\/span\u003e \u003c\/div\u003e\n\u003cdiv\u003e\n\u003cspan\u003e\u003c\/span\u003e \u003c\/div\u003e\n\u003cdiv\u003e\n\u003cspan\u003e\u003c\/span\u003e \u003c\/div\u003e\n\u003cdiv\u003e\u003cspan\u003eW1018 microcomputer digital thermostat manual\u003c\/span\u003e\u003c\/div\u003e\n\u003cdiv\u003e\u003cspan\u003eTemperature range: -20 ~ +100 °\u003c\/span\u003e\u003c\/div\u003e\n\u003cdiv\u003e\u003cspan\u003eResolution: -9.9 ° ~ 99.9 ° 0.1 °, other temperature 1 °\u003c\/span\u003e\u003c\/div\u003e\n\u003cdiv\u003e\u003cspan\u003eTemperature measurement accuracy: 1 °\u003c\/span\u003e\u003c\/div\u003e\n\u003cdiv\u003e\u003cspan\u003eRefresh frequency: about 0.5S\u003c\/span\u003e\u003c\/div\u003e\n\u003cdiv\u003e\u003cspan\u003eInput power: Dc 12V \u003c\/span\u003e\u003c\/div\u003e\n\u003cdiv\u003e\u003cspan\u003eMeasurement input: 1 meter NTC (10K 0.5%) waterproof sensor\u003c\/span\u003e\u003c\/div\u003e\n\u003cdiv\u003e\u003cspan\u003eOutput: All the way 10A relay\u003c\/span\u003e\u003c\/div\u003e\n\u003cdiv\u003e\u003cspan\u003eEnvironmental requirements: -10 ° ~ +60 ° Humidity 20% ~ 75%\u003c\/span\u003e\u003c\/div\u003e\n\u003cdiv\u003e\u003cspan\u003eAppearance size: 79 * 43mm\u003c\/span\u003e\u003c\/div\u003e\n\u003cdiv\u003e\u003cspan\u003eHole size: 76 * 39mm\u003c\/span\u003e\u003c\/div\u003e\n\u003cdiv\u003e\u003cspan\u003e \u003c\/span\u003e\u003c\/div\u003e\n\u003cdiv\u003e\u003cspan\u003e \u003c\/span\u003e\u003c\/div\u003e\n\u003cdiv\u003e\u003cimg alt=\"11\" src=\"https:\/\/ae01.alicdn.com\/kf\/HTB1ePjXEY1YBuNjSszeq6yblFXaZ.jpg\"\u003e\u003c\/div\u003e\n\u003cdiv\u003e\u003cspan\u003e \u003c\/span\u003e\u003c\/div\u003e\n\u003cdiv\u003e\u003cspan\u003e \u003c\/span\u003e\u003c\/div\u003e\n\u003cdiv\u003e\u003cspan\u003e \u003c\/span\u003e\u003c\/div\u003e\n\u003cdiv\u003e\u003cspan\u003ePanel introduction:\u003c\/span\u003e\u003c\/div\u003e\n\u003cdiv\u003e\u003cspan\u003e \u003c\/span\u003e\u003c\/div\u003e\n\u003cdiv\u003e\u003cspan\u003eCircuit connection: \u003c\/span\u003e\u003c\/div\u003e\n\u003cdiv\u003e\u003cspan\u003eThe reference circuit is connected with the power supply and load. At this time, the digital tube (upper) shows the actual measured temperature, the digital tube (lower) shows the preset temperature. Missing or damaged temperature sensor The digital display shows \"- - -\" and the purchaser must check if the temperature sensor is installed before use.\u003c\/span\u003e\u003c\/div\u003e\n\u003cdiv\u003e\u003cspan\u003eThe thermostat output 10A relay, to meet a variety of high-power load, make sure the line is correct.\u003c\/span\u003e\u003c\/div\u003e\n\u003cdiv\u003e\u003cspan\u003e \u003c\/span\u003e\u003c\/div\u003e\n\u003cdiv\u003e\u003cspan\u003eLED, LED status Description:\u003c\/span\u003e\u003c\/div\u003e\n\u003cdiv\u003e\u003cspan\u003eIndicator: Off means the relay is off, it means the relay is on\u003c\/span\u003e\u003c\/div\u003e\n\u003cdiv\u003e\u003cspan\u003eDigital tube: display \"- - -\", 1, check the temperature sensor is missing or damaged 2, heating mode high temperature protection 3, cooling mode low temperature protection. In protection mode the relay is automatically disconnected.\u003c\/span\u003e\u003c\/div\u003e\n\u003cdiv\u003e\u003cspan\u003e \u003c\/span\u003e\u003c\/div\u003e\n\u003cdiv\u003e\u003cspan\u003eThe use of buttons: Thermostat panel has three buttons, buttons + button - set the button SET\u003c\/span\u003e\u003c\/div\u003e\n\u003cdiv\u003e\u003cspan\u003eButton +: to achieve rapid accumulation of values\u003c\/span\u003e\u003c\/div\u003e\n\u003cdiv\u003e\u003cspan\u003eButton -: to achieve the rapid decline in value\u003c\/span\u003e\u003c\/div\u003e\n\u003cdiv\u003e\u003cspan\u003eRestart: Restart the button\u003c\/span\u003e\u003c\/div\u003e\n\u003cdiv\u003e\u003cspan\u003eSet the key SET: to achieve two-tier interface settings temperature setting interface parameter settings interface\u003c\/span\u003e\u003c\/div\u003e\n\u003cdiv\u003e\u003cspan\u003eSET short press digital tube (down) to quickly set the temperature. Preset -20 °, 0 °, 20 °, 40 °, 60 °, 80 °, 100 ° and other data sets to facilitate the user to quickly call. For example: Users need to set 68.8 °, first short press SET adjusted to 60 °, and then through the key to add fine-tuning to the appropriate temperature. Set to wait 5s automatic memory to save data. Relative to the 1st generation thermostat 2 generation more convenient and flexible operation, dual LED display the measured temperature at the same time, set the temperature more easy to observe.\u003c\/span\u003e\u003c\/div\u003e\n\u003cdiv\u003e\u003cspan\u003eSET long press to enter the parameter setting interface, P0-P5 is the corresponding parameter setting item. Under the parameter setting menu, P0-P5 can be switched by pressing SET briefly. Want to modify a parameter just switch to the corresponding item, through the addition and subtraction button to set. After setting, press and hold SET to save the data, or wait 6s to save the data automatically.\u003c\/span\u003e\u003c\/div\u003e\n\u003cdiv\u003e\u003cspan\u003e \u003c\/span\u003e\u003c\/div\u003e\n\u003cdiv\u003e\u003cspan\u003e \u003c\/span\u003e\u003c\/div\u003e\n\u003cdiv\u003e\u003cspan\u003eFriendly Reminder:\u003c\/span\u003e\u003c\/div\u003e\n\u003cdiv\u003e\u003cspan\u003eP3 set to 1 that the thermostat operation for 1 minute to stop, press SET to trigger again.\u003c\/span\u003e\u003c\/div\u003e\n\u003cdiv\u003e\u003cspan\u003eP4 set to 1 that the thermostat 1 minute after the start of work. After setting the digital tube will not light, until 1 minute after the normal work. Press SET to trigger again.\u003c\/span\u003e\u003c\/div\u003e\n\u003cdiv\u003e\u003cspan\u003eThe P5 default setting is OFF, and once the user has set the temperature, the P5 option can be set to ON in order to prevent others from changing it at will. Once set to ON data is locked, need to be set again when P5 needs to be OFF.\u003c\/span\u003e\u003c\/div\u003e\n\u003cdiv\u003e\u003cspan\u003e \u003c\/span\u003e\u003c\/div\u003e\n\u003cdiv\u003e\u003cspan\u003e \u003c\/span\u003e\u003c\/div\u003e\n\u003cdiv\u003e\u003cspan\u003eKnowledge Expansion: the concept of backtracking\u003c\/span\u003e\u003c\/div\u003e\n\u003cdiv\u003e\u003cspan\u003eBack to the simple understanding of the difference is to go back to the difference. Thermostat can be set heating and cooling two modes of work, so the backlash has two meanings:\u003c\/span\u003e\u003c\/div\u003e\n\u003cdiv\u003e\u003cspan\u003eIn the cooling mode (when P0 = C), if the set temperature is 30 °, the hysteresis is 2, indicating that the actual temperature\u0026gt; = 32 °, the relay is closed, when the actual temperature \u0026lt;= 30 °, the relay is disconnected;\u003c\/span\u003e\u003c\/div\u003e\n\u003cdiv\u003e\u003cspan\u003eIn the heating mode (P0 = H), if the set temperature is 30 °, the hysteresis is 2, indicating the actual temperature\u0026gt; = 30 °, the relay is off, when the actual temperature \u0026lt;= 28 ° closed.\u003c\/span\u003e\u003c\/div\u003e\n\u003c\/div\u003e\n\u003cdiv\u003e\u003cspan\u003e \u003c\/span\u003e\u003c\/div\u003e\n\u003cdiv\u003e\u003cspan\u003e \u003c\/span\u003e\u003c\/div\u003e\n\u003cdiv\u003e\u003cspan\u003ePackage included:\u003c\/span\u003e\u003c\/div\u003e\n\u003cdiv\u003e\n\u003cspan\u003e\u003c\/span\u003e\u003cbr\u003e\n\u003c\/div\u003e\n\u003cdiv\u003e\u003cspan\u003e1 x Timing Delay Relay Module\u003c\/span\u003e\u003c\/div\u003e"}