
DC 3.7V Handheld Miniature Spot Welder DIY Kit with 8000Mah Battery Welding


DC 3.7V Handheld Miniature Spot Welder DIY Kit with 8000Mah Battery Welding
SKU:YC0025
Regular price
$33.99 USD
![]()
- guaranteeQuality checked
- Special gift cardsSpecial gift cards
- Free return Within 60 days
- Consultancy86-0755-85201155
Description:
Installation steps and matters needing attention:
1. To operate this product, you need to have considerable electrical knowledge. Do not short-circuit or reverse the electrodes, otherwise the 300A short-circuit current will make you doubt your life;
2. Remove the circuit board, use a soldering iron to solder the buzzer (long feet positive, short feet negative) and handle the soldering ports to avoid puncturing the battery after installation;
3. The copper ear of the black soldering pen is connected to the upper surface of the circuit board by M5 screws, and the copper ear of the red soldering pen is connected to the positive electrode of the battery (the back of the circuit board);
4. Fully charge through the USB cable after assembly (to ensure the durability of the battery, we set a lower charging current, the charging process is about 4 hours, the red light is on when charging, and the light is fully turned to green);
5. After the battery is connected, the circuit board defaults to the on state and automatically shuts down after a delay of about 10 minutes. Press the switch to turn on and select the welding current intensity.
Instructions for use:
Function keys:
Function keys:
1. Used to switch the machine
2. Used to switch gears and spot welding mode
2. Used to switch gears and spot welding mode
Turn on the spot welder: long press the function button for 2 seconds to release the spot welder to turn on,
Shift: the first gear is the default after power on, long press the function button for 2 seconds to release it to increase by one gear. There are 5 levels in total, all with sound and LED lights!
For example: in the 3rd gear, the buzzer sounds three times and the LED flashes three times. There are 5 gears in total, and the spot welding strength is gradually strengthened from gear 1 to gear 5, and gear 5 is the strongest! After the 5th gear, press and hold the button again. It will shut down, and when it is off, long press the button to turn it on, and the gear will return to the No. 1st gear
Switch mode: In any gear, short press the function key to switch mode. A total of 2 modes: timing output mode and trigger mode.

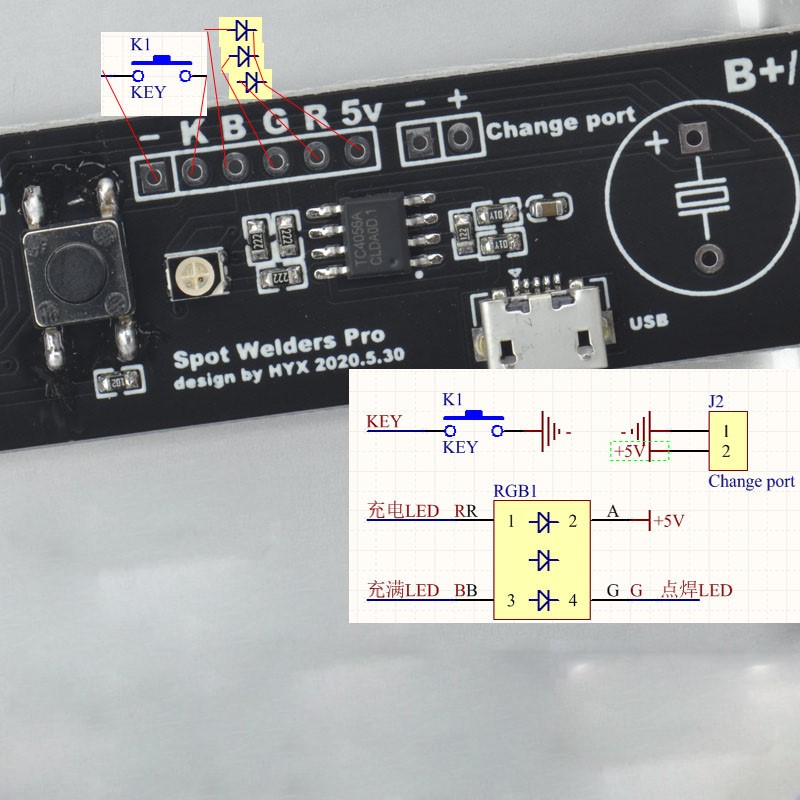
Extension interface definition
- K: Button pin (the other pin is connected to the negative pole)
- B: Working status light pin (the other pin is connected to the positive pole)
- G: Fully charged indicator pin (the other pin is connected to the positive pole)
- R: charging indicator pin (the other pin is connected to the positive pole)
- Change port: charge the battery and connect to a 5V power supply
- The expansion interface is used to connect the LED and the button externally, which can be used to install a shell.
Package Included:
1x High rate power battery
1x Circuit board
2x Copper soldering pen (with 10AWG wire)
2x Insulated heat shrink tube
1x USB charging cable
1x 1 meter 0.1mmx6mm nickel sheet
Other Customers also buy: