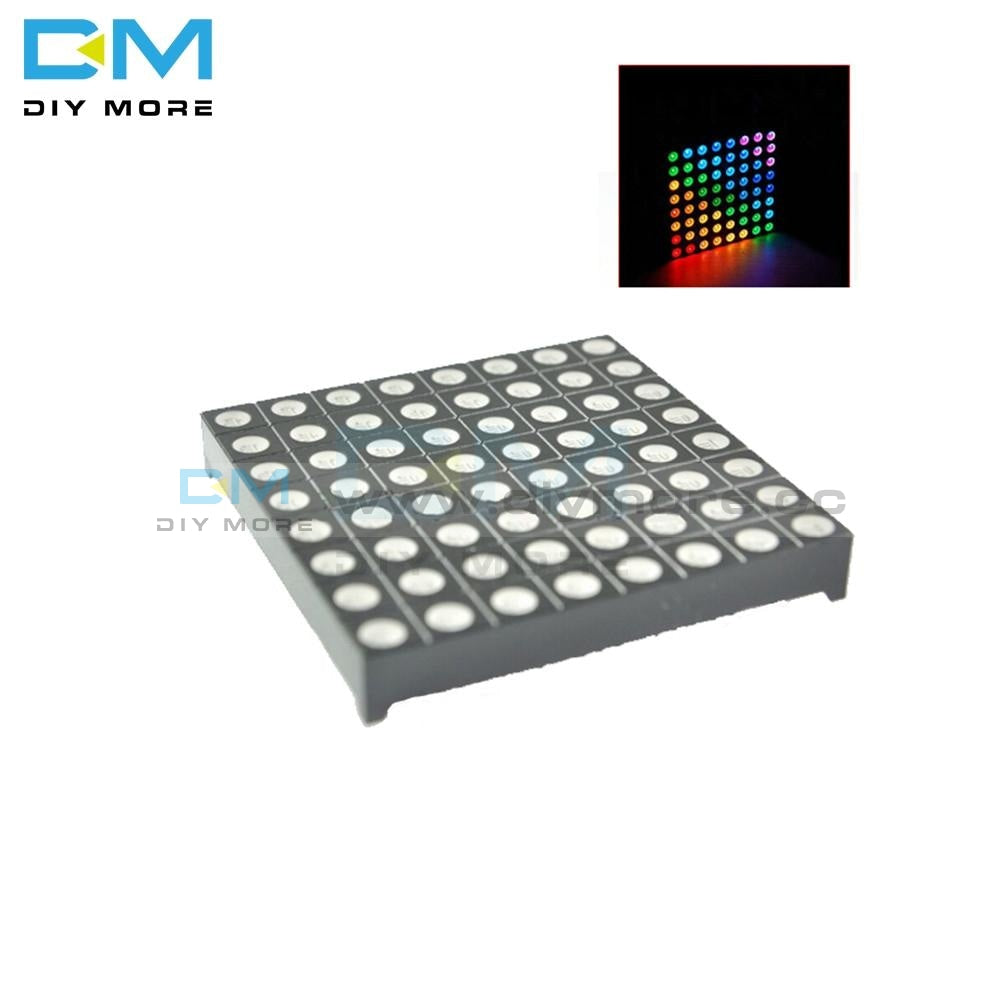
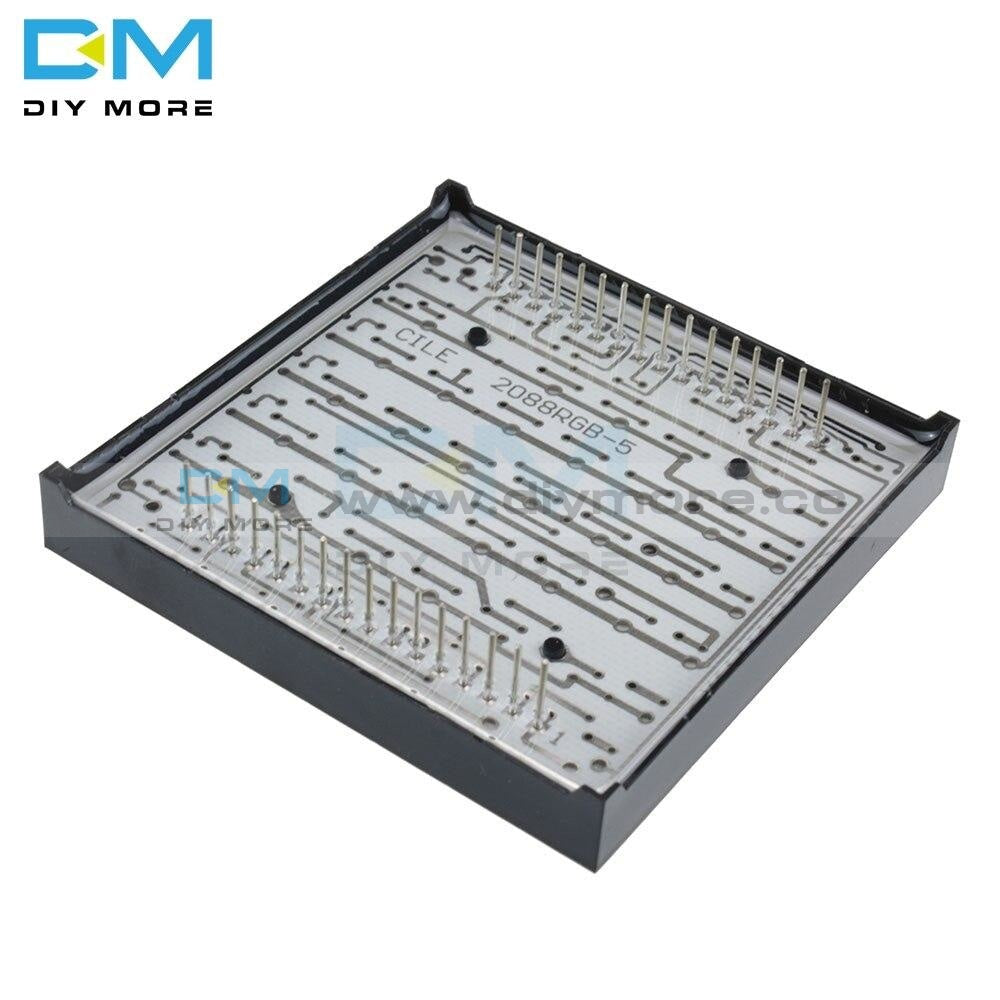
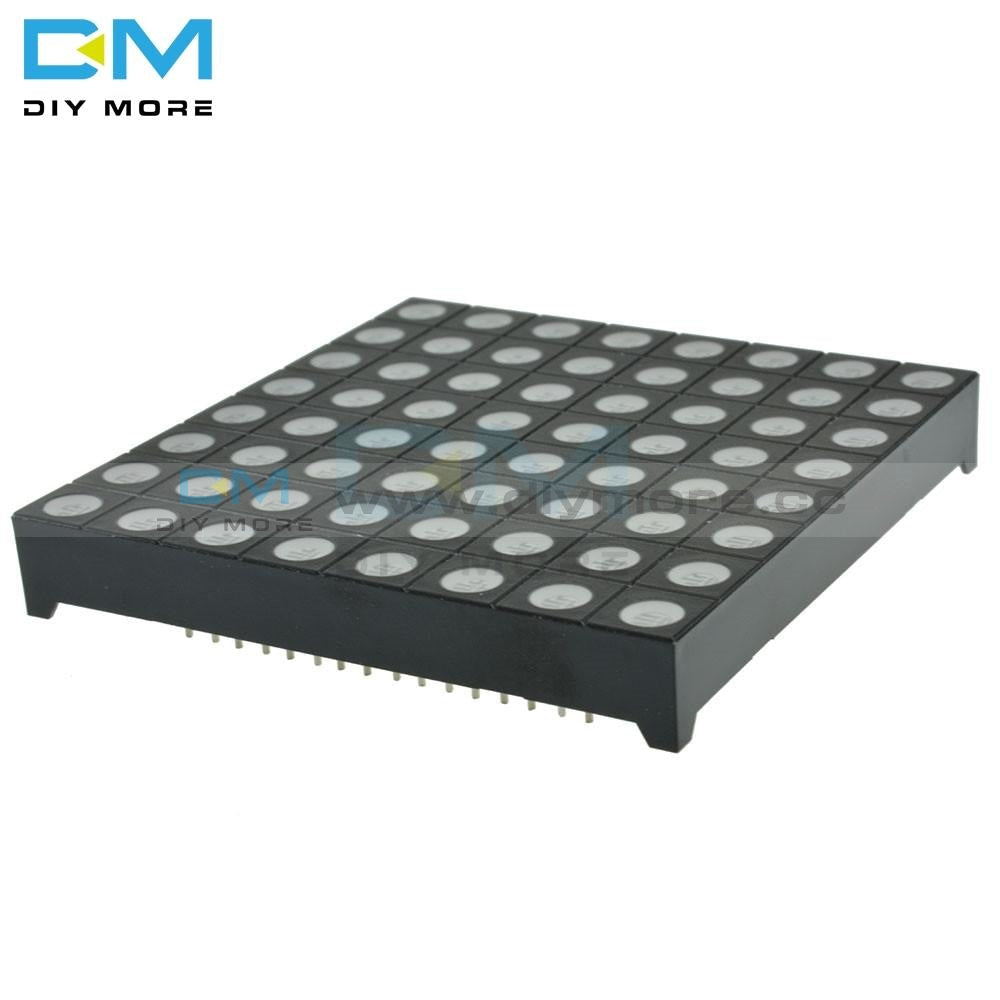
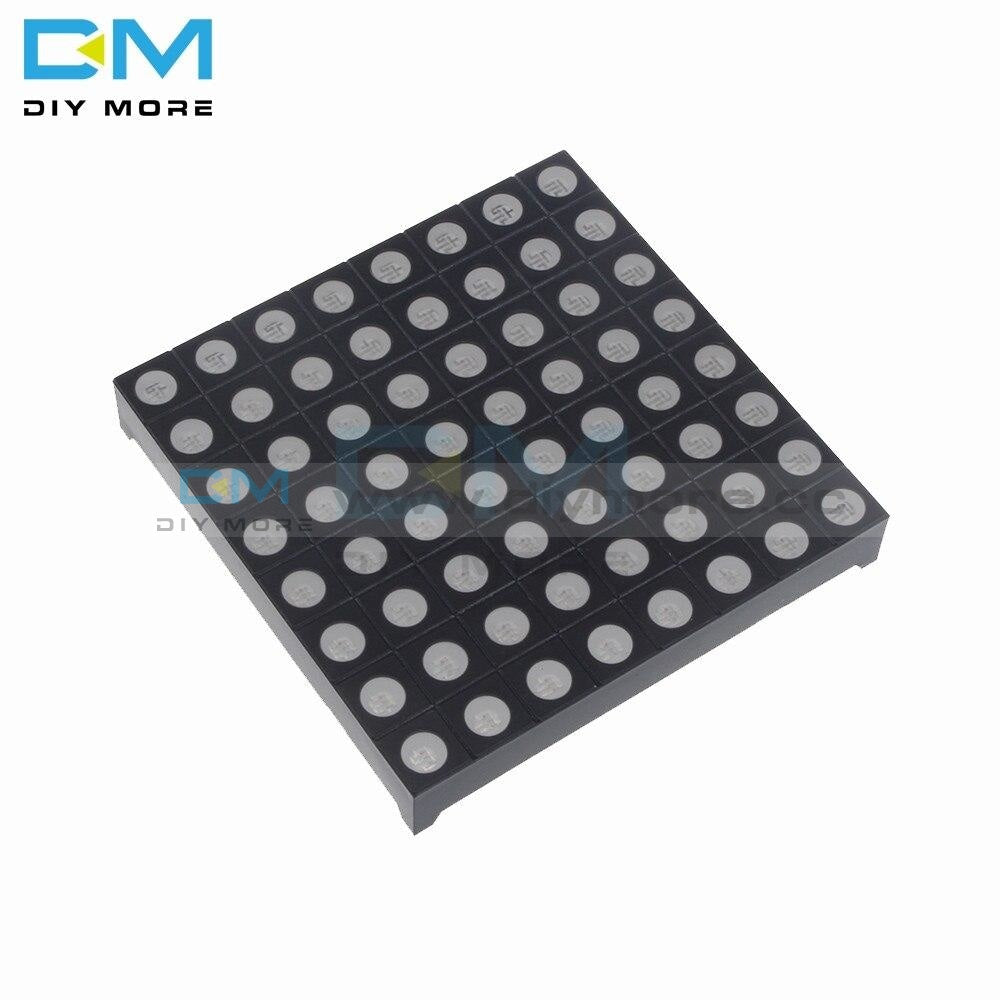
5MM LED RGB Matrix Module Driver Board 8x8 + Dot Matrix for Arduino AVR top
5MM LED RGB Matrix Module Driver Board 8x8 + Dot Matrix for Arduino AVR top
SKU:030081- guaranteeQuality checked
- Special gift cardsSpecial gift cards
- Free return Within 60 days
- Consultancy86-0755-85201155

The driver circuit based on 3 MBI5168 constant current sink drivers and a M54564 darlington source driver, the Colorduino pairs the M54564 with a single DM163 constant current driver. In order to better drive the RGB matrix and reach their best performance, we use the professional LED driver chip DM163 on board, by using the DM163, the Colorduino gains three 8+6-bit channels of hardware PWM control of the LED's freeing up the ATMega328P from having to implement it in software. And the DM163 comprises shift registers, data latches, 8×3 channel constant current and 64 x 256 gray level PWM for per color! Each channel provide a maximum current of 60 mA.
So, each RGB dot has 256×256x256 = 16,777,216 colours (16 million) in theory, and it's easy to use the 6bit correction register to calibrate the current error for each color LEDs
This shield can be programed via FT232 USB adapter
Power is supplied either by pin headers or via 2 sets of mini screw terminals, a slide switch selecting between the two. With the herder side, you just can use the 5V power supply, and in the terminal side, now support 6.2-7.5V power supply, more than 7V will cause the DM163 fever and more than 9V supply may burn your board. Pins brought out the edge of the board include RX, TX and DTS, which can be used to reprogram the onboard ATmega chip, and SCA and SCL for I2C communication. A green LED on the front of the board indicates power, although it is mostly obscured as soon as you plug the matrix panel in.
If you have an Arduino UNO, but just want to drive a RGB LED Matrix, you can consider this Colors shield, it's compatible with Colorduino v2.0.
To make it work, you must need this RGB LED Matrix,
For more information of this product, please visit theWiki PAGE
Documents:
Colorduino library.zip
Sch-Colorduino-V2.0.pdf
DM163.pdf
Package:
1 x RGB Led
1x Matrix Driver shield


Purchasing & Delivery
Before you make your purchase, it’s helpful to know the measurements of the area you plan to place the furniture. You should also measure any doorways and hallways through which the furniture will pass to get to its final destination.Picking up at the store
Shopify Shop requires that all products are properly inspected BEFORE you take it home to insure there are no surprises. Our team is happy to open all packages and will assist in the inspection process. We will then reseal packages for safe transport. We encourage all customers to bring furniture pads or blankets to protect the items during transport as well as rope or tie downs. Shopify Shop will not be responsible for damage that occurs after leaving the store or during transit. It is the purchaser’s responsibility to make sure the correct items are picked up and in good condition.Delivery
Customers are able to pick the next available delivery day that best fits their schedule. However, to route stops as efficiently as possible, Shopify Shop will provide the time frame. Customers will not be able to choose a time. You will be notified in advance of your scheduled time frame. Please make sure that a responsible adult (18 years or older) will be home at that time.In preparation for your delivery, please remove existing furniture, pictures, mirrors, accessories, etc. to prevent damages. Also insure that the area where you would like your furniture placed is clear of any old furniture and any other items that may obstruct the passageway of the delivery team. Shopify Shop will deliver, assemble, and set-up your new furniture purchase and remove all packing materials from your home. Our delivery crews are not permitted to move your existing furniture or other household items. Delivery personnel will attempt to deliver the purchased items in a safe and controlled manner but will not attempt to place furniture if they feel it will result in damage to the product or your home. Delivery personnel are unable to remove doors, hoist furniture or carry furniture up more than 3 flights of stairs. An elevator must be available for deliveries to the 4th floor and above.
Other Customers also buy:
-
Translation missing: en.products.product.regular_price
$1.99$5.99 On Sale{"id":4419983867975,"title":"5MM LED RGB Matrix Module Driver Board 8x8 + Dot Matrix for Arduino AVR top","handle":"5mm-led-rgb-matrix-module-driver-board-8x8-dot-matrix-for-arduino-avr-top-1","description":"\u003cdiv\u003e\n\u003cwidget data-widget-type=\"customText\" id=\"33684419\" title=\"Head\" type=\"custom\"\u003e\u003c\/widget\u003e \r \u003cdiv\u003e\r \r \u003c\/div\u003e \r \u003cdiv\u003e \r \u003cp\u003e\u003cimg src=\"https:\/\/ae01.alicdn.com\/kf\/HTB12JMgilsmBKNjSZFsq6yXSVXaS.jpg\"\u003e\u003c\/p\u003e \r \u003c\/div\u003e \r \u003cdiv\u003e\r \r \u003c\/div\u003e \r \u003cdiv\u003e\r \r \u003c\/div\u003e \r \u003cdiv\u003e\r \r \u003c\/div\u003e \r \u003cp\u003e\u003cspan style=\"color: #000000;\"\u003e\u003cspan style=\"font-size: 16.0px;font-family: arial , helvetica , sans-serif;\"\u003eThe driver circuit based on 3 MBI5168 constant current sink drivers and a M54564 darlington source driver, the Colorduino pairs the M54564 with a single DM163 constant current driver. In order to better drive the RGB matrix and reach their best performance, we use the professional LED driver chip DM163 on board, by using the DM163, the Colorduino gains three 8+6-bit channels of hardware PWM control of the LED's freeing up the ATMega328P from having to implement it in software. And the DM163 comprises shift registers, data latches, 8×3 channel constant current and 64 x 256 gray level PWM for per color! Each channel provide a maximum current of 60 mA.\u003c\/span\u003e\u003c\/span\u003e\u003c\/p\u003e \r \u003cp style=\"font-size: 12.0pt;font-family: verdana;color: #77776e;text-align: left;background-color: #ffffff;\"\u003e\u003cspan style=\"color: #000000;\"\u003e\u003cspan style=\"font-size: 16.0px;font-family: arial , helvetica , sans-serif;\"\u003eSo, each RGB dot has 256×256x256 = 16,777,216 colours (16 million) in theory, and it's easy to use the 6bit correction register to calibrate the current error for each color LEDs\u003c\/span\u003e\u003c\/span\u003e\u003c\/p\u003e \r \u003cp style=\"font-size: 12.0pt;font-family: verdana;color: #000000;text-align: left;background-color: #ffffff;\"\u003e\u003cspan style=\"color: #000000;\"\u003e\u003cspan style=\"font-size: 16.0px;font-family: arial , helvetica , sans-serif;\"\u003eThis shield can be programed via\u003c\/span\u003e\u003c\/span\u003e\u003cspan style=\"font-size: 16.0px;font-family: arial , helvetica , sans-serif;\"\u003e\u003ca\u003e FT232 USB adapter\u003c\/a\u003e\u003c\/span\u003e\u003cbr\u003e\u003cspan style=\"color: #000000;\"\u003e\u003cspan style=\"font-size: 16.0px;font-family: arial , helvetica , sans-serif;\"\u003ePower is supplied either by pin headers or via 2 sets of mini screw terminals, a slide switch selecting between the two. With the herder side, you just can use the 5V power supply, and in the terminal side, now support 6.2-7.5V power supply, more than 7V will cause the DM163 fever and more than 9V supply may burn your board. Pins brought out the edge of the board include RX, TX and DTS, which can be used to reprogram the onboard ATmega chip, and SCA and SCL for I2C communication. A green LED on the front of the board indicates power, although it is mostly obscured as soon as you plug the matrix panel in.\u003c\/span\u003e\u003cbr\u003e\u003cspan style=\"font-size: 16.0px;font-family: arial , helvetica , sans-serif;\"\u003eIf you have an Arduino UNO, but just want to drive a RGB LED Matrix, you can consider this Colors shield, it's compatible with Colorduino v2.0.\u003c\/span\u003e\u003c\/span\u003e\u003c\/p\u003e \r \u003cp style=\"font-size: 12.0pt;font-family: verdana;color: #77776e;text-align: left;background-color: #ffffff;\"\u003e\u003cspan style=\"color: #000000;\"\u003e\u003cspan style=\"font-size: 16.0px;font-family: arial , helvetica , sans-serif;\"\u003eTo make it work, you must need this \u003c\/span\u003e\u003c\/span\u003e\u003cspan style=\"font-size: 16.0px;font-family: arial , helvetica , sans-serif;\"\u003e\u003ca\u003e\u003cspan style=\"color: #000000;\"\u003eRGB LED Matrix,\u003c\/span\u003e\u003c\/a\u003e\u003c\/span\u003e\u003c\/p\u003e \r \u003cp style=\"font-size: 12.0pt;font-family: verdana;color: #77776e;text-align: left;background-color: #ffffff;\"\u003e\u003cspan style=\"color: #000000;\"\u003e\u003cspan style=\"font-size: 16.0px;font-family: arial , helvetica , sans-serif;\"\u003eFor more information of this product, please visit the\u003c\/span\u003e\u003c\/span\u003e\u003cspan style=\"font-size: 16.0px;font-family: arial , helvetica , sans-serif;\"\u003e\u003ca\u003e\u003cspan style=\"color: #000000;\"\u003eWiki PAGE\u003c\/span\u003e\u003c\/a\u003e\u003c\/span\u003e\u003c\/p\u003e \r \u003cp style=\"font-size: 12.0pt;font-family: verdana;color: #77776e;text-align: left;background-color: #ffffff;\"\u003e\u003cstrong\u003e\u003cspan style=\"color: #000000;\"\u003e\u003cspan style=\"font-size: 16.0px;font-family: arial , helvetica , sans-serif;\"\u003eDocuments:\u003c\/span\u003e\u003c\/span\u003e\u003c\/strong\u003e\u003c\/p\u003e \r \u003cp style=\"color: #77776e;text-align: left;background-color: #ffffff;\"\u003e\u003cspan style=\"color: #000000;\"\u003e\u003cspan style=\"font-size: 16.0px;font-family: arial , helvetica , sans-serif;\"\u003e\u003ca\u003eColorduino library.zip\u003c\/a\u003e\u003c\/span\u003e\u003c\/span\u003e\u003cbr\u003e\u003cspan style=\"font-size: 16.0px;font-family: arial , helvetica , sans-serif;\"\u003e\u003ca\u003e\u003cspan style=\"color: #000000;\"\u003eSch-Colorduino-V2.0.pdf\u003c\/span\u003e\u003c\/a\u003e\u003c\/span\u003e\u003cbr\u003e\u003cspan style=\"font-size: 16.0px;font-family: arial , helvetica , sans-serif;\"\u003e\u003ca\u003e\u003cspan style=\"color: #000000;\"\u003eDM163.pdf\u003c\/span\u003e\u003c\/a\u003e\u003c\/span\u003e\u003c\/p\u003e \r \u003cp\u003e \u003c\/p\u003e \r \u003cp\u003e\u003cspan style=\"color: #000000;\"\u003e\u003cspan style=\"font-size: 16.0px;font-family: arial , helvetica , sans-serif;\"\u003e\u003cstrong\u003ePackage:\u003c\/strong\u003e\u003c\/span\u003e\u003c\/span\u003e\u003c\/p\u003e \r \u003cp\u003e\u003cspan style=\"color: #000000;\"\u003e\u003cspan style=\"font-size: 16.0px;font-family: arial , helvetica , sans-serif;\"\u003e1 x RGB Led \u003c\/span\u003e\u003c\/span\u003e\u003c\/p\u003e \r \u003cp\u003e\u003cspan style=\"color: #000000;\"\u003e\u003cspan style=\"font-size: 16.0px;font-family: arial , helvetica , sans-serif;\"\u003e1x Matrix Driver shield\u003c\/span\u003e\u003c\/span\u003e\u003c\/p\u003e \r \u003cp\u003e \u003c\/p\u003e \r \u003cp\u003e \u003c\/p\u003e \r \u003cp\u003e\u003cimg src=\"https:\/\/ae01.alicdn.com\/kf\/HTB1VXjubuUXBuNjt_a0q6AysXXaA.jpg\"\u003e\u003c\/p\u003e \r \u003cp\u003e \u003c\/p\u003e \r \u003cp\u003e\u003cimg style=\"width: 1000.0px;\" src=\"https:\/\/ae01.alicdn.com\/kf\/HTB1dkrPavfsK1RjSszgq6yXzpXal.jpg\"\u003e\u003c\/p\u003e \r \u003cp\u003e\u003cimg style=\"width: 1000.0px;\" src=\"https:\/\/ae01.alicdn.com\/kf\/HTB1J7TOayLrK1Rjy1zdq6ynnpXa0.jpg\"\u003e\u003c\/p\u003e \r \u003cp\u003e\u003cimg style=\"width: 1000.0px;\" src=\"https:\/\/ae01.alicdn.com\/kf\/HTB1Mu6Fau6sK1RjSsrbq6xbDXXa2.jpg\"\u003e\u003c\/p\u003e \r \u003cp\u003e\u003cimg style=\"width: 1000.0px;\" src=\"https:\/\/ae01.alicdn.com\/kf\/HTB1s7rPavfsK1RjSszgq6yXzpXaL.jpg\"\u003e\u003c\/p\u003e \r \u003cp\u003e \u003c\/p\u003e \r \u003cp\u003e\u003cimg src=\"https:\/\/ae01.alicdn.com\/kf\/HTB1Hc.uimcqBKNjSZFgq6x_kXXaq.jpg\"\u003e\u003c\/p\u003e \r \u003cp\u003e \u003c\/p\u003e \r \u003cwidget data-widget-type=\"customText\" id=\"24006699\" title=\"Related\" type=\"custom\"\u003e\u003c\/widget\u003e \r \u003cp\u003e \u003c\/p\u003e \u003cscript\u003ewindow.adminAccountId=227552571;\u003c\/script\u003e \u003c\/div\u003e","published_at":"2022-09-19T12:31:18+08:00","created_at":"2019-12-27T18:24:55+08:00","vendor":"diymore","type":"Motor Driver Module","tags":[],"price":272,"price_min":272,"price_max":272,"available":true,"price_varies":false,"compare_at_price":544,"compare_at_price_min":544,"compare_at_price_max":544,"compare_at_price_varies":false,"variants":[{"id":31582900846663,"title":"Default Title","option1":"Default Title","option2":null,"option3":null,"sku":"030081","requires_shipping":true,"taxable":false,"featured_image":null,"available":true,"name":"5MM LED RGB Matrix Module Driver Board 8x8 + Dot Matrix for Arduino AVR top","public_title":null,"options":["Default Title"],"price":272,"weight":0,"compare_at_price":544,"inventory_management":null,"barcode":"","requires_selling_plan":false,"selling_plan_allocations":[]}],"images":["\/\/www.diymore.cc\/cdn\/shop\/products\/5MM-LED-RGB-Matrix-Module-Driver-Board-8x8-Dot-Matrix-for-Arduino-AVR-top_915.jpg?v=1588698614","\/\/www.diymore.cc\/cdn\/shop\/products\/5MM-LED-RGB-Matrix-Module-Driver-Board-8x8-Dot-Matrix-for-Arduino-AVR-top_b103e582-6bdf-46c0-b4e8-f1b84bea8d30_182.jpg?v=1588698614","\/\/www.diymore.cc\/cdn\/shop\/products\/5MM-LED-RGB-Matrix-Module-Driver-Board-8x8-Dot-Matrix-for-Arduino-AVR-top_8a893a41-992b-4b2d-8fc8-63e5e968c2c3_630.jpg?v=1588698614","\/\/www.diymore.cc\/cdn\/shop\/products\/5MM-LED-RGB-Matrix-Module-Driver-Board-8x8-Dot-Matrix-for-Arduino-AVR-top_695e9ab7-3820-46a5-a836-baa68e4b51d9_884.jpg?v=1588698614"],"featured_image":"\/\/www.diymore.cc\/cdn\/shop\/products\/5MM-LED-RGB-Matrix-Module-Driver-Board-8x8-Dot-Matrix-for-Arduino-AVR-top_915.jpg?v=1588698614","options":["Title"],"media":[{"alt":"5Mm Led Rgb Matrix Module Driver Board 8X8 + Dot For Arduino Avr Top Integrated Circuits","id":6682362675271,"position":1,"preview_image":{"aspect_ratio":1.0,"height":1000,"width":1000,"src":"\/\/www.diymore.cc\/cdn\/shop\/products\/5MM-LED-RGB-Matrix-Module-Driver-Board-8x8-Dot-Matrix-for-Arduino-AVR-top_915.jpg?v=1588698614"},"aspect_ratio":1.0,"height":1000,"media_type":"image","src":"\/\/www.diymore.cc\/cdn\/shop\/products\/5MM-LED-RGB-Matrix-Module-Driver-Board-8x8-Dot-Matrix-for-Arduino-AVR-top_915.jpg?v=1588698614","width":1000},{"alt":"5Mm Led Rgb Matrix Module Driver Board 8X8 + Dot For Arduino Avr Top Integrated Circuits","id":6682362937415,"position":2,"preview_image":{"aspect_ratio":1.0,"height":1000,"width":1000,"src":"\/\/www.diymore.cc\/cdn\/shop\/products\/5MM-LED-RGB-Matrix-Module-Driver-Board-8x8-Dot-Matrix-for-Arduino-AVR-top_b103e582-6bdf-46c0-b4e8-f1b84bea8d30_182.jpg?v=1588698614"},"aspect_ratio":1.0,"height":1000,"media_type":"image","src":"\/\/www.diymore.cc\/cdn\/shop\/products\/5MM-LED-RGB-Matrix-Module-Driver-Board-8x8-Dot-Matrix-for-Arduino-AVR-top_b103e582-6bdf-46c0-b4e8-f1b84bea8d30_182.jpg?v=1588698614","width":1000},{"alt":"5Mm Led Rgb Matrix Module Driver Board 8X8 + Dot For Arduino Avr Top Integrated Circuits","id":6682363035719,"position":3,"preview_image":{"aspect_ratio":1.0,"height":1000,"width":1000,"src":"\/\/www.diymore.cc\/cdn\/shop\/products\/5MM-LED-RGB-Matrix-Module-Driver-Board-8x8-Dot-Matrix-for-Arduino-AVR-top_8a893a41-992b-4b2d-8fc8-63e5e968c2c3_630.jpg?v=1588698614"},"aspect_ratio":1.0,"height":1000,"media_type":"image","src":"\/\/www.diymore.cc\/cdn\/shop\/products\/5MM-LED-RGB-Matrix-Module-Driver-Board-8x8-Dot-Matrix-for-Arduino-AVR-top_8a893a41-992b-4b2d-8fc8-63e5e968c2c3_630.jpg?v=1588698614","width":1000},{"alt":"5Mm Led Rgb Matrix Module Driver Board 8X8 + Dot For Arduino Avr Top Integrated Circuits","id":6682363232327,"position":4,"preview_image":{"aspect_ratio":1.0,"height":1000,"width":1000,"src":"\/\/www.diymore.cc\/cdn\/shop\/products\/5MM-LED-RGB-Matrix-Module-Driver-Board-8x8-Dot-Matrix-for-Arduino-AVR-top_695e9ab7-3820-46a5-a836-baa68e4b51d9_884.jpg?v=1588698614"},"aspect_ratio":1.0,"height":1000,"media_type":"image","src":"\/\/www.diymore.cc\/cdn\/shop\/products\/5MM-LED-RGB-Matrix-Module-Driver-Board-8x8-Dot-Matrix-for-Arduino-AVR-top_695e9ab7-3820-46a5-a836-baa68e4b51d9_884.jpg?v=1588698614","width":1000}],"requires_selling_plan":false,"selling_plan_groups":[],"content":"\u003cdiv\u003e\n\u003cwidget data-widget-type=\"customText\" id=\"33684419\" title=\"Head\" type=\"custom\"\u003e\u003c\/widget\u003e \r \u003cdiv\u003e\r \r \u003c\/div\u003e \r \u003cdiv\u003e \r \u003cp\u003e\u003cimg src=\"https:\/\/ae01.alicdn.com\/kf\/HTB12JMgilsmBKNjSZFsq6yXSVXaS.jpg\"\u003e\u003c\/p\u003e \r \u003c\/div\u003e \r \u003cdiv\u003e\r \r \u003c\/div\u003e \r \u003cdiv\u003e\r \r \u003c\/div\u003e \r \u003cdiv\u003e\r \r \u003c\/div\u003e \r \u003cp\u003e\u003cspan style=\"color: #000000;\"\u003e\u003cspan style=\"font-size: 16.0px;font-family: arial , helvetica , sans-serif;\"\u003eThe driver circuit based on 3 MBI5168 constant current sink drivers and a M54564 darlington source driver, the Colorduino pairs the M54564 with a single DM163 constant current driver. In order to better drive the RGB matrix and reach their best performance, we use the professional LED driver chip DM163 on board, by using the DM163, the Colorduino gains three 8+6-bit channels of hardware PWM control of the LED's freeing up the ATMega328P from having to implement it in software. And the DM163 comprises shift registers, data latches, 8×3 channel constant current and 64 x 256 gray level PWM for per color! Each channel provide a maximum current of 60 mA.\u003c\/span\u003e\u003c\/span\u003e\u003c\/p\u003e \r \u003cp style=\"font-size: 12.0pt;font-family: verdana;color: #77776e;text-align: left;background-color: #ffffff;\"\u003e\u003cspan style=\"color: #000000;\"\u003e\u003cspan style=\"font-size: 16.0px;font-family: arial , helvetica , sans-serif;\"\u003eSo, each RGB dot has 256×256x256 = 16,777,216 colours (16 million) in theory, and it's easy to use the 6bit correction register to calibrate the current error for each color LEDs\u003c\/span\u003e\u003c\/span\u003e\u003c\/p\u003e \r \u003cp style=\"font-size: 12.0pt;font-family: verdana;color: #000000;text-align: left;background-color: #ffffff;\"\u003e\u003cspan style=\"color: #000000;\"\u003e\u003cspan style=\"font-size: 16.0px;font-family: arial , helvetica , sans-serif;\"\u003eThis shield can be programed via\u003c\/span\u003e\u003c\/span\u003e\u003cspan style=\"font-size: 16.0px;font-family: arial , helvetica , sans-serif;\"\u003e\u003ca\u003e FT232 USB adapter\u003c\/a\u003e\u003c\/span\u003e\u003cbr\u003e\u003cspan style=\"color: #000000;\"\u003e\u003cspan style=\"font-size: 16.0px;font-family: arial , helvetica , sans-serif;\"\u003ePower is supplied either by pin headers or via 2 sets of mini screw terminals, a slide switch selecting between the two. With the herder side, you just can use the 5V power supply, and in the terminal side, now support 6.2-7.5V power supply, more than 7V will cause the DM163 fever and more than 9V supply may burn your board. Pins brought out the edge of the board include RX, TX and DTS, which can be used to reprogram the onboard ATmega chip, and SCA and SCL for I2C communication. A green LED on the front of the board indicates power, although it is mostly obscured as soon as you plug the matrix panel in.\u003c\/span\u003e\u003cbr\u003e\u003cspan style=\"font-size: 16.0px;font-family: arial , helvetica , sans-serif;\"\u003eIf you have an Arduino UNO, but just want to drive a RGB LED Matrix, you can consider this Colors shield, it's compatible with Colorduino v2.0.\u003c\/span\u003e\u003c\/span\u003e\u003c\/p\u003e \r \u003cp style=\"font-size: 12.0pt;font-family: verdana;color: #77776e;text-align: left;background-color: #ffffff;\"\u003e\u003cspan style=\"color: #000000;\"\u003e\u003cspan style=\"font-size: 16.0px;font-family: arial , helvetica , sans-serif;\"\u003eTo make it work, you must need this \u003c\/span\u003e\u003c\/span\u003e\u003cspan style=\"font-size: 16.0px;font-family: arial , helvetica , sans-serif;\"\u003e\u003ca\u003e\u003cspan style=\"color: #000000;\"\u003eRGB LED Matrix,\u003c\/span\u003e\u003c\/a\u003e\u003c\/span\u003e\u003c\/p\u003e \r \u003cp style=\"font-size: 12.0pt;font-family: verdana;color: #77776e;text-align: left;background-color: #ffffff;\"\u003e\u003cspan style=\"color: #000000;\"\u003e\u003cspan style=\"font-size: 16.0px;font-family: arial , helvetica , sans-serif;\"\u003eFor more information of this product, please visit the\u003c\/span\u003e\u003c\/span\u003e\u003cspan style=\"font-size: 16.0px;font-family: arial , helvetica , sans-serif;\"\u003e\u003ca\u003e\u003cspan style=\"color: #000000;\"\u003eWiki PAGE\u003c\/span\u003e\u003c\/a\u003e\u003c\/span\u003e\u003c\/p\u003e \r \u003cp style=\"font-size: 12.0pt;font-family: verdana;color: #77776e;text-align: left;background-color: #ffffff;\"\u003e\u003cstrong\u003e\u003cspan style=\"color: #000000;\"\u003e\u003cspan style=\"font-size: 16.0px;font-family: arial , helvetica , sans-serif;\"\u003eDocuments:\u003c\/span\u003e\u003c\/span\u003e\u003c\/strong\u003e\u003c\/p\u003e \r \u003cp style=\"color: #77776e;text-align: left;background-color: #ffffff;\"\u003e\u003cspan style=\"color: #000000;\"\u003e\u003cspan style=\"font-size: 16.0px;font-family: arial , helvetica , sans-serif;\"\u003e\u003ca\u003eColorduino library.zip\u003c\/a\u003e\u003c\/span\u003e\u003c\/span\u003e\u003cbr\u003e\u003cspan style=\"font-size: 16.0px;font-family: arial , helvetica , sans-serif;\"\u003e\u003ca\u003e\u003cspan style=\"color: #000000;\"\u003eSch-Colorduino-V2.0.pdf\u003c\/span\u003e\u003c\/a\u003e\u003c\/span\u003e\u003cbr\u003e\u003cspan style=\"font-size: 16.0px;font-family: arial , helvetica , sans-serif;\"\u003e\u003ca\u003e\u003cspan style=\"color: #000000;\"\u003eDM163.pdf\u003c\/span\u003e\u003c\/a\u003e\u003c\/span\u003e\u003c\/p\u003e \r \u003cp\u003e \u003c\/p\u003e \r \u003cp\u003e\u003cspan style=\"color: #000000;\"\u003e\u003cspan style=\"font-size: 16.0px;font-family: arial , helvetica , sans-serif;\"\u003e\u003cstrong\u003ePackage:\u003c\/strong\u003e\u003c\/span\u003e\u003c\/span\u003e\u003c\/p\u003e \r \u003cp\u003e\u003cspan style=\"color: #000000;\"\u003e\u003cspan style=\"font-size: 16.0px;font-family: arial , helvetica , sans-serif;\"\u003e1 x RGB Led \u003c\/span\u003e\u003c\/span\u003e\u003c\/p\u003e \r \u003cp\u003e\u003cspan style=\"color: #000000;\"\u003e\u003cspan style=\"font-size: 16.0px;font-family: arial , helvetica , sans-serif;\"\u003e1x Matrix Driver shield\u003c\/span\u003e\u003c\/span\u003e\u003c\/p\u003e \r \u003cp\u003e \u003c\/p\u003e \r \u003cp\u003e \u003c\/p\u003e \r \u003cp\u003e\u003cimg src=\"https:\/\/ae01.alicdn.com\/kf\/HTB1VXjubuUXBuNjt_a0q6AysXXaA.jpg\"\u003e\u003c\/p\u003e \r \u003cp\u003e \u003c\/p\u003e \r \u003cp\u003e\u003cimg style=\"width: 1000.0px;\" src=\"https:\/\/ae01.alicdn.com\/kf\/HTB1dkrPavfsK1RjSszgq6yXzpXal.jpg\"\u003e\u003c\/p\u003e \r \u003cp\u003e\u003cimg style=\"width: 1000.0px;\" src=\"https:\/\/ae01.alicdn.com\/kf\/HTB1J7TOayLrK1Rjy1zdq6ynnpXa0.jpg\"\u003e\u003c\/p\u003e \r \u003cp\u003e\u003cimg style=\"width: 1000.0px;\" src=\"https:\/\/ae01.alicdn.com\/kf\/HTB1Mu6Fau6sK1RjSsrbq6xbDXXa2.jpg\"\u003e\u003c\/p\u003e \r \u003cp\u003e\u003cimg style=\"width: 1000.0px;\" src=\"https:\/\/ae01.alicdn.com\/kf\/HTB1s7rPavfsK1RjSszgq6yXzpXaL.jpg\"\u003e\u003c\/p\u003e \r \u003cp\u003e \u003c\/p\u003e \r \u003cp\u003e\u003cimg src=\"https:\/\/ae01.alicdn.com\/kf\/HTB1Hc.uimcqBKNjSZFgq6x_kXXaq.jpg\"\u003e\u003c\/p\u003e \r \u003cp\u003e \u003c\/p\u003e \r \u003cwidget data-widget-type=\"customText\" id=\"24006699\" title=\"Related\" type=\"custom\"\u003e\u003c\/widget\u003e \r \u003cp\u003e \u003c\/p\u003e \u003cscript\u003ewindow.adminAccountId=227552571;\u003c\/script\u003e \u003c\/div\u003e"} -
Translation missing: en.products.product.regular_price
$5.99 On Sale{"id":4419983867975,"title":"5MM LED RGB Matrix Module Driver Board 8x8 + Dot Matrix for Arduino AVR top","handle":"5mm-led-rgb-matrix-module-driver-board-8x8-dot-matrix-for-arduino-avr-top-1","description":"\u003cdiv\u003e\n\u003cwidget data-widget-type=\"customText\" id=\"33684419\" title=\"Head\" type=\"custom\"\u003e\u003c\/widget\u003e \r \u003cdiv\u003e\r \r \u003c\/div\u003e \r \u003cdiv\u003e \r \u003cp\u003e\u003cimg src=\"https:\/\/ae01.alicdn.com\/kf\/HTB12JMgilsmBKNjSZFsq6yXSVXaS.jpg\"\u003e\u003c\/p\u003e \r \u003c\/div\u003e \r \u003cdiv\u003e\r \r \u003c\/div\u003e \r \u003cdiv\u003e\r \r \u003c\/div\u003e \r \u003cdiv\u003e\r \r \u003c\/div\u003e \r \u003cp\u003e\u003cspan style=\"color: #000000;\"\u003e\u003cspan style=\"font-size: 16.0px;font-family: arial , helvetica , sans-serif;\"\u003eThe driver circuit based on 3 MBI5168 constant current sink drivers and a M54564 darlington source driver, the Colorduino pairs the M54564 with a single DM163 constant current driver. In order to better drive the RGB matrix and reach their best performance, we use the professional LED driver chip DM163 on board, by using the DM163, the Colorduino gains three 8+6-bit channels of hardware PWM control of the LED's freeing up the ATMega328P from having to implement it in software. And the DM163 comprises shift registers, data latches, 8×3 channel constant current and 64 x 256 gray level PWM for per color! Each channel provide a maximum current of 60 mA.\u003c\/span\u003e\u003c\/span\u003e\u003c\/p\u003e \r \u003cp style=\"font-size: 12.0pt;font-family: verdana;color: #77776e;text-align: left;background-color: #ffffff;\"\u003e\u003cspan style=\"color: #000000;\"\u003e\u003cspan style=\"font-size: 16.0px;font-family: arial , helvetica , sans-serif;\"\u003eSo, each RGB dot has 256×256x256 = 16,777,216 colours (16 million) in theory, and it's easy to use the 6bit correction register to calibrate the current error for each color LEDs\u003c\/span\u003e\u003c\/span\u003e\u003c\/p\u003e \r \u003cp style=\"font-size: 12.0pt;font-family: verdana;color: #000000;text-align: left;background-color: #ffffff;\"\u003e\u003cspan style=\"color: #000000;\"\u003e\u003cspan style=\"font-size: 16.0px;font-family: arial , helvetica , sans-serif;\"\u003eThis shield can be programed via\u003c\/span\u003e\u003c\/span\u003e\u003cspan style=\"font-size: 16.0px;font-family: arial , helvetica , sans-serif;\"\u003e\u003ca\u003e FT232 USB adapter\u003c\/a\u003e\u003c\/span\u003e\u003cbr\u003e\u003cspan style=\"color: #000000;\"\u003e\u003cspan style=\"font-size: 16.0px;font-family: arial , helvetica , sans-serif;\"\u003ePower is supplied either by pin headers or via 2 sets of mini screw terminals, a slide switch selecting between the two. With the herder side, you just can use the 5V power supply, and in the terminal side, now support 6.2-7.5V power supply, more than 7V will cause the DM163 fever and more than 9V supply may burn your board. Pins brought out the edge of the board include RX, TX and DTS, which can be used to reprogram the onboard ATmega chip, and SCA and SCL for I2C communication. A green LED on the front of the board indicates power, although it is mostly obscured as soon as you plug the matrix panel in.\u003c\/span\u003e\u003cbr\u003e\u003cspan style=\"font-size: 16.0px;font-family: arial , helvetica , sans-serif;\"\u003eIf you have an Arduino UNO, but just want to drive a RGB LED Matrix, you can consider this Colors shield, it's compatible with Colorduino v2.0.\u003c\/span\u003e\u003c\/span\u003e\u003c\/p\u003e \r \u003cp style=\"font-size: 12.0pt;font-family: verdana;color: #77776e;text-align: left;background-color: #ffffff;\"\u003e\u003cspan style=\"color: #000000;\"\u003e\u003cspan style=\"font-size: 16.0px;font-family: arial , helvetica , sans-serif;\"\u003eTo make it work, you must need this \u003c\/span\u003e\u003c\/span\u003e\u003cspan style=\"font-size: 16.0px;font-family: arial , helvetica , sans-serif;\"\u003e\u003ca\u003e\u003cspan style=\"color: #000000;\"\u003eRGB LED Matrix,\u003c\/span\u003e\u003c\/a\u003e\u003c\/span\u003e\u003c\/p\u003e \r \u003cp style=\"font-size: 12.0pt;font-family: verdana;color: #77776e;text-align: left;background-color: #ffffff;\"\u003e\u003cspan style=\"color: #000000;\"\u003e\u003cspan style=\"font-size: 16.0px;font-family: arial , helvetica , sans-serif;\"\u003eFor more information of this product, please visit the\u003c\/span\u003e\u003c\/span\u003e\u003cspan style=\"font-size: 16.0px;font-family: arial , helvetica , sans-serif;\"\u003e\u003ca\u003e\u003cspan style=\"color: #000000;\"\u003eWiki PAGE\u003c\/span\u003e\u003c\/a\u003e\u003c\/span\u003e\u003c\/p\u003e \r \u003cp style=\"font-size: 12.0pt;font-family: verdana;color: #77776e;text-align: left;background-color: #ffffff;\"\u003e\u003cstrong\u003e\u003cspan style=\"color: #000000;\"\u003e\u003cspan style=\"font-size: 16.0px;font-family: arial , helvetica , sans-serif;\"\u003eDocuments:\u003c\/span\u003e\u003c\/span\u003e\u003c\/strong\u003e\u003c\/p\u003e \r \u003cp style=\"color: #77776e;text-align: left;background-color: #ffffff;\"\u003e\u003cspan style=\"color: #000000;\"\u003e\u003cspan style=\"font-size: 16.0px;font-family: arial , helvetica , sans-serif;\"\u003e\u003ca\u003eColorduino library.zip\u003c\/a\u003e\u003c\/span\u003e\u003c\/span\u003e\u003cbr\u003e\u003cspan style=\"font-size: 16.0px;font-family: arial , helvetica , sans-serif;\"\u003e\u003ca\u003e\u003cspan style=\"color: #000000;\"\u003eSch-Colorduino-V2.0.pdf\u003c\/span\u003e\u003c\/a\u003e\u003c\/span\u003e\u003cbr\u003e\u003cspan style=\"font-size: 16.0px;font-family: arial , helvetica , sans-serif;\"\u003e\u003ca\u003e\u003cspan style=\"color: #000000;\"\u003eDM163.pdf\u003c\/span\u003e\u003c\/a\u003e\u003c\/span\u003e\u003c\/p\u003e \r \u003cp\u003e \u003c\/p\u003e \r \u003cp\u003e\u003cspan style=\"color: #000000;\"\u003e\u003cspan style=\"font-size: 16.0px;font-family: arial , helvetica , sans-serif;\"\u003e\u003cstrong\u003ePackage:\u003c\/strong\u003e\u003c\/span\u003e\u003c\/span\u003e\u003c\/p\u003e \r \u003cp\u003e\u003cspan style=\"color: #000000;\"\u003e\u003cspan style=\"font-size: 16.0px;font-family: arial , helvetica , sans-serif;\"\u003e1 x RGB Led \u003c\/span\u003e\u003c\/span\u003e\u003c\/p\u003e \r \u003cp\u003e\u003cspan style=\"color: #000000;\"\u003e\u003cspan style=\"font-size: 16.0px;font-family: arial , helvetica , sans-serif;\"\u003e1x Matrix Driver shield\u003c\/span\u003e\u003c\/span\u003e\u003c\/p\u003e \r \u003cp\u003e \u003c\/p\u003e \r \u003cp\u003e \u003c\/p\u003e \r \u003cp\u003e\u003cimg src=\"https:\/\/ae01.alicdn.com\/kf\/HTB1VXjubuUXBuNjt_a0q6AysXXaA.jpg\"\u003e\u003c\/p\u003e \r \u003cp\u003e \u003c\/p\u003e \r \u003cp\u003e\u003cimg style=\"width: 1000.0px;\" src=\"https:\/\/ae01.alicdn.com\/kf\/HTB1dkrPavfsK1RjSszgq6yXzpXal.jpg\"\u003e\u003c\/p\u003e \r \u003cp\u003e\u003cimg style=\"width: 1000.0px;\" src=\"https:\/\/ae01.alicdn.com\/kf\/HTB1J7TOayLrK1Rjy1zdq6ynnpXa0.jpg\"\u003e\u003c\/p\u003e \r \u003cp\u003e\u003cimg style=\"width: 1000.0px;\" src=\"https:\/\/ae01.alicdn.com\/kf\/HTB1Mu6Fau6sK1RjSsrbq6xbDXXa2.jpg\"\u003e\u003c\/p\u003e \r \u003cp\u003e\u003cimg style=\"width: 1000.0px;\" src=\"https:\/\/ae01.alicdn.com\/kf\/HTB1s7rPavfsK1RjSszgq6yXzpXaL.jpg\"\u003e\u003c\/p\u003e \r \u003cp\u003e \u003c\/p\u003e \r \u003cp\u003e\u003cimg src=\"https:\/\/ae01.alicdn.com\/kf\/HTB1Hc.uimcqBKNjSZFgq6x_kXXaq.jpg\"\u003e\u003c\/p\u003e \r \u003cp\u003e \u003c\/p\u003e \r \u003cwidget data-widget-type=\"customText\" id=\"24006699\" title=\"Related\" type=\"custom\"\u003e\u003c\/widget\u003e \r \u003cp\u003e \u003c\/p\u003e \u003cscript\u003ewindow.adminAccountId=227552571;\u003c\/script\u003e \u003c\/div\u003e","published_at":"2022-09-19T12:31:18+08:00","created_at":"2019-12-27T18:24:55+08:00","vendor":"diymore","type":"Motor Driver Module","tags":[],"price":272,"price_min":272,"price_max":272,"available":true,"price_varies":false,"compare_at_price":544,"compare_at_price_min":544,"compare_at_price_max":544,"compare_at_price_varies":false,"variants":[{"id":31582900846663,"title":"Default Title","option1":"Default Title","option2":null,"option3":null,"sku":"030081","requires_shipping":true,"taxable":false,"featured_image":null,"available":true,"name":"5MM LED RGB Matrix Module Driver Board 8x8 + Dot Matrix for Arduino AVR top","public_title":null,"options":["Default Title"],"price":272,"weight":0,"compare_at_price":544,"inventory_management":null,"barcode":"","requires_selling_plan":false,"selling_plan_allocations":[]}],"images":["\/\/www.diymore.cc\/cdn\/shop\/products\/5MM-LED-RGB-Matrix-Module-Driver-Board-8x8-Dot-Matrix-for-Arduino-AVR-top_915.jpg?v=1588698614","\/\/www.diymore.cc\/cdn\/shop\/products\/5MM-LED-RGB-Matrix-Module-Driver-Board-8x8-Dot-Matrix-for-Arduino-AVR-top_b103e582-6bdf-46c0-b4e8-f1b84bea8d30_182.jpg?v=1588698614","\/\/www.diymore.cc\/cdn\/shop\/products\/5MM-LED-RGB-Matrix-Module-Driver-Board-8x8-Dot-Matrix-for-Arduino-AVR-top_8a893a41-992b-4b2d-8fc8-63e5e968c2c3_630.jpg?v=1588698614","\/\/www.diymore.cc\/cdn\/shop\/products\/5MM-LED-RGB-Matrix-Module-Driver-Board-8x8-Dot-Matrix-for-Arduino-AVR-top_695e9ab7-3820-46a5-a836-baa68e4b51d9_884.jpg?v=1588698614"],"featured_image":"\/\/www.diymore.cc\/cdn\/shop\/products\/5MM-LED-RGB-Matrix-Module-Driver-Board-8x8-Dot-Matrix-for-Arduino-AVR-top_915.jpg?v=1588698614","options":["Title"],"media":[{"alt":"5Mm Led Rgb Matrix Module Driver Board 8X8 + Dot For Arduino Avr Top Integrated Circuits","id":6682362675271,"position":1,"preview_image":{"aspect_ratio":1.0,"height":1000,"width":1000,"src":"\/\/www.diymore.cc\/cdn\/shop\/products\/5MM-LED-RGB-Matrix-Module-Driver-Board-8x8-Dot-Matrix-for-Arduino-AVR-top_915.jpg?v=1588698614"},"aspect_ratio":1.0,"height":1000,"media_type":"image","src":"\/\/www.diymore.cc\/cdn\/shop\/products\/5MM-LED-RGB-Matrix-Module-Driver-Board-8x8-Dot-Matrix-for-Arduino-AVR-top_915.jpg?v=1588698614","width":1000},{"alt":"5Mm Led Rgb Matrix Module Driver Board 8X8 + Dot For Arduino Avr Top Integrated Circuits","id":6682362937415,"position":2,"preview_image":{"aspect_ratio":1.0,"height":1000,"width":1000,"src":"\/\/www.diymore.cc\/cdn\/shop\/products\/5MM-LED-RGB-Matrix-Module-Driver-Board-8x8-Dot-Matrix-for-Arduino-AVR-top_b103e582-6bdf-46c0-b4e8-f1b84bea8d30_182.jpg?v=1588698614"},"aspect_ratio":1.0,"height":1000,"media_type":"image","src":"\/\/www.diymore.cc\/cdn\/shop\/products\/5MM-LED-RGB-Matrix-Module-Driver-Board-8x8-Dot-Matrix-for-Arduino-AVR-top_b103e582-6bdf-46c0-b4e8-f1b84bea8d30_182.jpg?v=1588698614","width":1000},{"alt":"5Mm Led Rgb Matrix Module Driver Board 8X8 + Dot For Arduino Avr Top Integrated Circuits","id":6682363035719,"position":3,"preview_image":{"aspect_ratio":1.0,"height":1000,"width":1000,"src":"\/\/www.diymore.cc\/cdn\/shop\/products\/5MM-LED-RGB-Matrix-Module-Driver-Board-8x8-Dot-Matrix-for-Arduino-AVR-top_8a893a41-992b-4b2d-8fc8-63e5e968c2c3_630.jpg?v=1588698614"},"aspect_ratio":1.0,"height":1000,"media_type":"image","src":"\/\/www.diymore.cc\/cdn\/shop\/products\/5MM-LED-RGB-Matrix-Module-Driver-Board-8x8-Dot-Matrix-for-Arduino-AVR-top_8a893a41-992b-4b2d-8fc8-63e5e968c2c3_630.jpg?v=1588698614","width":1000},{"alt":"5Mm Led Rgb Matrix Module Driver Board 8X8 + Dot For Arduino Avr Top Integrated Circuits","id":6682363232327,"position":4,"preview_image":{"aspect_ratio":1.0,"height":1000,"width":1000,"src":"\/\/www.diymore.cc\/cdn\/shop\/products\/5MM-LED-RGB-Matrix-Module-Driver-Board-8x8-Dot-Matrix-for-Arduino-AVR-top_695e9ab7-3820-46a5-a836-baa68e4b51d9_884.jpg?v=1588698614"},"aspect_ratio":1.0,"height":1000,"media_type":"image","src":"\/\/www.diymore.cc\/cdn\/shop\/products\/5MM-LED-RGB-Matrix-Module-Driver-Board-8x8-Dot-Matrix-for-Arduino-AVR-top_695e9ab7-3820-46a5-a836-baa68e4b51d9_884.jpg?v=1588698614","width":1000}],"requires_selling_plan":false,"selling_plan_groups":[],"content":"\u003cdiv\u003e\n\u003cwidget data-widget-type=\"customText\" id=\"33684419\" title=\"Head\" type=\"custom\"\u003e\u003c\/widget\u003e \r \u003cdiv\u003e\r \r \u003c\/div\u003e \r \u003cdiv\u003e \r \u003cp\u003e\u003cimg src=\"https:\/\/ae01.alicdn.com\/kf\/HTB12JMgilsmBKNjSZFsq6yXSVXaS.jpg\"\u003e\u003c\/p\u003e \r \u003c\/div\u003e \r \u003cdiv\u003e\r \r \u003c\/div\u003e \r \u003cdiv\u003e\r \r \u003c\/div\u003e \r \u003cdiv\u003e\r \r \u003c\/div\u003e \r \u003cp\u003e\u003cspan style=\"color: #000000;\"\u003e\u003cspan style=\"font-size: 16.0px;font-family: arial , helvetica , sans-serif;\"\u003eThe driver circuit based on 3 MBI5168 constant current sink drivers and a M54564 darlington source driver, the Colorduino pairs the M54564 with a single DM163 constant current driver. In order to better drive the RGB matrix and reach their best performance, we use the professional LED driver chip DM163 on board, by using the DM163, the Colorduino gains three 8+6-bit channels of hardware PWM control of the LED's freeing up the ATMega328P from having to implement it in software. And the DM163 comprises shift registers, data latches, 8×3 channel constant current and 64 x 256 gray level PWM for per color! Each channel provide a maximum current of 60 mA.\u003c\/span\u003e\u003c\/span\u003e\u003c\/p\u003e \r \u003cp style=\"font-size: 12.0pt;font-family: verdana;color: #77776e;text-align: left;background-color: #ffffff;\"\u003e\u003cspan style=\"color: #000000;\"\u003e\u003cspan style=\"font-size: 16.0px;font-family: arial , helvetica , sans-serif;\"\u003eSo, each RGB dot has 256×256x256 = 16,777,216 colours (16 million) in theory, and it's easy to use the 6bit correction register to calibrate the current error for each color LEDs\u003c\/span\u003e\u003c\/span\u003e\u003c\/p\u003e \r \u003cp style=\"font-size: 12.0pt;font-family: verdana;color: #000000;text-align: left;background-color: #ffffff;\"\u003e\u003cspan style=\"color: #000000;\"\u003e\u003cspan style=\"font-size: 16.0px;font-family: arial , helvetica , sans-serif;\"\u003eThis shield can be programed via\u003c\/span\u003e\u003c\/span\u003e\u003cspan style=\"font-size: 16.0px;font-family: arial , helvetica , sans-serif;\"\u003e\u003ca\u003e FT232 USB adapter\u003c\/a\u003e\u003c\/span\u003e\u003cbr\u003e\u003cspan style=\"color: #000000;\"\u003e\u003cspan style=\"font-size: 16.0px;font-family: arial , helvetica , sans-serif;\"\u003ePower is supplied either by pin headers or via 2 sets of mini screw terminals, a slide switch selecting between the two. With the herder side, you just can use the 5V power supply, and in the terminal side, now support 6.2-7.5V power supply, more than 7V will cause the DM163 fever and more than 9V supply may burn your board. Pins brought out the edge of the board include RX, TX and DTS, which can be used to reprogram the onboard ATmega chip, and SCA and SCL for I2C communication. A green LED on the front of the board indicates power, although it is mostly obscured as soon as you plug the matrix panel in.\u003c\/span\u003e\u003cbr\u003e\u003cspan style=\"font-size: 16.0px;font-family: arial , helvetica , sans-serif;\"\u003eIf you have an Arduino UNO, but just want to drive a RGB LED Matrix, you can consider this Colors shield, it's compatible with Colorduino v2.0.\u003c\/span\u003e\u003c\/span\u003e\u003c\/p\u003e \r \u003cp style=\"font-size: 12.0pt;font-family: verdana;color: #77776e;text-align: left;background-color: #ffffff;\"\u003e\u003cspan style=\"color: #000000;\"\u003e\u003cspan style=\"font-size: 16.0px;font-family: arial , helvetica , sans-serif;\"\u003eTo make it work, you must need this \u003c\/span\u003e\u003c\/span\u003e\u003cspan style=\"font-size: 16.0px;font-family: arial , helvetica , sans-serif;\"\u003e\u003ca\u003e\u003cspan style=\"color: #000000;\"\u003eRGB LED Matrix,\u003c\/span\u003e\u003c\/a\u003e\u003c\/span\u003e\u003c\/p\u003e \r \u003cp style=\"font-size: 12.0pt;font-family: verdana;color: #77776e;text-align: left;background-color: #ffffff;\"\u003e\u003cspan style=\"color: #000000;\"\u003e\u003cspan style=\"font-size: 16.0px;font-family: arial , helvetica , sans-serif;\"\u003eFor more information of this product, please visit the\u003c\/span\u003e\u003c\/span\u003e\u003cspan style=\"font-size: 16.0px;font-family: arial , helvetica , sans-serif;\"\u003e\u003ca\u003e\u003cspan style=\"color: #000000;\"\u003eWiki PAGE\u003c\/span\u003e\u003c\/a\u003e\u003c\/span\u003e\u003c\/p\u003e \r \u003cp style=\"font-size: 12.0pt;font-family: verdana;color: #77776e;text-align: left;background-color: #ffffff;\"\u003e\u003cstrong\u003e\u003cspan style=\"color: #000000;\"\u003e\u003cspan style=\"font-size: 16.0px;font-family: arial , helvetica , sans-serif;\"\u003eDocuments:\u003c\/span\u003e\u003c\/span\u003e\u003c\/strong\u003e\u003c\/p\u003e \r \u003cp style=\"color: #77776e;text-align: left;background-color: #ffffff;\"\u003e\u003cspan style=\"color: #000000;\"\u003e\u003cspan style=\"font-size: 16.0px;font-family: arial , helvetica , sans-serif;\"\u003e\u003ca\u003eColorduino library.zip\u003c\/a\u003e\u003c\/span\u003e\u003c\/span\u003e\u003cbr\u003e\u003cspan style=\"font-size: 16.0px;font-family: arial , helvetica , sans-serif;\"\u003e\u003ca\u003e\u003cspan style=\"color: #000000;\"\u003eSch-Colorduino-V2.0.pdf\u003c\/span\u003e\u003c\/a\u003e\u003c\/span\u003e\u003cbr\u003e\u003cspan style=\"font-size: 16.0px;font-family: arial , helvetica , sans-serif;\"\u003e\u003ca\u003e\u003cspan style=\"color: #000000;\"\u003eDM163.pdf\u003c\/span\u003e\u003c\/a\u003e\u003c\/span\u003e\u003c\/p\u003e \r \u003cp\u003e \u003c\/p\u003e \r \u003cp\u003e\u003cspan style=\"color: #000000;\"\u003e\u003cspan style=\"font-size: 16.0px;font-family: arial , helvetica , sans-serif;\"\u003e\u003cstrong\u003ePackage:\u003c\/strong\u003e\u003c\/span\u003e\u003c\/span\u003e\u003c\/p\u003e \r \u003cp\u003e\u003cspan style=\"color: #000000;\"\u003e\u003cspan style=\"font-size: 16.0px;font-family: arial , helvetica , sans-serif;\"\u003e1 x RGB Led \u003c\/span\u003e\u003c\/span\u003e\u003c\/p\u003e \r \u003cp\u003e\u003cspan style=\"color: #000000;\"\u003e\u003cspan style=\"font-size: 16.0px;font-family: arial , helvetica , sans-serif;\"\u003e1x Matrix Driver shield\u003c\/span\u003e\u003c\/span\u003e\u003c\/p\u003e \r \u003cp\u003e \u003c\/p\u003e \r \u003cp\u003e \u003c\/p\u003e \r \u003cp\u003e\u003cimg src=\"https:\/\/ae01.alicdn.com\/kf\/HTB1VXjubuUXBuNjt_a0q6AysXXaA.jpg\"\u003e\u003c\/p\u003e \r \u003cp\u003e \u003c\/p\u003e \r \u003cp\u003e\u003cimg style=\"width: 1000.0px;\" src=\"https:\/\/ae01.alicdn.com\/kf\/HTB1dkrPavfsK1RjSszgq6yXzpXal.jpg\"\u003e\u003c\/p\u003e \r \u003cp\u003e\u003cimg style=\"width: 1000.0px;\" src=\"https:\/\/ae01.alicdn.com\/kf\/HTB1J7TOayLrK1Rjy1zdq6ynnpXa0.jpg\"\u003e\u003c\/p\u003e \r \u003cp\u003e\u003cimg style=\"width: 1000.0px;\" src=\"https:\/\/ae01.alicdn.com\/kf\/HTB1Mu6Fau6sK1RjSsrbq6xbDXXa2.jpg\"\u003e\u003c\/p\u003e \r \u003cp\u003e\u003cimg style=\"width: 1000.0px;\" src=\"https:\/\/ae01.alicdn.com\/kf\/HTB1s7rPavfsK1RjSszgq6yXzpXaL.jpg\"\u003e\u003c\/p\u003e \r \u003cp\u003e \u003c\/p\u003e \r \u003cp\u003e\u003cimg src=\"https:\/\/ae01.alicdn.com\/kf\/HTB1Hc.uimcqBKNjSZFgq6x_kXXaq.jpg\"\u003e\u003c\/p\u003e \r \u003cp\u003e \u003c\/p\u003e \r \u003cwidget data-widget-type=\"customText\" id=\"24006699\" title=\"Related\" type=\"custom\"\u003e\u003c\/widget\u003e \r \u003cp\u003e \u003c\/p\u003e \u003cscript\u003ewindow.adminAccountId=227552571;\u003c\/script\u003e \u003c\/div\u003e"} -
Translation missing: en.products.product.regular_price
$7.99 On Sale{"id":4419983867975,"title":"5MM LED RGB Matrix Module Driver Board 8x8 + Dot Matrix for Arduino AVR top","handle":"5mm-led-rgb-matrix-module-driver-board-8x8-dot-matrix-for-arduino-avr-top-1","description":"\u003cdiv\u003e\n\u003cwidget data-widget-type=\"customText\" id=\"33684419\" title=\"Head\" type=\"custom\"\u003e\u003c\/widget\u003e \r \u003cdiv\u003e\r \r \u003c\/div\u003e \r \u003cdiv\u003e \r \u003cp\u003e\u003cimg src=\"https:\/\/ae01.alicdn.com\/kf\/HTB12JMgilsmBKNjSZFsq6yXSVXaS.jpg\"\u003e\u003c\/p\u003e \r \u003c\/div\u003e \r \u003cdiv\u003e\r \r \u003c\/div\u003e \r \u003cdiv\u003e\r \r \u003c\/div\u003e \r \u003cdiv\u003e\r \r \u003c\/div\u003e \r \u003cp\u003e\u003cspan style=\"color: #000000;\"\u003e\u003cspan style=\"font-size: 16.0px;font-family: arial , helvetica , sans-serif;\"\u003eThe driver circuit based on 3 MBI5168 constant current sink drivers and a M54564 darlington source driver, the Colorduino pairs the M54564 with a single DM163 constant current driver. In order to better drive the RGB matrix and reach their best performance, we use the professional LED driver chip DM163 on board, by using the DM163, the Colorduino gains three 8+6-bit channels of hardware PWM control of the LED's freeing up the ATMega328P from having to implement it in software. And the DM163 comprises shift registers, data latches, 8×3 channel constant current and 64 x 256 gray level PWM for per color! Each channel provide a maximum current of 60 mA.\u003c\/span\u003e\u003c\/span\u003e\u003c\/p\u003e \r \u003cp style=\"font-size: 12.0pt;font-family: verdana;color: #77776e;text-align: left;background-color: #ffffff;\"\u003e\u003cspan style=\"color: #000000;\"\u003e\u003cspan style=\"font-size: 16.0px;font-family: arial , helvetica , sans-serif;\"\u003eSo, each RGB dot has 256×256x256 = 16,777,216 colours (16 million) in theory, and it's easy to use the 6bit correction register to calibrate the current error for each color LEDs\u003c\/span\u003e\u003c\/span\u003e\u003c\/p\u003e \r \u003cp style=\"font-size: 12.0pt;font-family: verdana;color: #000000;text-align: left;background-color: #ffffff;\"\u003e\u003cspan style=\"color: #000000;\"\u003e\u003cspan style=\"font-size: 16.0px;font-family: arial , helvetica , sans-serif;\"\u003eThis shield can be programed via\u003c\/span\u003e\u003c\/span\u003e\u003cspan style=\"font-size: 16.0px;font-family: arial , helvetica , sans-serif;\"\u003e\u003ca\u003e FT232 USB adapter\u003c\/a\u003e\u003c\/span\u003e\u003cbr\u003e\u003cspan style=\"color: #000000;\"\u003e\u003cspan style=\"font-size: 16.0px;font-family: arial , helvetica , sans-serif;\"\u003ePower is supplied either by pin headers or via 2 sets of mini screw terminals, a slide switch selecting between the two. With the herder side, you just can use the 5V power supply, and in the terminal side, now support 6.2-7.5V power supply, more than 7V will cause the DM163 fever and more than 9V supply may burn your board. Pins brought out the edge of the board include RX, TX and DTS, which can be used to reprogram the onboard ATmega chip, and SCA and SCL for I2C communication. A green LED on the front of the board indicates power, although it is mostly obscured as soon as you plug the matrix panel in.\u003c\/span\u003e\u003cbr\u003e\u003cspan style=\"font-size: 16.0px;font-family: arial , helvetica , sans-serif;\"\u003eIf you have an Arduino UNO, but just want to drive a RGB LED Matrix, you can consider this Colors shield, it's compatible with Colorduino v2.0.\u003c\/span\u003e\u003c\/span\u003e\u003c\/p\u003e \r \u003cp style=\"font-size: 12.0pt;font-family: verdana;color: #77776e;text-align: left;background-color: #ffffff;\"\u003e\u003cspan style=\"color: #000000;\"\u003e\u003cspan style=\"font-size: 16.0px;font-family: arial , helvetica , sans-serif;\"\u003eTo make it work, you must need this \u003c\/span\u003e\u003c\/span\u003e\u003cspan style=\"font-size: 16.0px;font-family: arial , helvetica , sans-serif;\"\u003e\u003ca\u003e\u003cspan style=\"color: #000000;\"\u003eRGB LED Matrix,\u003c\/span\u003e\u003c\/a\u003e\u003c\/span\u003e\u003c\/p\u003e \r \u003cp style=\"font-size: 12.0pt;font-family: verdana;color: #77776e;text-align: left;background-color: #ffffff;\"\u003e\u003cspan style=\"color: #000000;\"\u003e\u003cspan style=\"font-size: 16.0px;font-family: arial , helvetica , sans-serif;\"\u003eFor more information of this product, please visit the\u003c\/span\u003e\u003c\/span\u003e\u003cspan style=\"font-size: 16.0px;font-family: arial , helvetica , sans-serif;\"\u003e\u003ca\u003e\u003cspan style=\"color: #000000;\"\u003eWiki PAGE\u003c\/span\u003e\u003c\/a\u003e\u003c\/span\u003e\u003c\/p\u003e \r \u003cp style=\"font-size: 12.0pt;font-family: verdana;color: #77776e;text-align: left;background-color: #ffffff;\"\u003e\u003cstrong\u003e\u003cspan style=\"color: #000000;\"\u003e\u003cspan style=\"font-size: 16.0px;font-family: arial , helvetica , sans-serif;\"\u003eDocuments:\u003c\/span\u003e\u003c\/span\u003e\u003c\/strong\u003e\u003c\/p\u003e \r \u003cp style=\"color: #77776e;text-align: left;background-color: #ffffff;\"\u003e\u003cspan style=\"color: #000000;\"\u003e\u003cspan style=\"font-size: 16.0px;font-family: arial , helvetica , sans-serif;\"\u003e\u003ca\u003eColorduino library.zip\u003c\/a\u003e\u003c\/span\u003e\u003c\/span\u003e\u003cbr\u003e\u003cspan style=\"font-size: 16.0px;font-family: arial , helvetica , sans-serif;\"\u003e\u003ca\u003e\u003cspan style=\"color: #000000;\"\u003eSch-Colorduino-V2.0.pdf\u003c\/span\u003e\u003c\/a\u003e\u003c\/span\u003e\u003cbr\u003e\u003cspan style=\"font-size: 16.0px;font-family: arial , helvetica , sans-serif;\"\u003e\u003ca\u003e\u003cspan style=\"color: #000000;\"\u003eDM163.pdf\u003c\/span\u003e\u003c\/a\u003e\u003c\/span\u003e\u003c\/p\u003e \r \u003cp\u003e \u003c\/p\u003e \r \u003cp\u003e\u003cspan style=\"color: #000000;\"\u003e\u003cspan style=\"font-size: 16.0px;font-family: arial , helvetica , sans-serif;\"\u003e\u003cstrong\u003ePackage:\u003c\/strong\u003e\u003c\/span\u003e\u003c\/span\u003e\u003c\/p\u003e \r \u003cp\u003e\u003cspan style=\"color: #000000;\"\u003e\u003cspan style=\"font-size: 16.0px;font-family: arial , helvetica , sans-serif;\"\u003e1 x RGB Led \u003c\/span\u003e\u003c\/span\u003e\u003c\/p\u003e \r \u003cp\u003e\u003cspan style=\"color: #000000;\"\u003e\u003cspan style=\"font-size: 16.0px;font-family: arial , helvetica , sans-serif;\"\u003e1x Matrix Driver shield\u003c\/span\u003e\u003c\/span\u003e\u003c\/p\u003e \r \u003cp\u003e \u003c\/p\u003e \r \u003cp\u003e \u003c\/p\u003e \r \u003cp\u003e\u003cimg src=\"https:\/\/ae01.alicdn.com\/kf\/HTB1VXjubuUXBuNjt_a0q6AysXXaA.jpg\"\u003e\u003c\/p\u003e \r \u003cp\u003e \u003c\/p\u003e \r \u003cp\u003e\u003cimg style=\"width: 1000.0px;\" src=\"https:\/\/ae01.alicdn.com\/kf\/HTB1dkrPavfsK1RjSszgq6yXzpXal.jpg\"\u003e\u003c\/p\u003e \r \u003cp\u003e\u003cimg style=\"width: 1000.0px;\" src=\"https:\/\/ae01.alicdn.com\/kf\/HTB1J7TOayLrK1Rjy1zdq6ynnpXa0.jpg\"\u003e\u003c\/p\u003e \r \u003cp\u003e\u003cimg style=\"width: 1000.0px;\" src=\"https:\/\/ae01.alicdn.com\/kf\/HTB1Mu6Fau6sK1RjSsrbq6xbDXXa2.jpg\"\u003e\u003c\/p\u003e \r \u003cp\u003e\u003cimg style=\"width: 1000.0px;\" src=\"https:\/\/ae01.alicdn.com\/kf\/HTB1s7rPavfsK1RjSszgq6yXzpXaL.jpg\"\u003e\u003c\/p\u003e \r \u003cp\u003e \u003c\/p\u003e \r \u003cp\u003e\u003cimg src=\"https:\/\/ae01.alicdn.com\/kf\/HTB1Hc.uimcqBKNjSZFgq6x_kXXaq.jpg\"\u003e\u003c\/p\u003e \r \u003cp\u003e \u003c\/p\u003e \r \u003cwidget data-widget-type=\"customText\" id=\"24006699\" title=\"Related\" type=\"custom\"\u003e\u003c\/widget\u003e \r \u003cp\u003e \u003c\/p\u003e \u003cscript\u003ewindow.adminAccountId=227552571;\u003c\/script\u003e \u003c\/div\u003e","published_at":"2022-09-19T12:31:18+08:00","created_at":"2019-12-27T18:24:55+08:00","vendor":"diymore","type":"Motor Driver Module","tags":[],"price":272,"price_min":272,"price_max":272,"available":true,"price_varies":false,"compare_at_price":544,"compare_at_price_min":544,"compare_at_price_max":544,"compare_at_price_varies":false,"variants":[{"id":31582900846663,"title":"Default Title","option1":"Default Title","option2":null,"option3":null,"sku":"030081","requires_shipping":true,"taxable":false,"featured_image":null,"available":true,"name":"5MM LED RGB Matrix Module Driver Board 8x8 + Dot Matrix for Arduino AVR top","public_title":null,"options":["Default Title"],"price":272,"weight":0,"compare_at_price":544,"inventory_management":null,"barcode":"","requires_selling_plan":false,"selling_plan_allocations":[]}],"images":["\/\/www.diymore.cc\/cdn\/shop\/products\/5MM-LED-RGB-Matrix-Module-Driver-Board-8x8-Dot-Matrix-for-Arduino-AVR-top_915.jpg?v=1588698614","\/\/www.diymore.cc\/cdn\/shop\/products\/5MM-LED-RGB-Matrix-Module-Driver-Board-8x8-Dot-Matrix-for-Arduino-AVR-top_b103e582-6bdf-46c0-b4e8-f1b84bea8d30_182.jpg?v=1588698614","\/\/www.diymore.cc\/cdn\/shop\/products\/5MM-LED-RGB-Matrix-Module-Driver-Board-8x8-Dot-Matrix-for-Arduino-AVR-top_8a893a41-992b-4b2d-8fc8-63e5e968c2c3_630.jpg?v=1588698614","\/\/www.diymore.cc\/cdn\/shop\/products\/5MM-LED-RGB-Matrix-Module-Driver-Board-8x8-Dot-Matrix-for-Arduino-AVR-top_695e9ab7-3820-46a5-a836-baa68e4b51d9_884.jpg?v=1588698614"],"featured_image":"\/\/www.diymore.cc\/cdn\/shop\/products\/5MM-LED-RGB-Matrix-Module-Driver-Board-8x8-Dot-Matrix-for-Arduino-AVR-top_915.jpg?v=1588698614","options":["Title"],"media":[{"alt":"5Mm Led Rgb Matrix Module Driver Board 8X8 + Dot For Arduino Avr Top Integrated Circuits","id":6682362675271,"position":1,"preview_image":{"aspect_ratio":1.0,"height":1000,"width":1000,"src":"\/\/www.diymore.cc\/cdn\/shop\/products\/5MM-LED-RGB-Matrix-Module-Driver-Board-8x8-Dot-Matrix-for-Arduino-AVR-top_915.jpg?v=1588698614"},"aspect_ratio":1.0,"height":1000,"media_type":"image","src":"\/\/www.diymore.cc\/cdn\/shop\/products\/5MM-LED-RGB-Matrix-Module-Driver-Board-8x8-Dot-Matrix-for-Arduino-AVR-top_915.jpg?v=1588698614","width":1000},{"alt":"5Mm Led Rgb Matrix Module Driver Board 8X8 + Dot For Arduino Avr Top Integrated Circuits","id":6682362937415,"position":2,"preview_image":{"aspect_ratio":1.0,"height":1000,"width":1000,"src":"\/\/www.diymore.cc\/cdn\/shop\/products\/5MM-LED-RGB-Matrix-Module-Driver-Board-8x8-Dot-Matrix-for-Arduino-AVR-top_b103e582-6bdf-46c0-b4e8-f1b84bea8d30_182.jpg?v=1588698614"},"aspect_ratio":1.0,"height":1000,"media_type":"image","src":"\/\/www.diymore.cc\/cdn\/shop\/products\/5MM-LED-RGB-Matrix-Module-Driver-Board-8x8-Dot-Matrix-for-Arduino-AVR-top_b103e582-6bdf-46c0-b4e8-f1b84bea8d30_182.jpg?v=1588698614","width":1000},{"alt":"5Mm Led Rgb Matrix Module Driver Board 8X8 + Dot For Arduino Avr Top Integrated Circuits","id":6682363035719,"position":3,"preview_image":{"aspect_ratio":1.0,"height":1000,"width":1000,"src":"\/\/www.diymore.cc\/cdn\/shop\/products\/5MM-LED-RGB-Matrix-Module-Driver-Board-8x8-Dot-Matrix-for-Arduino-AVR-top_8a893a41-992b-4b2d-8fc8-63e5e968c2c3_630.jpg?v=1588698614"},"aspect_ratio":1.0,"height":1000,"media_type":"image","src":"\/\/www.diymore.cc\/cdn\/shop\/products\/5MM-LED-RGB-Matrix-Module-Driver-Board-8x8-Dot-Matrix-for-Arduino-AVR-top_8a893a41-992b-4b2d-8fc8-63e5e968c2c3_630.jpg?v=1588698614","width":1000},{"alt":"5Mm Led Rgb Matrix Module Driver Board 8X8 + Dot For Arduino Avr Top Integrated Circuits","id":6682363232327,"position":4,"preview_image":{"aspect_ratio":1.0,"height":1000,"width":1000,"src":"\/\/www.diymore.cc\/cdn\/shop\/products\/5MM-LED-RGB-Matrix-Module-Driver-Board-8x8-Dot-Matrix-for-Arduino-AVR-top_695e9ab7-3820-46a5-a836-baa68e4b51d9_884.jpg?v=1588698614"},"aspect_ratio":1.0,"height":1000,"media_type":"image","src":"\/\/www.diymore.cc\/cdn\/shop\/products\/5MM-LED-RGB-Matrix-Module-Driver-Board-8x8-Dot-Matrix-for-Arduino-AVR-top_695e9ab7-3820-46a5-a836-baa68e4b51d9_884.jpg?v=1588698614","width":1000}],"requires_selling_plan":false,"selling_plan_groups":[],"content":"\u003cdiv\u003e\n\u003cwidget data-widget-type=\"customText\" id=\"33684419\" title=\"Head\" type=\"custom\"\u003e\u003c\/widget\u003e \r \u003cdiv\u003e\r \r \u003c\/div\u003e \r \u003cdiv\u003e \r \u003cp\u003e\u003cimg src=\"https:\/\/ae01.alicdn.com\/kf\/HTB12JMgilsmBKNjSZFsq6yXSVXaS.jpg\"\u003e\u003c\/p\u003e \r \u003c\/div\u003e \r \u003cdiv\u003e\r \r \u003c\/div\u003e \r \u003cdiv\u003e\r \r \u003c\/div\u003e \r \u003cdiv\u003e\r \r \u003c\/div\u003e \r \u003cp\u003e\u003cspan style=\"color: #000000;\"\u003e\u003cspan style=\"font-size: 16.0px;font-family: arial , helvetica , sans-serif;\"\u003eThe driver circuit based on 3 MBI5168 constant current sink drivers and a M54564 darlington source driver, the Colorduino pairs the M54564 with a single DM163 constant current driver. In order to better drive the RGB matrix and reach their best performance, we use the professional LED driver chip DM163 on board, by using the DM163, the Colorduino gains three 8+6-bit channels of hardware PWM control of the LED's freeing up the ATMega328P from having to implement it in software. And the DM163 comprises shift registers, data latches, 8×3 channel constant current and 64 x 256 gray level PWM for per color! Each channel provide a maximum current of 60 mA.\u003c\/span\u003e\u003c\/span\u003e\u003c\/p\u003e \r \u003cp style=\"font-size: 12.0pt;font-family: verdana;color: #77776e;text-align: left;background-color: #ffffff;\"\u003e\u003cspan style=\"color: #000000;\"\u003e\u003cspan style=\"font-size: 16.0px;font-family: arial , helvetica , sans-serif;\"\u003eSo, each RGB dot has 256×256x256 = 16,777,216 colours (16 million) in theory, and it's easy to use the 6bit correction register to calibrate the current error for each color LEDs\u003c\/span\u003e\u003c\/span\u003e\u003c\/p\u003e \r \u003cp style=\"font-size: 12.0pt;font-family: verdana;color: #000000;text-align: left;background-color: #ffffff;\"\u003e\u003cspan style=\"color: #000000;\"\u003e\u003cspan style=\"font-size: 16.0px;font-family: arial , helvetica , sans-serif;\"\u003eThis shield can be programed via\u003c\/span\u003e\u003c\/span\u003e\u003cspan style=\"font-size: 16.0px;font-family: arial , helvetica , sans-serif;\"\u003e\u003ca\u003e FT232 USB adapter\u003c\/a\u003e\u003c\/span\u003e\u003cbr\u003e\u003cspan style=\"color: #000000;\"\u003e\u003cspan style=\"font-size: 16.0px;font-family: arial , helvetica , sans-serif;\"\u003ePower is supplied either by pin headers or via 2 sets of mini screw terminals, a slide switch selecting between the two. With the herder side, you just can use the 5V power supply, and in the terminal side, now support 6.2-7.5V power supply, more than 7V will cause the DM163 fever and more than 9V supply may burn your board. Pins brought out the edge of the board include RX, TX and DTS, which can be used to reprogram the onboard ATmega chip, and SCA and SCL for I2C communication. A green LED on the front of the board indicates power, although it is mostly obscured as soon as you plug the matrix panel in.\u003c\/span\u003e\u003cbr\u003e\u003cspan style=\"font-size: 16.0px;font-family: arial , helvetica , sans-serif;\"\u003eIf you have an Arduino UNO, but just want to drive a RGB LED Matrix, you can consider this Colors shield, it's compatible with Colorduino v2.0.\u003c\/span\u003e\u003c\/span\u003e\u003c\/p\u003e \r \u003cp style=\"font-size: 12.0pt;font-family: verdana;color: #77776e;text-align: left;background-color: #ffffff;\"\u003e\u003cspan style=\"color: #000000;\"\u003e\u003cspan style=\"font-size: 16.0px;font-family: arial , helvetica , sans-serif;\"\u003eTo make it work, you must need this \u003c\/span\u003e\u003c\/span\u003e\u003cspan style=\"font-size: 16.0px;font-family: arial , helvetica , sans-serif;\"\u003e\u003ca\u003e\u003cspan style=\"color: #000000;\"\u003eRGB LED Matrix,\u003c\/span\u003e\u003c\/a\u003e\u003c\/span\u003e\u003c\/p\u003e \r \u003cp style=\"font-size: 12.0pt;font-family: verdana;color: #77776e;text-align: left;background-color: #ffffff;\"\u003e\u003cspan style=\"color: #000000;\"\u003e\u003cspan style=\"font-size: 16.0px;font-family: arial , helvetica , sans-serif;\"\u003eFor more information of this product, please visit the\u003c\/span\u003e\u003c\/span\u003e\u003cspan style=\"font-size: 16.0px;font-family: arial , helvetica , sans-serif;\"\u003e\u003ca\u003e\u003cspan style=\"color: #000000;\"\u003eWiki PAGE\u003c\/span\u003e\u003c\/a\u003e\u003c\/span\u003e\u003c\/p\u003e \r \u003cp style=\"font-size: 12.0pt;font-family: verdana;color: #77776e;text-align: left;background-color: #ffffff;\"\u003e\u003cstrong\u003e\u003cspan style=\"color: #000000;\"\u003e\u003cspan style=\"font-size: 16.0px;font-family: arial , helvetica , sans-serif;\"\u003eDocuments:\u003c\/span\u003e\u003c\/span\u003e\u003c\/strong\u003e\u003c\/p\u003e \r \u003cp style=\"color: #77776e;text-align: left;background-color: #ffffff;\"\u003e\u003cspan style=\"color: #000000;\"\u003e\u003cspan style=\"font-size: 16.0px;font-family: arial , helvetica , sans-serif;\"\u003e\u003ca\u003eColorduino library.zip\u003c\/a\u003e\u003c\/span\u003e\u003c\/span\u003e\u003cbr\u003e\u003cspan style=\"font-size: 16.0px;font-family: arial , helvetica , sans-serif;\"\u003e\u003ca\u003e\u003cspan style=\"color: #000000;\"\u003eSch-Colorduino-V2.0.pdf\u003c\/span\u003e\u003c\/a\u003e\u003c\/span\u003e\u003cbr\u003e\u003cspan style=\"font-size: 16.0px;font-family: arial , helvetica , sans-serif;\"\u003e\u003ca\u003e\u003cspan style=\"color: #000000;\"\u003eDM163.pdf\u003c\/span\u003e\u003c\/a\u003e\u003c\/span\u003e\u003c\/p\u003e \r \u003cp\u003e \u003c\/p\u003e \r \u003cp\u003e\u003cspan style=\"color: #000000;\"\u003e\u003cspan style=\"font-size: 16.0px;font-family: arial , helvetica , sans-serif;\"\u003e\u003cstrong\u003ePackage:\u003c\/strong\u003e\u003c\/span\u003e\u003c\/span\u003e\u003c\/p\u003e \r \u003cp\u003e\u003cspan style=\"color: #000000;\"\u003e\u003cspan style=\"font-size: 16.0px;font-family: arial , helvetica , sans-serif;\"\u003e1 x RGB Led \u003c\/span\u003e\u003c\/span\u003e\u003c\/p\u003e \r \u003cp\u003e\u003cspan style=\"color: #000000;\"\u003e\u003cspan style=\"font-size: 16.0px;font-family: arial , helvetica , sans-serif;\"\u003e1x Matrix Driver shield\u003c\/span\u003e\u003c\/span\u003e\u003c\/p\u003e \r \u003cp\u003e \u003c\/p\u003e \r \u003cp\u003e \u003c\/p\u003e \r \u003cp\u003e\u003cimg src=\"https:\/\/ae01.alicdn.com\/kf\/HTB1VXjubuUXBuNjt_a0q6AysXXaA.jpg\"\u003e\u003c\/p\u003e \r \u003cp\u003e \u003c\/p\u003e \r \u003cp\u003e\u003cimg style=\"width: 1000.0px;\" src=\"https:\/\/ae01.alicdn.com\/kf\/HTB1dkrPavfsK1RjSszgq6yXzpXal.jpg\"\u003e\u003c\/p\u003e \r \u003cp\u003e\u003cimg style=\"width: 1000.0px;\" src=\"https:\/\/ae01.alicdn.com\/kf\/HTB1J7TOayLrK1Rjy1zdq6ynnpXa0.jpg\"\u003e\u003c\/p\u003e \r \u003cp\u003e\u003cimg style=\"width: 1000.0px;\" src=\"https:\/\/ae01.alicdn.com\/kf\/HTB1Mu6Fau6sK1RjSsrbq6xbDXXa2.jpg\"\u003e\u003c\/p\u003e \r \u003cp\u003e\u003cimg style=\"width: 1000.0px;\" src=\"https:\/\/ae01.alicdn.com\/kf\/HTB1s7rPavfsK1RjSszgq6yXzpXaL.jpg\"\u003e\u003c\/p\u003e \r \u003cp\u003e \u003c\/p\u003e \r \u003cp\u003e\u003cimg src=\"https:\/\/ae01.alicdn.com\/kf\/HTB1Hc.uimcqBKNjSZFgq6x_kXXaq.jpg\"\u003e\u003c\/p\u003e \r \u003cp\u003e \u003c\/p\u003e \r \u003cwidget data-widget-type=\"customText\" id=\"24006699\" title=\"Related\" type=\"custom\"\u003e\u003c\/widget\u003e \r \u003cp\u003e \u003c\/p\u003e \u003cscript\u003ewindow.adminAccountId=227552571;\u003c\/script\u003e \u003c\/div\u003e"} -
Translation missing: en.products.product.regular_price
$5.99 On Sale{"id":4419983867975,"title":"5MM LED RGB Matrix Module Driver Board 8x8 + Dot Matrix for Arduino AVR top","handle":"5mm-led-rgb-matrix-module-driver-board-8x8-dot-matrix-for-arduino-avr-top-1","description":"\u003cdiv\u003e\n\u003cwidget data-widget-type=\"customText\" id=\"33684419\" title=\"Head\" type=\"custom\"\u003e\u003c\/widget\u003e \r \u003cdiv\u003e\r \r \u003c\/div\u003e \r \u003cdiv\u003e \r \u003cp\u003e\u003cimg src=\"https:\/\/ae01.alicdn.com\/kf\/HTB12JMgilsmBKNjSZFsq6yXSVXaS.jpg\"\u003e\u003c\/p\u003e \r \u003c\/div\u003e \r \u003cdiv\u003e\r \r \u003c\/div\u003e \r \u003cdiv\u003e\r \r \u003c\/div\u003e \r \u003cdiv\u003e\r \r \u003c\/div\u003e \r \u003cp\u003e\u003cspan style=\"color: #000000;\"\u003e\u003cspan style=\"font-size: 16.0px;font-family: arial , helvetica , sans-serif;\"\u003eThe driver circuit based on 3 MBI5168 constant current sink drivers and a M54564 darlington source driver, the Colorduino pairs the M54564 with a single DM163 constant current driver. In order to better drive the RGB matrix and reach their best performance, we use the professional LED driver chip DM163 on board, by using the DM163, the Colorduino gains three 8+6-bit channels of hardware PWM control of the LED's freeing up the ATMega328P from having to implement it in software. And the DM163 comprises shift registers, data latches, 8×3 channel constant current and 64 x 256 gray level PWM for per color! Each channel provide a maximum current of 60 mA.\u003c\/span\u003e\u003c\/span\u003e\u003c\/p\u003e \r \u003cp style=\"font-size: 12.0pt;font-family: verdana;color: #77776e;text-align: left;background-color: #ffffff;\"\u003e\u003cspan style=\"color: #000000;\"\u003e\u003cspan style=\"font-size: 16.0px;font-family: arial , helvetica , sans-serif;\"\u003eSo, each RGB dot has 256×256x256 = 16,777,216 colours (16 million) in theory, and it's easy to use the 6bit correction register to calibrate the current error for each color LEDs\u003c\/span\u003e\u003c\/span\u003e\u003c\/p\u003e \r \u003cp style=\"font-size: 12.0pt;font-family: verdana;color: #000000;text-align: left;background-color: #ffffff;\"\u003e\u003cspan style=\"color: #000000;\"\u003e\u003cspan style=\"font-size: 16.0px;font-family: arial , helvetica , sans-serif;\"\u003eThis shield can be programed via\u003c\/span\u003e\u003c\/span\u003e\u003cspan style=\"font-size: 16.0px;font-family: arial , helvetica , sans-serif;\"\u003e\u003ca\u003e FT232 USB adapter\u003c\/a\u003e\u003c\/span\u003e\u003cbr\u003e\u003cspan style=\"color: #000000;\"\u003e\u003cspan style=\"font-size: 16.0px;font-family: arial , helvetica , sans-serif;\"\u003ePower is supplied either by pin headers or via 2 sets of mini screw terminals, a slide switch selecting between the two. With the herder side, you just can use the 5V power supply, and in the terminal side, now support 6.2-7.5V power supply, more than 7V will cause the DM163 fever and more than 9V supply may burn your board. Pins brought out the edge of the board include RX, TX and DTS, which can be used to reprogram the onboard ATmega chip, and SCA and SCL for I2C communication. A green LED on the front of the board indicates power, although it is mostly obscured as soon as you plug the matrix panel in.\u003c\/span\u003e\u003cbr\u003e\u003cspan style=\"font-size: 16.0px;font-family: arial , helvetica , sans-serif;\"\u003eIf you have an Arduino UNO, but just want to drive a RGB LED Matrix, you can consider this Colors shield, it's compatible with Colorduino v2.0.\u003c\/span\u003e\u003c\/span\u003e\u003c\/p\u003e \r \u003cp style=\"font-size: 12.0pt;font-family: verdana;color: #77776e;text-align: left;background-color: #ffffff;\"\u003e\u003cspan style=\"color: #000000;\"\u003e\u003cspan style=\"font-size: 16.0px;font-family: arial , helvetica , sans-serif;\"\u003eTo make it work, you must need this \u003c\/span\u003e\u003c\/span\u003e\u003cspan style=\"font-size: 16.0px;font-family: arial , helvetica , sans-serif;\"\u003e\u003ca\u003e\u003cspan style=\"color: #000000;\"\u003eRGB LED Matrix,\u003c\/span\u003e\u003c\/a\u003e\u003c\/span\u003e\u003c\/p\u003e \r \u003cp style=\"font-size: 12.0pt;font-family: verdana;color: #77776e;text-align: left;background-color: #ffffff;\"\u003e\u003cspan style=\"color: #000000;\"\u003e\u003cspan style=\"font-size: 16.0px;font-family: arial , helvetica , sans-serif;\"\u003eFor more information of this product, please visit the\u003c\/span\u003e\u003c\/span\u003e\u003cspan style=\"font-size: 16.0px;font-family: arial , helvetica , sans-serif;\"\u003e\u003ca\u003e\u003cspan style=\"color: #000000;\"\u003eWiki PAGE\u003c\/span\u003e\u003c\/a\u003e\u003c\/span\u003e\u003c\/p\u003e \r \u003cp style=\"font-size: 12.0pt;font-family: verdana;color: #77776e;text-align: left;background-color: #ffffff;\"\u003e\u003cstrong\u003e\u003cspan style=\"color: #000000;\"\u003e\u003cspan style=\"font-size: 16.0px;font-family: arial , helvetica , sans-serif;\"\u003eDocuments:\u003c\/span\u003e\u003c\/span\u003e\u003c\/strong\u003e\u003c\/p\u003e \r \u003cp style=\"color: #77776e;text-align: left;background-color: #ffffff;\"\u003e\u003cspan style=\"color: #000000;\"\u003e\u003cspan style=\"font-size: 16.0px;font-family: arial , helvetica , sans-serif;\"\u003e\u003ca\u003eColorduino library.zip\u003c\/a\u003e\u003c\/span\u003e\u003c\/span\u003e\u003cbr\u003e\u003cspan style=\"font-size: 16.0px;font-family: arial , helvetica , sans-serif;\"\u003e\u003ca\u003e\u003cspan style=\"color: #000000;\"\u003eSch-Colorduino-V2.0.pdf\u003c\/span\u003e\u003c\/a\u003e\u003c\/span\u003e\u003cbr\u003e\u003cspan style=\"font-size: 16.0px;font-family: arial , helvetica , sans-serif;\"\u003e\u003ca\u003e\u003cspan style=\"color: #000000;\"\u003eDM163.pdf\u003c\/span\u003e\u003c\/a\u003e\u003c\/span\u003e\u003c\/p\u003e \r \u003cp\u003e \u003c\/p\u003e \r \u003cp\u003e\u003cspan style=\"color: #000000;\"\u003e\u003cspan style=\"font-size: 16.0px;font-family: arial , helvetica , sans-serif;\"\u003e\u003cstrong\u003ePackage:\u003c\/strong\u003e\u003c\/span\u003e\u003c\/span\u003e\u003c\/p\u003e \r \u003cp\u003e\u003cspan style=\"color: #000000;\"\u003e\u003cspan style=\"font-size: 16.0px;font-family: arial , helvetica , sans-serif;\"\u003e1 x RGB Led \u003c\/span\u003e\u003c\/span\u003e\u003c\/p\u003e \r \u003cp\u003e\u003cspan style=\"color: #000000;\"\u003e\u003cspan style=\"font-size: 16.0px;font-family: arial , helvetica , sans-serif;\"\u003e1x Matrix Driver shield\u003c\/span\u003e\u003c\/span\u003e\u003c\/p\u003e \r \u003cp\u003e \u003c\/p\u003e \r \u003cp\u003e \u003c\/p\u003e \r \u003cp\u003e\u003cimg src=\"https:\/\/ae01.alicdn.com\/kf\/HTB1VXjubuUXBuNjt_a0q6AysXXaA.jpg\"\u003e\u003c\/p\u003e \r \u003cp\u003e \u003c\/p\u003e \r \u003cp\u003e\u003cimg style=\"width: 1000.0px;\" src=\"https:\/\/ae01.alicdn.com\/kf\/HTB1dkrPavfsK1RjSszgq6yXzpXal.jpg\"\u003e\u003c\/p\u003e \r \u003cp\u003e\u003cimg style=\"width: 1000.0px;\" src=\"https:\/\/ae01.alicdn.com\/kf\/HTB1J7TOayLrK1Rjy1zdq6ynnpXa0.jpg\"\u003e\u003c\/p\u003e \r \u003cp\u003e\u003cimg style=\"width: 1000.0px;\" src=\"https:\/\/ae01.alicdn.com\/kf\/HTB1Mu6Fau6sK1RjSsrbq6xbDXXa2.jpg\"\u003e\u003c\/p\u003e \r \u003cp\u003e\u003cimg style=\"width: 1000.0px;\" src=\"https:\/\/ae01.alicdn.com\/kf\/HTB1s7rPavfsK1RjSszgq6yXzpXaL.jpg\"\u003e\u003c\/p\u003e \r \u003cp\u003e \u003c\/p\u003e \r \u003cp\u003e\u003cimg src=\"https:\/\/ae01.alicdn.com\/kf\/HTB1Hc.uimcqBKNjSZFgq6x_kXXaq.jpg\"\u003e\u003c\/p\u003e \r \u003cp\u003e \u003c\/p\u003e \r \u003cwidget data-widget-type=\"customText\" id=\"24006699\" title=\"Related\" type=\"custom\"\u003e\u003c\/widget\u003e \r \u003cp\u003e \u003c\/p\u003e \u003cscript\u003ewindow.adminAccountId=227552571;\u003c\/script\u003e \u003c\/div\u003e","published_at":"2022-09-19T12:31:18+08:00","created_at":"2019-12-27T18:24:55+08:00","vendor":"diymore","type":"Motor Driver Module","tags":[],"price":272,"price_min":272,"price_max":272,"available":true,"price_varies":false,"compare_at_price":544,"compare_at_price_min":544,"compare_at_price_max":544,"compare_at_price_varies":false,"variants":[{"id":31582900846663,"title":"Default Title","option1":"Default Title","option2":null,"option3":null,"sku":"030081","requires_shipping":true,"taxable":false,"featured_image":null,"available":true,"name":"5MM LED RGB Matrix Module Driver Board 8x8 + Dot Matrix for Arduino AVR top","public_title":null,"options":["Default Title"],"price":272,"weight":0,"compare_at_price":544,"inventory_management":null,"barcode":"","requires_selling_plan":false,"selling_plan_allocations":[]}],"images":["\/\/www.diymore.cc\/cdn\/shop\/products\/5MM-LED-RGB-Matrix-Module-Driver-Board-8x8-Dot-Matrix-for-Arduino-AVR-top_915.jpg?v=1588698614","\/\/www.diymore.cc\/cdn\/shop\/products\/5MM-LED-RGB-Matrix-Module-Driver-Board-8x8-Dot-Matrix-for-Arduino-AVR-top_b103e582-6bdf-46c0-b4e8-f1b84bea8d30_182.jpg?v=1588698614","\/\/www.diymore.cc\/cdn\/shop\/products\/5MM-LED-RGB-Matrix-Module-Driver-Board-8x8-Dot-Matrix-for-Arduino-AVR-top_8a893a41-992b-4b2d-8fc8-63e5e968c2c3_630.jpg?v=1588698614","\/\/www.diymore.cc\/cdn\/shop\/products\/5MM-LED-RGB-Matrix-Module-Driver-Board-8x8-Dot-Matrix-for-Arduino-AVR-top_695e9ab7-3820-46a5-a836-baa68e4b51d9_884.jpg?v=1588698614"],"featured_image":"\/\/www.diymore.cc\/cdn\/shop\/products\/5MM-LED-RGB-Matrix-Module-Driver-Board-8x8-Dot-Matrix-for-Arduino-AVR-top_915.jpg?v=1588698614","options":["Title"],"media":[{"alt":"5Mm Led Rgb Matrix Module Driver Board 8X8 + Dot For Arduino Avr Top Integrated Circuits","id":6682362675271,"position":1,"preview_image":{"aspect_ratio":1.0,"height":1000,"width":1000,"src":"\/\/www.diymore.cc\/cdn\/shop\/products\/5MM-LED-RGB-Matrix-Module-Driver-Board-8x8-Dot-Matrix-for-Arduino-AVR-top_915.jpg?v=1588698614"},"aspect_ratio":1.0,"height":1000,"media_type":"image","src":"\/\/www.diymore.cc\/cdn\/shop\/products\/5MM-LED-RGB-Matrix-Module-Driver-Board-8x8-Dot-Matrix-for-Arduino-AVR-top_915.jpg?v=1588698614","width":1000},{"alt":"5Mm Led Rgb Matrix Module Driver Board 8X8 + Dot For Arduino Avr Top Integrated Circuits","id":6682362937415,"position":2,"preview_image":{"aspect_ratio":1.0,"height":1000,"width":1000,"src":"\/\/www.diymore.cc\/cdn\/shop\/products\/5MM-LED-RGB-Matrix-Module-Driver-Board-8x8-Dot-Matrix-for-Arduino-AVR-top_b103e582-6bdf-46c0-b4e8-f1b84bea8d30_182.jpg?v=1588698614"},"aspect_ratio":1.0,"height":1000,"media_type":"image","src":"\/\/www.diymore.cc\/cdn\/shop\/products\/5MM-LED-RGB-Matrix-Module-Driver-Board-8x8-Dot-Matrix-for-Arduino-AVR-top_b103e582-6bdf-46c0-b4e8-f1b84bea8d30_182.jpg?v=1588698614","width":1000},{"alt":"5Mm Led Rgb Matrix Module Driver Board 8X8 + Dot For Arduino Avr Top Integrated Circuits","id":6682363035719,"position":3,"preview_image":{"aspect_ratio":1.0,"height":1000,"width":1000,"src":"\/\/www.diymore.cc\/cdn\/shop\/products\/5MM-LED-RGB-Matrix-Module-Driver-Board-8x8-Dot-Matrix-for-Arduino-AVR-top_8a893a41-992b-4b2d-8fc8-63e5e968c2c3_630.jpg?v=1588698614"},"aspect_ratio":1.0,"height":1000,"media_type":"image","src":"\/\/www.diymore.cc\/cdn\/shop\/products\/5MM-LED-RGB-Matrix-Module-Driver-Board-8x8-Dot-Matrix-for-Arduino-AVR-top_8a893a41-992b-4b2d-8fc8-63e5e968c2c3_630.jpg?v=1588698614","width":1000},{"alt":"5Mm Led Rgb Matrix Module Driver Board 8X8 + Dot For Arduino Avr Top Integrated Circuits","id":6682363232327,"position":4,"preview_image":{"aspect_ratio":1.0,"height":1000,"width":1000,"src":"\/\/www.diymore.cc\/cdn\/shop\/products\/5MM-LED-RGB-Matrix-Module-Driver-Board-8x8-Dot-Matrix-for-Arduino-AVR-top_695e9ab7-3820-46a5-a836-baa68e4b51d9_884.jpg?v=1588698614"},"aspect_ratio":1.0,"height":1000,"media_type":"image","src":"\/\/www.diymore.cc\/cdn\/shop\/products\/5MM-LED-RGB-Matrix-Module-Driver-Board-8x8-Dot-Matrix-for-Arduino-AVR-top_695e9ab7-3820-46a5-a836-baa68e4b51d9_884.jpg?v=1588698614","width":1000}],"requires_selling_plan":false,"selling_plan_groups":[],"content":"\u003cdiv\u003e\n\u003cwidget data-widget-type=\"customText\" id=\"33684419\" title=\"Head\" type=\"custom\"\u003e\u003c\/widget\u003e \r \u003cdiv\u003e\r \r \u003c\/div\u003e \r \u003cdiv\u003e \r \u003cp\u003e\u003cimg src=\"https:\/\/ae01.alicdn.com\/kf\/HTB12JMgilsmBKNjSZFsq6yXSVXaS.jpg\"\u003e\u003c\/p\u003e \r \u003c\/div\u003e \r \u003cdiv\u003e\r \r \u003c\/div\u003e \r \u003cdiv\u003e\r \r \u003c\/div\u003e \r \u003cdiv\u003e\r \r \u003c\/div\u003e \r \u003cp\u003e\u003cspan style=\"color: #000000;\"\u003e\u003cspan style=\"font-size: 16.0px;font-family: arial , helvetica , sans-serif;\"\u003eThe driver circuit based on 3 MBI5168 constant current sink drivers and a M54564 darlington source driver, the Colorduino pairs the M54564 with a single DM163 constant current driver. In order to better drive the RGB matrix and reach their best performance, we use the professional LED driver chip DM163 on board, by using the DM163, the Colorduino gains three 8+6-bit channels of hardware PWM control of the LED's freeing up the ATMega328P from having to implement it in software. And the DM163 comprises shift registers, data latches, 8×3 channel constant current and 64 x 256 gray level PWM for per color! Each channel provide a maximum current of 60 mA.\u003c\/span\u003e\u003c\/span\u003e\u003c\/p\u003e \r \u003cp style=\"font-size: 12.0pt;font-family: verdana;color: #77776e;text-align: left;background-color: #ffffff;\"\u003e\u003cspan style=\"color: #000000;\"\u003e\u003cspan style=\"font-size: 16.0px;font-family: arial , helvetica , sans-serif;\"\u003eSo, each RGB dot has 256×256x256 = 16,777,216 colours (16 million) in theory, and it's easy to use the 6bit correction register to calibrate the current error for each color LEDs\u003c\/span\u003e\u003c\/span\u003e\u003c\/p\u003e \r \u003cp style=\"font-size: 12.0pt;font-family: verdana;color: #000000;text-align: left;background-color: #ffffff;\"\u003e\u003cspan style=\"color: #000000;\"\u003e\u003cspan style=\"font-size: 16.0px;font-family: arial , helvetica , sans-serif;\"\u003eThis shield can be programed via\u003c\/span\u003e\u003c\/span\u003e\u003cspan style=\"font-size: 16.0px;font-family: arial , helvetica , sans-serif;\"\u003e\u003ca\u003e FT232 USB adapter\u003c\/a\u003e\u003c\/span\u003e\u003cbr\u003e\u003cspan style=\"color: #000000;\"\u003e\u003cspan style=\"font-size: 16.0px;font-family: arial , helvetica , sans-serif;\"\u003ePower is supplied either by pin headers or via 2 sets of mini screw terminals, a slide switch selecting between the two. With the herder side, you just can use the 5V power supply, and in the terminal side, now support 6.2-7.5V power supply, more than 7V will cause the DM163 fever and more than 9V supply may burn your board. Pins brought out the edge of the board include RX, TX and DTS, which can be used to reprogram the onboard ATmega chip, and SCA and SCL for I2C communication. A green LED on the front of the board indicates power, although it is mostly obscured as soon as you plug the matrix panel in.\u003c\/span\u003e\u003cbr\u003e\u003cspan style=\"font-size: 16.0px;font-family: arial , helvetica , sans-serif;\"\u003eIf you have an Arduino UNO, but just want to drive a RGB LED Matrix, you can consider this Colors shield, it's compatible with Colorduino v2.0.\u003c\/span\u003e\u003c\/span\u003e\u003c\/p\u003e \r \u003cp style=\"font-size: 12.0pt;font-family: verdana;color: #77776e;text-align: left;background-color: #ffffff;\"\u003e\u003cspan style=\"color: #000000;\"\u003e\u003cspan style=\"font-size: 16.0px;font-family: arial , helvetica , sans-serif;\"\u003eTo make it work, you must need this \u003c\/span\u003e\u003c\/span\u003e\u003cspan style=\"font-size: 16.0px;font-family: arial , helvetica , sans-serif;\"\u003e\u003ca\u003e\u003cspan style=\"color: #000000;\"\u003eRGB LED Matrix,\u003c\/span\u003e\u003c\/a\u003e\u003c\/span\u003e\u003c\/p\u003e \r \u003cp style=\"font-size: 12.0pt;font-family: verdana;color: #77776e;text-align: left;background-color: #ffffff;\"\u003e\u003cspan style=\"color: #000000;\"\u003e\u003cspan style=\"font-size: 16.0px;font-family: arial , helvetica , sans-serif;\"\u003eFor more information of this product, please visit the\u003c\/span\u003e\u003c\/span\u003e\u003cspan style=\"font-size: 16.0px;font-family: arial , helvetica , sans-serif;\"\u003e\u003ca\u003e\u003cspan style=\"color: #000000;\"\u003eWiki PAGE\u003c\/span\u003e\u003c\/a\u003e\u003c\/span\u003e\u003c\/p\u003e \r \u003cp style=\"font-size: 12.0pt;font-family: verdana;color: #77776e;text-align: left;background-color: #ffffff;\"\u003e\u003cstrong\u003e\u003cspan style=\"color: #000000;\"\u003e\u003cspan style=\"font-size: 16.0px;font-family: arial , helvetica , sans-serif;\"\u003eDocuments:\u003c\/span\u003e\u003c\/span\u003e\u003c\/strong\u003e\u003c\/p\u003e \r \u003cp style=\"color: #77776e;text-align: left;background-color: #ffffff;\"\u003e\u003cspan style=\"color: #000000;\"\u003e\u003cspan style=\"font-size: 16.0px;font-family: arial , helvetica , sans-serif;\"\u003e\u003ca\u003eColorduino library.zip\u003c\/a\u003e\u003c\/span\u003e\u003c\/span\u003e\u003cbr\u003e\u003cspan style=\"font-size: 16.0px;font-family: arial , helvetica , sans-serif;\"\u003e\u003ca\u003e\u003cspan style=\"color: #000000;\"\u003eSch-Colorduino-V2.0.pdf\u003c\/span\u003e\u003c\/a\u003e\u003c\/span\u003e\u003cbr\u003e\u003cspan style=\"font-size: 16.0px;font-family: arial , helvetica , sans-serif;\"\u003e\u003ca\u003e\u003cspan style=\"color: #000000;\"\u003eDM163.pdf\u003c\/span\u003e\u003c\/a\u003e\u003c\/span\u003e\u003c\/p\u003e \r \u003cp\u003e \u003c\/p\u003e \r \u003cp\u003e\u003cspan style=\"color: #000000;\"\u003e\u003cspan style=\"font-size: 16.0px;font-family: arial , helvetica , sans-serif;\"\u003e\u003cstrong\u003ePackage:\u003c\/strong\u003e\u003c\/span\u003e\u003c\/span\u003e\u003c\/p\u003e \r \u003cp\u003e\u003cspan style=\"color: #000000;\"\u003e\u003cspan style=\"font-size: 16.0px;font-family: arial , helvetica , sans-serif;\"\u003e1 x RGB Led \u003c\/span\u003e\u003c\/span\u003e\u003c\/p\u003e \r \u003cp\u003e\u003cspan style=\"color: #000000;\"\u003e\u003cspan style=\"font-size: 16.0px;font-family: arial , helvetica , sans-serif;\"\u003e1x Matrix Driver shield\u003c\/span\u003e\u003c\/span\u003e\u003c\/p\u003e \r \u003cp\u003e \u003c\/p\u003e \r \u003cp\u003e \u003c\/p\u003e \r \u003cp\u003e\u003cimg src=\"https:\/\/ae01.alicdn.com\/kf\/HTB1VXjubuUXBuNjt_a0q6AysXXaA.jpg\"\u003e\u003c\/p\u003e \r \u003cp\u003e \u003c\/p\u003e \r \u003cp\u003e\u003cimg style=\"width: 1000.0px;\" src=\"https:\/\/ae01.alicdn.com\/kf\/HTB1dkrPavfsK1RjSszgq6yXzpXal.jpg\"\u003e\u003c\/p\u003e \r \u003cp\u003e\u003cimg style=\"width: 1000.0px;\" src=\"https:\/\/ae01.alicdn.com\/kf\/HTB1J7TOayLrK1Rjy1zdq6ynnpXa0.jpg\"\u003e\u003c\/p\u003e \r \u003cp\u003e\u003cimg style=\"width: 1000.0px;\" src=\"https:\/\/ae01.alicdn.com\/kf\/HTB1Mu6Fau6sK1RjSsrbq6xbDXXa2.jpg\"\u003e\u003c\/p\u003e \r \u003cp\u003e\u003cimg style=\"width: 1000.0px;\" src=\"https:\/\/ae01.alicdn.com\/kf\/HTB1s7rPavfsK1RjSszgq6yXzpXaL.jpg\"\u003e\u003c\/p\u003e \r \u003cp\u003e \u003c\/p\u003e \r \u003cp\u003e\u003cimg src=\"https:\/\/ae01.alicdn.com\/kf\/HTB1Hc.uimcqBKNjSZFgq6x_kXXaq.jpg\"\u003e\u003c\/p\u003e \r \u003cp\u003e \u003c\/p\u003e \r \u003cwidget data-widget-type=\"customText\" id=\"24006699\" title=\"Related\" type=\"custom\"\u003e\u003c\/widget\u003e \r \u003cp\u003e \u003c\/p\u003e \u003cscript\u003ewindow.adminAccountId=227552571;\u003c\/script\u003e \u003c\/div\u003e"} -
Translation missing: en.products.product.regular_price
$8.99 On Sale{"id":4419983867975,"title":"5MM LED RGB Matrix Module Driver Board 8x8 + Dot Matrix for Arduino AVR top","handle":"5mm-led-rgb-matrix-module-driver-board-8x8-dot-matrix-for-arduino-avr-top-1","description":"\u003cdiv\u003e\n\u003cwidget data-widget-type=\"customText\" id=\"33684419\" title=\"Head\" type=\"custom\"\u003e\u003c\/widget\u003e \r \u003cdiv\u003e\r \r \u003c\/div\u003e \r \u003cdiv\u003e \r \u003cp\u003e\u003cimg src=\"https:\/\/ae01.alicdn.com\/kf\/HTB12JMgilsmBKNjSZFsq6yXSVXaS.jpg\"\u003e\u003c\/p\u003e \r \u003c\/div\u003e \r \u003cdiv\u003e\r \r \u003c\/div\u003e \r \u003cdiv\u003e\r \r \u003c\/div\u003e \r \u003cdiv\u003e\r \r \u003c\/div\u003e \r \u003cp\u003e\u003cspan style=\"color: #000000;\"\u003e\u003cspan style=\"font-size: 16.0px;font-family: arial , helvetica , sans-serif;\"\u003eThe driver circuit based on 3 MBI5168 constant current sink drivers and a M54564 darlington source driver, the Colorduino pairs the M54564 with a single DM163 constant current driver. In order to better drive the RGB matrix and reach their best performance, we use the professional LED driver chip DM163 on board, by using the DM163, the Colorduino gains three 8+6-bit channels of hardware PWM control of the LED's freeing up the ATMega328P from having to implement it in software. And the DM163 comprises shift registers, data latches, 8×3 channel constant current and 64 x 256 gray level PWM for per color! Each channel provide a maximum current of 60 mA.\u003c\/span\u003e\u003c\/span\u003e\u003c\/p\u003e \r \u003cp style=\"font-size: 12.0pt;font-family: verdana;color: #77776e;text-align: left;background-color: #ffffff;\"\u003e\u003cspan style=\"color: #000000;\"\u003e\u003cspan style=\"font-size: 16.0px;font-family: arial , helvetica , sans-serif;\"\u003eSo, each RGB dot has 256×256x256 = 16,777,216 colours (16 million) in theory, and it's easy to use the 6bit correction register to calibrate the current error for each color LEDs\u003c\/span\u003e\u003c\/span\u003e\u003c\/p\u003e \r \u003cp style=\"font-size: 12.0pt;font-family: verdana;color: #000000;text-align: left;background-color: #ffffff;\"\u003e\u003cspan style=\"color: #000000;\"\u003e\u003cspan style=\"font-size: 16.0px;font-family: arial , helvetica , sans-serif;\"\u003eThis shield can be programed via\u003c\/span\u003e\u003c\/span\u003e\u003cspan style=\"font-size: 16.0px;font-family: arial , helvetica , sans-serif;\"\u003e\u003ca\u003e FT232 USB adapter\u003c\/a\u003e\u003c\/span\u003e\u003cbr\u003e\u003cspan style=\"color: #000000;\"\u003e\u003cspan style=\"font-size: 16.0px;font-family: arial , helvetica , sans-serif;\"\u003ePower is supplied either by pin headers or via 2 sets of mini screw terminals, a slide switch selecting between the two. With the herder side, you just can use the 5V power supply, and in the terminal side, now support 6.2-7.5V power supply, more than 7V will cause the DM163 fever and more than 9V supply may burn your board. Pins brought out the edge of the board include RX, TX and DTS, which can be used to reprogram the onboard ATmega chip, and SCA and SCL for I2C communication. A green LED on the front of the board indicates power, although it is mostly obscured as soon as you plug the matrix panel in.\u003c\/span\u003e\u003cbr\u003e\u003cspan style=\"font-size: 16.0px;font-family: arial , helvetica , sans-serif;\"\u003eIf you have an Arduino UNO, but just want to drive a RGB LED Matrix, you can consider this Colors shield, it's compatible with Colorduino v2.0.\u003c\/span\u003e\u003c\/span\u003e\u003c\/p\u003e \r \u003cp style=\"font-size: 12.0pt;font-family: verdana;color: #77776e;text-align: left;background-color: #ffffff;\"\u003e\u003cspan style=\"color: #000000;\"\u003e\u003cspan style=\"font-size: 16.0px;font-family: arial , helvetica , sans-serif;\"\u003eTo make it work, you must need this \u003c\/span\u003e\u003c\/span\u003e\u003cspan style=\"font-size: 16.0px;font-family: arial , helvetica , sans-serif;\"\u003e\u003ca\u003e\u003cspan style=\"color: #000000;\"\u003eRGB LED Matrix,\u003c\/span\u003e\u003c\/a\u003e\u003c\/span\u003e\u003c\/p\u003e \r \u003cp style=\"font-size: 12.0pt;font-family: verdana;color: #77776e;text-align: left;background-color: #ffffff;\"\u003e\u003cspan style=\"color: #000000;\"\u003e\u003cspan style=\"font-size: 16.0px;font-family: arial , helvetica , sans-serif;\"\u003eFor more information of this product, please visit the\u003c\/span\u003e\u003c\/span\u003e\u003cspan style=\"font-size: 16.0px;font-family: arial , helvetica , sans-serif;\"\u003e\u003ca\u003e\u003cspan style=\"color: #000000;\"\u003eWiki PAGE\u003c\/span\u003e\u003c\/a\u003e\u003c\/span\u003e\u003c\/p\u003e \r \u003cp style=\"font-size: 12.0pt;font-family: verdana;color: #77776e;text-align: left;background-color: #ffffff;\"\u003e\u003cstrong\u003e\u003cspan style=\"color: #000000;\"\u003e\u003cspan style=\"font-size: 16.0px;font-family: arial , helvetica , sans-serif;\"\u003eDocuments:\u003c\/span\u003e\u003c\/span\u003e\u003c\/strong\u003e\u003c\/p\u003e \r \u003cp style=\"color: #77776e;text-align: left;background-color: #ffffff;\"\u003e\u003cspan style=\"color: #000000;\"\u003e\u003cspan style=\"font-size: 16.0px;font-family: arial , helvetica , sans-serif;\"\u003e\u003ca\u003eColorduino library.zip\u003c\/a\u003e\u003c\/span\u003e\u003c\/span\u003e\u003cbr\u003e\u003cspan style=\"font-size: 16.0px;font-family: arial , helvetica , sans-serif;\"\u003e\u003ca\u003e\u003cspan style=\"color: #000000;\"\u003eSch-Colorduino-V2.0.pdf\u003c\/span\u003e\u003c\/a\u003e\u003c\/span\u003e\u003cbr\u003e\u003cspan style=\"font-size: 16.0px;font-family: arial , helvetica , sans-serif;\"\u003e\u003ca\u003e\u003cspan style=\"color: #000000;\"\u003eDM163.pdf\u003c\/span\u003e\u003c\/a\u003e\u003c\/span\u003e\u003c\/p\u003e \r \u003cp\u003e \u003c\/p\u003e \r \u003cp\u003e\u003cspan style=\"color: #000000;\"\u003e\u003cspan style=\"font-size: 16.0px;font-family: arial , helvetica , sans-serif;\"\u003e\u003cstrong\u003ePackage:\u003c\/strong\u003e\u003c\/span\u003e\u003c\/span\u003e\u003c\/p\u003e \r \u003cp\u003e\u003cspan style=\"color: #000000;\"\u003e\u003cspan style=\"font-size: 16.0px;font-family: arial , helvetica , sans-serif;\"\u003e1 x RGB Led \u003c\/span\u003e\u003c\/span\u003e\u003c\/p\u003e \r \u003cp\u003e\u003cspan style=\"color: #000000;\"\u003e\u003cspan style=\"font-size: 16.0px;font-family: arial , helvetica , sans-serif;\"\u003e1x Matrix Driver shield\u003c\/span\u003e\u003c\/span\u003e\u003c\/p\u003e \r \u003cp\u003e \u003c\/p\u003e \r \u003cp\u003e \u003c\/p\u003e \r \u003cp\u003e\u003cimg src=\"https:\/\/ae01.alicdn.com\/kf\/HTB1VXjubuUXBuNjt_a0q6AysXXaA.jpg\"\u003e\u003c\/p\u003e \r \u003cp\u003e \u003c\/p\u003e \r \u003cp\u003e\u003cimg style=\"width: 1000.0px;\" src=\"https:\/\/ae01.alicdn.com\/kf\/HTB1dkrPavfsK1RjSszgq6yXzpXal.jpg\"\u003e\u003c\/p\u003e \r \u003cp\u003e\u003cimg style=\"width: 1000.0px;\" src=\"https:\/\/ae01.alicdn.com\/kf\/HTB1J7TOayLrK1Rjy1zdq6ynnpXa0.jpg\"\u003e\u003c\/p\u003e \r \u003cp\u003e\u003cimg style=\"width: 1000.0px;\" src=\"https:\/\/ae01.alicdn.com\/kf\/HTB1Mu6Fau6sK1RjSsrbq6xbDXXa2.jpg\"\u003e\u003c\/p\u003e \r \u003cp\u003e\u003cimg style=\"width: 1000.0px;\" src=\"https:\/\/ae01.alicdn.com\/kf\/HTB1s7rPavfsK1RjSszgq6yXzpXaL.jpg\"\u003e\u003c\/p\u003e \r \u003cp\u003e \u003c\/p\u003e \r \u003cp\u003e\u003cimg src=\"https:\/\/ae01.alicdn.com\/kf\/HTB1Hc.uimcqBKNjSZFgq6x_kXXaq.jpg\"\u003e\u003c\/p\u003e \r \u003cp\u003e \u003c\/p\u003e \r \u003cwidget data-widget-type=\"customText\" id=\"24006699\" title=\"Related\" type=\"custom\"\u003e\u003c\/widget\u003e \r \u003cp\u003e \u003c\/p\u003e \u003cscript\u003ewindow.adminAccountId=227552571;\u003c\/script\u003e \u003c\/div\u003e","published_at":"2022-09-19T12:31:18+08:00","created_at":"2019-12-27T18:24:55+08:00","vendor":"diymore","type":"Motor Driver Module","tags":[],"price":272,"price_min":272,"price_max":272,"available":true,"price_varies":false,"compare_at_price":544,"compare_at_price_min":544,"compare_at_price_max":544,"compare_at_price_varies":false,"variants":[{"id":31582900846663,"title":"Default Title","option1":"Default Title","option2":null,"option3":null,"sku":"030081","requires_shipping":true,"taxable":false,"featured_image":null,"available":true,"name":"5MM LED RGB Matrix Module Driver Board 8x8 + Dot Matrix for Arduino AVR top","public_title":null,"options":["Default Title"],"price":272,"weight":0,"compare_at_price":544,"inventory_management":null,"barcode":"","requires_selling_plan":false,"selling_plan_allocations":[]}],"images":["\/\/www.diymore.cc\/cdn\/shop\/products\/5MM-LED-RGB-Matrix-Module-Driver-Board-8x8-Dot-Matrix-for-Arduino-AVR-top_915.jpg?v=1588698614","\/\/www.diymore.cc\/cdn\/shop\/products\/5MM-LED-RGB-Matrix-Module-Driver-Board-8x8-Dot-Matrix-for-Arduino-AVR-top_b103e582-6bdf-46c0-b4e8-f1b84bea8d30_182.jpg?v=1588698614","\/\/www.diymore.cc\/cdn\/shop\/products\/5MM-LED-RGB-Matrix-Module-Driver-Board-8x8-Dot-Matrix-for-Arduino-AVR-top_8a893a41-992b-4b2d-8fc8-63e5e968c2c3_630.jpg?v=1588698614","\/\/www.diymore.cc\/cdn\/shop\/products\/5MM-LED-RGB-Matrix-Module-Driver-Board-8x8-Dot-Matrix-for-Arduino-AVR-top_695e9ab7-3820-46a5-a836-baa68e4b51d9_884.jpg?v=1588698614"],"featured_image":"\/\/www.diymore.cc\/cdn\/shop\/products\/5MM-LED-RGB-Matrix-Module-Driver-Board-8x8-Dot-Matrix-for-Arduino-AVR-top_915.jpg?v=1588698614","options":["Title"],"media":[{"alt":"5Mm Led Rgb Matrix Module Driver Board 8X8 + Dot For Arduino Avr Top Integrated Circuits","id":6682362675271,"position":1,"preview_image":{"aspect_ratio":1.0,"height":1000,"width":1000,"src":"\/\/www.diymore.cc\/cdn\/shop\/products\/5MM-LED-RGB-Matrix-Module-Driver-Board-8x8-Dot-Matrix-for-Arduino-AVR-top_915.jpg?v=1588698614"},"aspect_ratio":1.0,"height":1000,"media_type":"image","src":"\/\/www.diymore.cc\/cdn\/shop\/products\/5MM-LED-RGB-Matrix-Module-Driver-Board-8x8-Dot-Matrix-for-Arduino-AVR-top_915.jpg?v=1588698614","width":1000},{"alt":"5Mm Led Rgb Matrix Module Driver Board 8X8 + Dot For Arduino Avr Top Integrated Circuits","id":6682362937415,"position":2,"preview_image":{"aspect_ratio":1.0,"height":1000,"width":1000,"src":"\/\/www.diymore.cc\/cdn\/shop\/products\/5MM-LED-RGB-Matrix-Module-Driver-Board-8x8-Dot-Matrix-for-Arduino-AVR-top_b103e582-6bdf-46c0-b4e8-f1b84bea8d30_182.jpg?v=1588698614"},"aspect_ratio":1.0,"height":1000,"media_type":"image","src":"\/\/www.diymore.cc\/cdn\/shop\/products\/5MM-LED-RGB-Matrix-Module-Driver-Board-8x8-Dot-Matrix-for-Arduino-AVR-top_b103e582-6bdf-46c0-b4e8-f1b84bea8d30_182.jpg?v=1588698614","width":1000},{"alt":"5Mm Led Rgb Matrix Module Driver Board 8X8 + Dot For Arduino Avr Top Integrated Circuits","id":6682363035719,"position":3,"preview_image":{"aspect_ratio":1.0,"height":1000,"width":1000,"src":"\/\/www.diymore.cc\/cdn\/shop\/products\/5MM-LED-RGB-Matrix-Module-Driver-Board-8x8-Dot-Matrix-for-Arduino-AVR-top_8a893a41-992b-4b2d-8fc8-63e5e968c2c3_630.jpg?v=1588698614"},"aspect_ratio":1.0,"height":1000,"media_type":"image","src":"\/\/www.diymore.cc\/cdn\/shop\/products\/5MM-LED-RGB-Matrix-Module-Driver-Board-8x8-Dot-Matrix-for-Arduino-AVR-top_8a893a41-992b-4b2d-8fc8-63e5e968c2c3_630.jpg?v=1588698614","width":1000},{"alt":"5Mm Led Rgb Matrix Module Driver Board 8X8 + Dot For Arduino Avr Top Integrated Circuits","id":6682363232327,"position":4,"preview_image":{"aspect_ratio":1.0,"height":1000,"width":1000,"src":"\/\/www.diymore.cc\/cdn\/shop\/products\/5MM-LED-RGB-Matrix-Module-Driver-Board-8x8-Dot-Matrix-for-Arduino-AVR-top_695e9ab7-3820-46a5-a836-baa68e4b51d9_884.jpg?v=1588698614"},"aspect_ratio":1.0,"height":1000,"media_type":"image","src":"\/\/www.diymore.cc\/cdn\/shop\/products\/5MM-LED-RGB-Matrix-Module-Driver-Board-8x8-Dot-Matrix-for-Arduino-AVR-top_695e9ab7-3820-46a5-a836-baa68e4b51d9_884.jpg?v=1588698614","width":1000}],"requires_selling_plan":false,"selling_plan_groups":[],"content":"\u003cdiv\u003e\n\u003cwidget data-widget-type=\"customText\" id=\"33684419\" title=\"Head\" type=\"custom\"\u003e\u003c\/widget\u003e \r \u003cdiv\u003e\r \r \u003c\/div\u003e \r \u003cdiv\u003e \r \u003cp\u003e\u003cimg src=\"https:\/\/ae01.alicdn.com\/kf\/HTB12JMgilsmBKNjSZFsq6yXSVXaS.jpg\"\u003e\u003c\/p\u003e \r \u003c\/div\u003e \r \u003cdiv\u003e\r \r \u003c\/div\u003e \r \u003cdiv\u003e\r \r \u003c\/div\u003e \r \u003cdiv\u003e\r \r \u003c\/div\u003e \r \u003cp\u003e\u003cspan style=\"color: #000000;\"\u003e\u003cspan style=\"font-size: 16.0px;font-family: arial , helvetica , sans-serif;\"\u003eThe driver circuit based on 3 MBI5168 constant current sink drivers and a M54564 darlington source driver, the Colorduino pairs the M54564 with a single DM163 constant current driver. In order to better drive the RGB matrix and reach their best performance, we use the professional LED driver chip DM163 on board, by using the DM163, the Colorduino gains three 8+6-bit channels of hardware PWM control of the LED's freeing up the ATMega328P from having to implement it in software. And the DM163 comprises shift registers, data latches, 8×3 channel constant current and 64 x 256 gray level PWM for per color! Each channel provide a maximum current of 60 mA.\u003c\/span\u003e\u003c\/span\u003e\u003c\/p\u003e \r \u003cp style=\"font-size: 12.0pt;font-family: verdana;color: #77776e;text-align: left;background-color: #ffffff;\"\u003e\u003cspan style=\"color: #000000;\"\u003e\u003cspan style=\"font-size: 16.0px;font-family: arial , helvetica , sans-serif;\"\u003eSo, each RGB dot has 256×256x256 = 16,777,216 colours (16 million) in theory, and it's easy to use the 6bit correction register to calibrate the current error for each color LEDs\u003c\/span\u003e\u003c\/span\u003e\u003c\/p\u003e \r \u003cp style=\"font-size: 12.0pt;font-family: verdana;color: #000000;text-align: left;background-color: #ffffff;\"\u003e\u003cspan style=\"color: #000000;\"\u003e\u003cspan style=\"font-size: 16.0px;font-family: arial , helvetica , sans-serif;\"\u003eThis shield can be programed via\u003c\/span\u003e\u003c\/span\u003e\u003cspan style=\"font-size: 16.0px;font-family: arial , helvetica , sans-serif;\"\u003e\u003ca\u003e FT232 USB adapter\u003c\/a\u003e\u003c\/span\u003e\u003cbr\u003e\u003cspan style=\"color: #000000;\"\u003e\u003cspan style=\"font-size: 16.0px;font-family: arial , helvetica , sans-serif;\"\u003ePower is supplied either by pin headers or via 2 sets of mini screw terminals, a slide switch selecting between the two. With the herder side, you just can use the 5V power supply, and in the terminal side, now support 6.2-7.5V power supply, more than 7V will cause the DM163 fever and more than 9V supply may burn your board. Pins brought out the edge of the board include RX, TX and DTS, which can be used to reprogram the onboard ATmega chip, and SCA and SCL for I2C communication. A green LED on the front of the board indicates power, although it is mostly obscured as soon as you plug the matrix panel in.\u003c\/span\u003e\u003cbr\u003e\u003cspan style=\"font-size: 16.0px;font-family: arial , helvetica , sans-serif;\"\u003eIf you have an Arduino UNO, but just want to drive a RGB LED Matrix, you can consider this Colors shield, it's compatible with Colorduino v2.0.\u003c\/span\u003e\u003c\/span\u003e\u003c\/p\u003e \r \u003cp style=\"font-size: 12.0pt;font-family: verdana;color: #77776e;text-align: left;background-color: #ffffff;\"\u003e\u003cspan style=\"color: #000000;\"\u003e\u003cspan style=\"font-size: 16.0px;font-family: arial , helvetica , sans-serif;\"\u003eTo make it work, you must need this \u003c\/span\u003e\u003c\/span\u003e\u003cspan style=\"font-size: 16.0px;font-family: arial , helvetica , sans-serif;\"\u003e\u003ca\u003e\u003cspan style=\"color: #000000;\"\u003eRGB LED Matrix,\u003c\/span\u003e\u003c\/a\u003e\u003c\/span\u003e\u003c\/p\u003e \r \u003cp style=\"font-size: 12.0pt;font-family: verdana;color: #77776e;text-align: left;background-color: #ffffff;\"\u003e\u003cspan style=\"color: #000000;\"\u003e\u003cspan style=\"font-size: 16.0px;font-family: arial , helvetica , sans-serif;\"\u003eFor more information of this product, please visit the\u003c\/span\u003e\u003c\/span\u003e\u003cspan style=\"font-size: 16.0px;font-family: arial , helvetica , sans-serif;\"\u003e\u003ca\u003e\u003cspan style=\"color: #000000;\"\u003eWiki PAGE\u003c\/span\u003e\u003c\/a\u003e\u003c\/span\u003e\u003c\/p\u003e \r \u003cp style=\"font-size: 12.0pt;font-family: verdana;color: #77776e;text-align: left;background-color: #ffffff;\"\u003e\u003cstrong\u003e\u003cspan style=\"color: #000000;\"\u003e\u003cspan style=\"font-size: 16.0px;font-family: arial , helvetica , sans-serif;\"\u003eDocuments:\u003c\/span\u003e\u003c\/span\u003e\u003c\/strong\u003e\u003c\/p\u003e \r \u003cp style=\"color: #77776e;text-align: left;background-color: #ffffff;\"\u003e\u003cspan style=\"color: #000000;\"\u003e\u003cspan style=\"font-size: 16.0px;font-family: arial , helvetica , sans-serif;\"\u003e\u003ca\u003eColorduino library.zip\u003c\/a\u003e\u003c\/span\u003e\u003c\/span\u003e\u003cbr\u003e\u003cspan style=\"font-size: 16.0px;font-family: arial , helvetica , sans-serif;\"\u003e\u003ca\u003e\u003cspan style=\"color: #000000;\"\u003eSch-Colorduino-V2.0.pdf\u003c\/span\u003e\u003c\/a\u003e\u003c\/span\u003e\u003cbr\u003e\u003cspan style=\"font-size: 16.0px;font-family: arial , helvetica , sans-serif;\"\u003e\u003ca\u003e\u003cspan style=\"color: #000000;\"\u003eDM163.pdf\u003c\/span\u003e\u003c\/a\u003e\u003c\/span\u003e\u003c\/p\u003e \r \u003cp\u003e \u003c\/p\u003e \r \u003cp\u003e\u003cspan style=\"color: #000000;\"\u003e\u003cspan style=\"font-size: 16.0px;font-family: arial , helvetica , sans-serif;\"\u003e\u003cstrong\u003ePackage:\u003c\/strong\u003e\u003c\/span\u003e\u003c\/span\u003e\u003c\/p\u003e \r \u003cp\u003e\u003cspan style=\"color: #000000;\"\u003e\u003cspan style=\"font-size: 16.0px;font-family: arial , helvetica , sans-serif;\"\u003e1 x RGB Led \u003c\/span\u003e\u003c\/span\u003e\u003c\/p\u003e \r \u003cp\u003e\u003cspan style=\"color: #000000;\"\u003e\u003cspan style=\"font-size: 16.0px;font-family: arial , helvetica , sans-serif;\"\u003e1x Matrix Driver shield\u003c\/span\u003e\u003c\/span\u003e\u003c\/p\u003e \r \u003cp\u003e \u003c\/p\u003e \r \u003cp\u003e \u003c\/p\u003e \r \u003cp\u003e\u003cimg src=\"https:\/\/ae01.alicdn.com\/kf\/HTB1VXjubuUXBuNjt_a0q6AysXXaA.jpg\"\u003e\u003c\/p\u003e \r \u003cp\u003e \u003c\/p\u003e \r \u003cp\u003e\u003cimg style=\"width: 1000.0px;\" src=\"https:\/\/ae01.alicdn.com\/kf\/HTB1dkrPavfsK1RjSszgq6yXzpXal.jpg\"\u003e\u003c\/p\u003e \r \u003cp\u003e\u003cimg style=\"width: 1000.0px;\" src=\"https:\/\/ae01.alicdn.com\/kf\/HTB1J7TOayLrK1Rjy1zdq6ynnpXa0.jpg\"\u003e\u003c\/p\u003e \r \u003cp\u003e\u003cimg style=\"width: 1000.0px;\" src=\"https:\/\/ae01.alicdn.com\/kf\/HTB1Mu6Fau6sK1RjSsrbq6xbDXXa2.jpg\"\u003e\u003c\/p\u003e \r \u003cp\u003e\u003cimg style=\"width: 1000.0px;\" src=\"https:\/\/ae01.alicdn.com\/kf\/HTB1s7rPavfsK1RjSszgq6yXzpXaL.jpg\"\u003e\u003c\/p\u003e \r \u003cp\u003e \u003c\/p\u003e \r \u003cp\u003e\u003cimg src=\"https:\/\/ae01.alicdn.com\/kf\/HTB1Hc.uimcqBKNjSZFgq6x_kXXaq.jpg\"\u003e\u003c\/p\u003e \r \u003cp\u003e \u003c\/p\u003e \r \u003cwidget data-widget-type=\"customText\" id=\"24006699\" title=\"Related\" type=\"custom\"\u003e\u003c\/widget\u003e \r \u003cp\u003e \u003c\/p\u003e \u003cscript\u003ewindow.adminAccountId=227552571;\u003c\/script\u003e \u003c\/div\u003e"} -
Translation missing: en.products.product.regular_price
$7.99 On Sale{"id":4419983867975,"title":"5MM LED RGB Matrix Module Driver Board 8x8 + Dot Matrix for Arduino AVR top","handle":"5mm-led-rgb-matrix-module-driver-board-8x8-dot-matrix-for-arduino-avr-top-1","description":"\u003cdiv\u003e\n\u003cwidget data-widget-type=\"customText\" id=\"33684419\" title=\"Head\" type=\"custom\"\u003e\u003c\/widget\u003e \r \u003cdiv\u003e\r \r \u003c\/div\u003e \r \u003cdiv\u003e \r \u003cp\u003e\u003cimg src=\"https:\/\/ae01.alicdn.com\/kf\/HTB12JMgilsmBKNjSZFsq6yXSVXaS.jpg\"\u003e\u003c\/p\u003e \r \u003c\/div\u003e \r \u003cdiv\u003e\r \r \u003c\/div\u003e \r \u003cdiv\u003e\r \r \u003c\/div\u003e \r \u003cdiv\u003e\r \r \u003c\/div\u003e \r \u003cp\u003e\u003cspan style=\"color: #000000;\"\u003e\u003cspan style=\"font-size: 16.0px;font-family: arial , helvetica , sans-serif;\"\u003eThe driver circuit based on 3 MBI5168 constant current sink drivers and a M54564 darlington source driver, the Colorduino pairs the M54564 with a single DM163 constant current driver. In order to better drive the RGB matrix and reach their best performance, we use the professional LED driver chip DM163 on board, by using the DM163, the Colorduino gains three 8+6-bit channels of hardware PWM control of the LED's freeing up the ATMega328P from having to implement it in software. And the DM163 comprises shift registers, data latches, 8×3 channel constant current and 64 x 256 gray level PWM for per color! Each channel provide a maximum current of 60 mA.\u003c\/span\u003e\u003c\/span\u003e\u003c\/p\u003e \r \u003cp style=\"font-size: 12.0pt;font-family: verdana;color: #77776e;text-align: left;background-color: #ffffff;\"\u003e\u003cspan style=\"color: #000000;\"\u003e\u003cspan style=\"font-size: 16.0px;font-family: arial , helvetica , sans-serif;\"\u003eSo, each RGB dot has 256×256x256 = 16,777,216 colours (16 million) in theory, and it's easy to use the 6bit correction register to calibrate the current error for each color LEDs\u003c\/span\u003e\u003c\/span\u003e\u003c\/p\u003e \r \u003cp style=\"font-size: 12.0pt;font-family: verdana;color: #000000;text-align: left;background-color: #ffffff;\"\u003e\u003cspan style=\"color: #000000;\"\u003e\u003cspan style=\"font-size: 16.0px;font-family: arial , helvetica , sans-serif;\"\u003eThis shield can be programed via\u003c\/span\u003e\u003c\/span\u003e\u003cspan style=\"font-size: 16.0px;font-family: arial , helvetica , sans-serif;\"\u003e\u003ca\u003e FT232 USB adapter\u003c\/a\u003e\u003c\/span\u003e\u003cbr\u003e\u003cspan style=\"color: #000000;\"\u003e\u003cspan style=\"font-size: 16.0px;font-family: arial , helvetica , sans-serif;\"\u003ePower is supplied either by pin headers or via 2 sets of mini screw terminals, a slide switch selecting between the two. With the herder side, you just can use the 5V power supply, and in the terminal side, now support 6.2-7.5V power supply, more than 7V will cause the DM163 fever and more than 9V supply may burn your board. Pins brought out the edge of the board include RX, TX and DTS, which can be used to reprogram the onboard ATmega chip, and SCA and SCL for I2C communication. A green LED on the front of the board indicates power, although it is mostly obscured as soon as you plug the matrix panel in.\u003c\/span\u003e\u003cbr\u003e\u003cspan style=\"font-size: 16.0px;font-family: arial , helvetica , sans-serif;\"\u003eIf you have an Arduino UNO, but just want to drive a RGB LED Matrix, you can consider this Colors shield, it's compatible with Colorduino v2.0.\u003c\/span\u003e\u003c\/span\u003e\u003c\/p\u003e \r \u003cp style=\"font-size: 12.0pt;font-family: verdana;color: #77776e;text-align: left;background-color: #ffffff;\"\u003e\u003cspan style=\"color: #000000;\"\u003e\u003cspan style=\"font-size: 16.0px;font-family: arial , helvetica , sans-serif;\"\u003eTo make it work, you must need this \u003c\/span\u003e\u003c\/span\u003e\u003cspan style=\"font-size: 16.0px;font-family: arial , helvetica , sans-serif;\"\u003e\u003ca\u003e\u003cspan style=\"color: #000000;\"\u003eRGB LED Matrix,\u003c\/span\u003e\u003c\/a\u003e\u003c\/span\u003e\u003c\/p\u003e \r \u003cp style=\"font-size: 12.0pt;font-family: verdana;color: #77776e;text-align: left;background-color: #ffffff;\"\u003e\u003cspan style=\"color: #000000;\"\u003e\u003cspan style=\"font-size: 16.0px;font-family: arial , helvetica , sans-serif;\"\u003eFor more information of this product, please visit the\u003c\/span\u003e\u003c\/span\u003e\u003cspan style=\"font-size: 16.0px;font-family: arial , helvetica , sans-serif;\"\u003e\u003ca\u003e\u003cspan style=\"color: #000000;\"\u003eWiki PAGE\u003c\/span\u003e\u003c\/a\u003e\u003c\/span\u003e\u003c\/p\u003e \r \u003cp style=\"font-size: 12.0pt;font-family: verdana;color: #77776e;text-align: left;background-color: #ffffff;\"\u003e\u003cstrong\u003e\u003cspan style=\"color: #000000;\"\u003e\u003cspan style=\"font-size: 16.0px;font-family: arial , helvetica , sans-serif;\"\u003eDocuments:\u003c\/span\u003e\u003c\/span\u003e\u003c\/strong\u003e\u003c\/p\u003e \r \u003cp style=\"color: #77776e;text-align: left;background-color: #ffffff;\"\u003e\u003cspan style=\"color: #000000;\"\u003e\u003cspan style=\"font-size: 16.0px;font-family: arial , helvetica , sans-serif;\"\u003e\u003ca\u003eColorduino library.zip\u003c\/a\u003e\u003c\/span\u003e\u003c\/span\u003e\u003cbr\u003e\u003cspan style=\"font-size: 16.0px;font-family: arial , helvetica , sans-serif;\"\u003e\u003ca\u003e\u003cspan style=\"color: #000000;\"\u003eSch-Colorduino-V2.0.pdf\u003c\/span\u003e\u003c\/a\u003e\u003c\/span\u003e\u003cbr\u003e\u003cspan style=\"font-size: 16.0px;font-family: arial , helvetica , sans-serif;\"\u003e\u003ca\u003e\u003cspan style=\"color: #000000;\"\u003eDM163.pdf\u003c\/span\u003e\u003c\/a\u003e\u003c\/span\u003e\u003c\/p\u003e \r \u003cp\u003e \u003c\/p\u003e \r \u003cp\u003e\u003cspan style=\"color: #000000;\"\u003e\u003cspan style=\"font-size: 16.0px;font-family: arial , helvetica , sans-serif;\"\u003e\u003cstrong\u003ePackage:\u003c\/strong\u003e\u003c\/span\u003e\u003c\/span\u003e\u003c\/p\u003e \r \u003cp\u003e\u003cspan style=\"color: #000000;\"\u003e\u003cspan style=\"font-size: 16.0px;font-family: arial , helvetica , sans-serif;\"\u003e1 x RGB Led \u003c\/span\u003e\u003c\/span\u003e\u003c\/p\u003e \r \u003cp\u003e\u003cspan style=\"color: #000000;\"\u003e\u003cspan style=\"font-size: 16.0px;font-family: arial , helvetica , sans-serif;\"\u003e1x Matrix Driver shield\u003c\/span\u003e\u003c\/span\u003e\u003c\/p\u003e \r \u003cp\u003e \u003c\/p\u003e \r \u003cp\u003e \u003c\/p\u003e \r \u003cp\u003e\u003cimg src=\"https:\/\/ae01.alicdn.com\/kf\/HTB1VXjubuUXBuNjt_a0q6AysXXaA.jpg\"\u003e\u003c\/p\u003e \r \u003cp\u003e \u003c\/p\u003e \r \u003cp\u003e\u003cimg style=\"width: 1000.0px;\" src=\"https:\/\/ae01.alicdn.com\/kf\/HTB1dkrPavfsK1RjSszgq6yXzpXal.jpg\"\u003e\u003c\/p\u003e \r \u003cp\u003e\u003cimg style=\"width: 1000.0px;\" src=\"https:\/\/ae01.alicdn.com\/kf\/HTB1J7TOayLrK1Rjy1zdq6ynnpXa0.jpg\"\u003e\u003c\/p\u003e \r \u003cp\u003e\u003cimg style=\"width: 1000.0px;\" src=\"https:\/\/ae01.alicdn.com\/kf\/HTB1Mu6Fau6sK1RjSsrbq6xbDXXa2.jpg\"\u003e\u003c\/p\u003e \r \u003cp\u003e\u003cimg style=\"width: 1000.0px;\" src=\"https:\/\/ae01.alicdn.com\/kf\/HTB1s7rPavfsK1RjSszgq6yXzpXaL.jpg\"\u003e\u003c\/p\u003e \r \u003cp\u003e \u003c\/p\u003e \r \u003cp\u003e\u003cimg src=\"https:\/\/ae01.alicdn.com\/kf\/HTB1Hc.uimcqBKNjSZFgq6x_kXXaq.jpg\"\u003e\u003c\/p\u003e \r \u003cp\u003e \u003c\/p\u003e \r \u003cwidget data-widget-type=\"customText\" id=\"24006699\" title=\"Related\" type=\"custom\"\u003e\u003c\/widget\u003e \r \u003cp\u003e \u003c\/p\u003e \u003cscript\u003ewindow.adminAccountId=227552571;\u003c\/script\u003e \u003c\/div\u003e","published_at":"2022-09-19T12:31:18+08:00","created_at":"2019-12-27T18:24:55+08:00","vendor":"diymore","type":"Motor Driver Module","tags":[],"price":272,"price_min":272,"price_max":272,"available":true,"price_varies":false,"compare_at_price":544,"compare_at_price_min":544,"compare_at_price_max":544,"compare_at_price_varies":false,"variants":[{"id":31582900846663,"title":"Default Title","option1":"Default Title","option2":null,"option3":null,"sku":"030081","requires_shipping":true,"taxable":false,"featured_image":null,"available":true,"name":"5MM LED RGB Matrix Module Driver Board 8x8 + Dot Matrix for Arduino AVR top","public_title":null,"options":["Default Title"],"price":272,"weight":0,"compare_at_price":544,"inventory_management":null,"barcode":"","requires_selling_plan":false,"selling_plan_allocations":[]}],"images":["\/\/www.diymore.cc\/cdn\/shop\/products\/5MM-LED-RGB-Matrix-Module-Driver-Board-8x8-Dot-Matrix-for-Arduino-AVR-top_915.jpg?v=1588698614","\/\/www.diymore.cc\/cdn\/shop\/products\/5MM-LED-RGB-Matrix-Module-Driver-Board-8x8-Dot-Matrix-for-Arduino-AVR-top_b103e582-6bdf-46c0-b4e8-f1b84bea8d30_182.jpg?v=1588698614","\/\/www.diymore.cc\/cdn\/shop\/products\/5MM-LED-RGB-Matrix-Module-Driver-Board-8x8-Dot-Matrix-for-Arduino-AVR-top_8a893a41-992b-4b2d-8fc8-63e5e968c2c3_630.jpg?v=1588698614","\/\/www.diymore.cc\/cdn\/shop\/products\/5MM-LED-RGB-Matrix-Module-Driver-Board-8x8-Dot-Matrix-for-Arduino-AVR-top_695e9ab7-3820-46a5-a836-baa68e4b51d9_884.jpg?v=1588698614"],"featured_image":"\/\/www.diymore.cc\/cdn\/shop\/products\/5MM-LED-RGB-Matrix-Module-Driver-Board-8x8-Dot-Matrix-for-Arduino-AVR-top_915.jpg?v=1588698614","options":["Title"],"media":[{"alt":"5Mm Led Rgb Matrix Module Driver Board 8X8 + Dot For Arduino Avr Top Integrated Circuits","id":6682362675271,"position":1,"preview_image":{"aspect_ratio":1.0,"height":1000,"width":1000,"src":"\/\/www.diymore.cc\/cdn\/shop\/products\/5MM-LED-RGB-Matrix-Module-Driver-Board-8x8-Dot-Matrix-for-Arduino-AVR-top_915.jpg?v=1588698614"},"aspect_ratio":1.0,"height":1000,"media_type":"image","src":"\/\/www.diymore.cc\/cdn\/shop\/products\/5MM-LED-RGB-Matrix-Module-Driver-Board-8x8-Dot-Matrix-for-Arduino-AVR-top_915.jpg?v=1588698614","width":1000},{"alt":"5Mm Led Rgb Matrix Module Driver Board 8X8 + Dot For Arduino Avr Top Integrated Circuits","id":6682362937415,"position":2,"preview_image":{"aspect_ratio":1.0,"height":1000,"width":1000,"src":"\/\/www.diymore.cc\/cdn\/shop\/products\/5MM-LED-RGB-Matrix-Module-Driver-Board-8x8-Dot-Matrix-for-Arduino-AVR-top_b103e582-6bdf-46c0-b4e8-f1b84bea8d30_182.jpg?v=1588698614"},"aspect_ratio":1.0,"height":1000,"media_type":"image","src":"\/\/www.diymore.cc\/cdn\/shop\/products\/5MM-LED-RGB-Matrix-Module-Driver-Board-8x8-Dot-Matrix-for-Arduino-AVR-top_b103e582-6bdf-46c0-b4e8-f1b84bea8d30_182.jpg?v=1588698614","width":1000},{"alt":"5Mm Led Rgb Matrix Module Driver Board 8X8 + Dot For Arduino Avr Top Integrated Circuits","id":6682363035719,"position":3,"preview_image":{"aspect_ratio":1.0,"height":1000,"width":1000,"src":"\/\/www.diymore.cc\/cdn\/shop\/products\/5MM-LED-RGB-Matrix-Module-Driver-Board-8x8-Dot-Matrix-for-Arduino-AVR-top_8a893a41-992b-4b2d-8fc8-63e5e968c2c3_630.jpg?v=1588698614"},"aspect_ratio":1.0,"height":1000,"media_type":"image","src":"\/\/www.diymore.cc\/cdn\/shop\/products\/5MM-LED-RGB-Matrix-Module-Driver-Board-8x8-Dot-Matrix-for-Arduino-AVR-top_8a893a41-992b-4b2d-8fc8-63e5e968c2c3_630.jpg?v=1588698614","width":1000},{"alt":"5Mm Led Rgb Matrix Module Driver Board 8X8 + Dot For Arduino Avr Top Integrated Circuits","id":6682363232327,"position":4,"preview_image":{"aspect_ratio":1.0,"height":1000,"width":1000,"src":"\/\/www.diymore.cc\/cdn\/shop\/products\/5MM-LED-RGB-Matrix-Module-Driver-Board-8x8-Dot-Matrix-for-Arduino-AVR-top_695e9ab7-3820-46a5-a836-baa68e4b51d9_884.jpg?v=1588698614"},"aspect_ratio":1.0,"height":1000,"media_type":"image","src":"\/\/www.diymore.cc\/cdn\/shop\/products\/5MM-LED-RGB-Matrix-Module-Driver-Board-8x8-Dot-Matrix-for-Arduino-AVR-top_695e9ab7-3820-46a5-a836-baa68e4b51d9_884.jpg?v=1588698614","width":1000}],"requires_selling_plan":false,"selling_plan_groups":[],"content":"\u003cdiv\u003e\n\u003cwidget data-widget-type=\"customText\" id=\"33684419\" title=\"Head\" type=\"custom\"\u003e\u003c\/widget\u003e \r \u003cdiv\u003e\r \r \u003c\/div\u003e \r \u003cdiv\u003e \r \u003cp\u003e\u003cimg src=\"https:\/\/ae01.alicdn.com\/kf\/HTB12JMgilsmBKNjSZFsq6yXSVXaS.jpg\"\u003e\u003c\/p\u003e \r \u003c\/div\u003e \r \u003cdiv\u003e\r \r \u003c\/div\u003e \r \u003cdiv\u003e\r \r \u003c\/div\u003e \r \u003cdiv\u003e\r \r \u003c\/div\u003e \r \u003cp\u003e\u003cspan style=\"color: #000000;\"\u003e\u003cspan style=\"font-size: 16.0px;font-family: arial , helvetica , sans-serif;\"\u003eThe driver circuit based on 3 MBI5168 constant current sink drivers and a M54564 darlington source driver, the Colorduino pairs the M54564 with a single DM163 constant current driver. In order to better drive the RGB matrix and reach their best performance, we use the professional LED driver chip DM163 on board, by using the DM163, the Colorduino gains three 8+6-bit channels of hardware PWM control of the LED's freeing up the ATMega328P from having to implement it in software. And the DM163 comprises shift registers, data latches, 8×3 channel constant current and 64 x 256 gray level PWM for per color! Each channel provide a maximum current of 60 mA.\u003c\/span\u003e\u003c\/span\u003e\u003c\/p\u003e \r \u003cp style=\"font-size: 12.0pt;font-family: verdana;color: #77776e;text-align: left;background-color: #ffffff;\"\u003e\u003cspan style=\"color: #000000;\"\u003e\u003cspan style=\"font-size: 16.0px;font-family: arial , helvetica , sans-serif;\"\u003eSo, each RGB dot has 256×256x256 = 16,777,216 colours (16 million) in theory, and it's easy to use the 6bit correction register to calibrate the current error for each color LEDs\u003c\/span\u003e\u003c\/span\u003e\u003c\/p\u003e \r \u003cp style=\"font-size: 12.0pt;font-family: verdana;color: #000000;text-align: left;background-color: #ffffff;\"\u003e\u003cspan style=\"color: #000000;\"\u003e\u003cspan style=\"font-size: 16.0px;font-family: arial , helvetica , sans-serif;\"\u003eThis shield can be programed via\u003c\/span\u003e\u003c\/span\u003e\u003cspan style=\"font-size: 16.0px;font-family: arial , helvetica , sans-serif;\"\u003e\u003ca\u003e FT232 USB adapter\u003c\/a\u003e\u003c\/span\u003e\u003cbr\u003e\u003cspan style=\"color: #000000;\"\u003e\u003cspan style=\"font-size: 16.0px;font-family: arial , helvetica , sans-serif;\"\u003ePower is supplied either by pin headers or via 2 sets of mini screw terminals, a slide switch selecting between the two. With the herder side, you just can use the 5V power supply, and in the terminal side, now support 6.2-7.5V power supply, more than 7V will cause the DM163 fever and more than 9V supply may burn your board. Pins brought out the edge of the board include RX, TX and DTS, which can be used to reprogram the onboard ATmega chip, and SCA and SCL for I2C communication. A green LED on the front of the board indicates power, although it is mostly obscured as soon as you plug the matrix panel in.\u003c\/span\u003e\u003cbr\u003e\u003cspan style=\"font-size: 16.0px;font-family: arial , helvetica , sans-serif;\"\u003eIf you have an Arduino UNO, but just want to drive a RGB LED Matrix, you can consider this Colors shield, it's compatible with Colorduino v2.0.\u003c\/span\u003e\u003c\/span\u003e\u003c\/p\u003e \r \u003cp style=\"font-size: 12.0pt;font-family: verdana;color: #77776e;text-align: left;background-color: #ffffff;\"\u003e\u003cspan style=\"color: #000000;\"\u003e\u003cspan style=\"font-size: 16.0px;font-family: arial , helvetica , sans-serif;\"\u003eTo make it work, you must need this \u003c\/span\u003e\u003c\/span\u003e\u003cspan style=\"font-size: 16.0px;font-family: arial , helvetica , sans-serif;\"\u003e\u003ca\u003e\u003cspan style=\"color: #000000;\"\u003eRGB LED Matrix,\u003c\/span\u003e\u003c\/a\u003e\u003c\/span\u003e\u003c\/p\u003e \r \u003cp style=\"font-size: 12.0pt;font-family: verdana;color: #77776e;text-align: left;background-color: #ffffff;\"\u003e\u003cspan style=\"color: #000000;\"\u003e\u003cspan style=\"font-size: 16.0px;font-family: arial , helvetica , sans-serif;\"\u003eFor more information of this product, please visit the\u003c\/span\u003e\u003c\/span\u003e\u003cspan style=\"font-size: 16.0px;font-family: arial , helvetica , sans-serif;\"\u003e\u003ca\u003e\u003cspan style=\"color: #000000;\"\u003eWiki PAGE\u003c\/span\u003e\u003c\/a\u003e\u003c\/span\u003e\u003c\/p\u003e \r \u003cp style=\"font-size: 12.0pt;font-family: verdana;color: #77776e;text-align: left;background-color: #ffffff;\"\u003e\u003cstrong\u003e\u003cspan style=\"color: #000000;\"\u003e\u003cspan style=\"font-size: 16.0px;font-family: arial , helvetica , sans-serif;\"\u003eDocuments:\u003c\/span\u003e\u003c\/span\u003e\u003c\/strong\u003e\u003c\/p\u003e \r \u003cp style=\"color: #77776e;text-align: left;background-color: #ffffff;\"\u003e\u003cspan style=\"color: #000000;\"\u003e\u003cspan style=\"font-size: 16.0px;font-family: arial , helvetica , sans-serif;\"\u003e\u003ca\u003eColorduino library.zip\u003c\/a\u003e\u003c\/span\u003e\u003c\/span\u003e\u003cbr\u003e\u003cspan style=\"font-size: 16.0px;font-family: arial , helvetica , sans-serif;\"\u003e\u003ca\u003e\u003cspan style=\"color: #000000;\"\u003eSch-Colorduino-V2.0.pdf\u003c\/span\u003e\u003c\/a\u003e\u003c\/span\u003e\u003cbr\u003e\u003cspan style=\"font-size: 16.0px;font-family: arial , helvetica , sans-serif;\"\u003e\u003ca\u003e\u003cspan style=\"color: #000000;\"\u003eDM163.pdf\u003c\/span\u003e\u003c\/a\u003e\u003c\/span\u003e\u003c\/p\u003e \r \u003cp\u003e \u003c\/p\u003e \r \u003cp\u003e\u003cspan style=\"color: #000000;\"\u003e\u003cspan style=\"font-size: 16.0px;font-family: arial , helvetica , sans-serif;\"\u003e\u003cstrong\u003ePackage:\u003c\/strong\u003e\u003c\/span\u003e\u003c\/span\u003e\u003c\/p\u003e \r \u003cp\u003e\u003cspan style=\"color: #000000;\"\u003e\u003cspan style=\"font-size: 16.0px;font-family: arial , helvetica , sans-serif;\"\u003e1 x RGB Led \u003c\/span\u003e\u003c\/span\u003e\u003c\/p\u003e \r \u003cp\u003e\u003cspan style=\"color: #000000;\"\u003e\u003cspan style=\"font-size: 16.0px;font-family: arial , helvetica , sans-serif;\"\u003e1x Matrix Driver shield\u003c\/span\u003e\u003c\/span\u003e\u003c\/p\u003e \r \u003cp\u003e \u003c\/p\u003e \r \u003cp\u003e \u003c\/p\u003e \r \u003cp\u003e\u003cimg src=\"https:\/\/ae01.alicdn.com\/kf\/HTB1VXjubuUXBuNjt_a0q6AysXXaA.jpg\"\u003e\u003c\/p\u003e \r \u003cp\u003e \u003c\/p\u003e \r \u003cp\u003e\u003cimg style=\"width: 1000.0px;\" src=\"https:\/\/ae01.alicdn.com\/kf\/HTB1dkrPavfsK1RjSszgq6yXzpXal.jpg\"\u003e\u003c\/p\u003e \r \u003cp\u003e\u003cimg style=\"width: 1000.0px;\" src=\"https:\/\/ae01.alicdn.com\/kf\/HTB1J7TOayLrK1Rjy1zdq6ynnpXa0.jpg\"\u003e\u003c\/p\u003e \r \u003cp\u003e\u003cimg style=\"width: 1000.0px;\" src=\"https:\/\/ae01.alicdn.com\/kf\/HTB1Mu6Fau6sK1RjSsrbq6xbDXXa2.jpg\"\u003e\u003c\/p\u003e \r \u003cp\u003e\u003cimg style=\"width: 1000.0px;\" src=\"https:\/\/ae01.alicdn.com\/kf\/HTB1s7rPavfsK1RjSszgq6yXzpXaL.jpg\"\u003e\u003c\/p\u003e \r \u003cp\u003e \u003c\/p\u003e \r \u003cp\u003e\u003cimg src=\"https:\/\/ae01.alicdn.com\/kf\/HTB1Hc.uimcqBKNjSZFgq6x_kXXaq.jpg\"\u003e\u003c\/p\u003e \r \u003cp\u003e \u003c\/p\u003e \r \u003cwidget data-widget-type=\"customText\" id=\"24006699\" title=\"Related\" type=\"custom\"\u003e\u003c\/widget\u003e \r \u003cp\u003e \u003c\/p\u003e \u003cscript\u003ewindow.adminAccountId=227552571;\u003c\/script\u003e \u003c\/div\u003e"}


